
Easter is meant to feel special, and nothing says that quite like a bathroom full of fizzing colour and citrus scent. If you have been searching for easter bath bombs that actually look like something worth gifting, or you want a rainy-day activity that keeps the kids busy without a screen in sight, you are in the right place. Making your own easter egg bath bombs costs a fraction of what you would pay in shops and lets you control exactly what goes into them.
This guide walks you through the whole process, from picking a reliable base recipe to getting that clean egg shape without the mixture crumbling apart. We will cover the essential ingredients, the moulds that work best, and how to layer colours so each egg looks hand-painted rather than muddy.
At Coorong Candle Co. we make bath bombs by hand using natural, skin-friendly ingredients, so we know the small details that separate a bath bomb that fizzes beautifully from one that flops. Whether you are after bath bombs easter gifting or a family project, these steps will get you there.
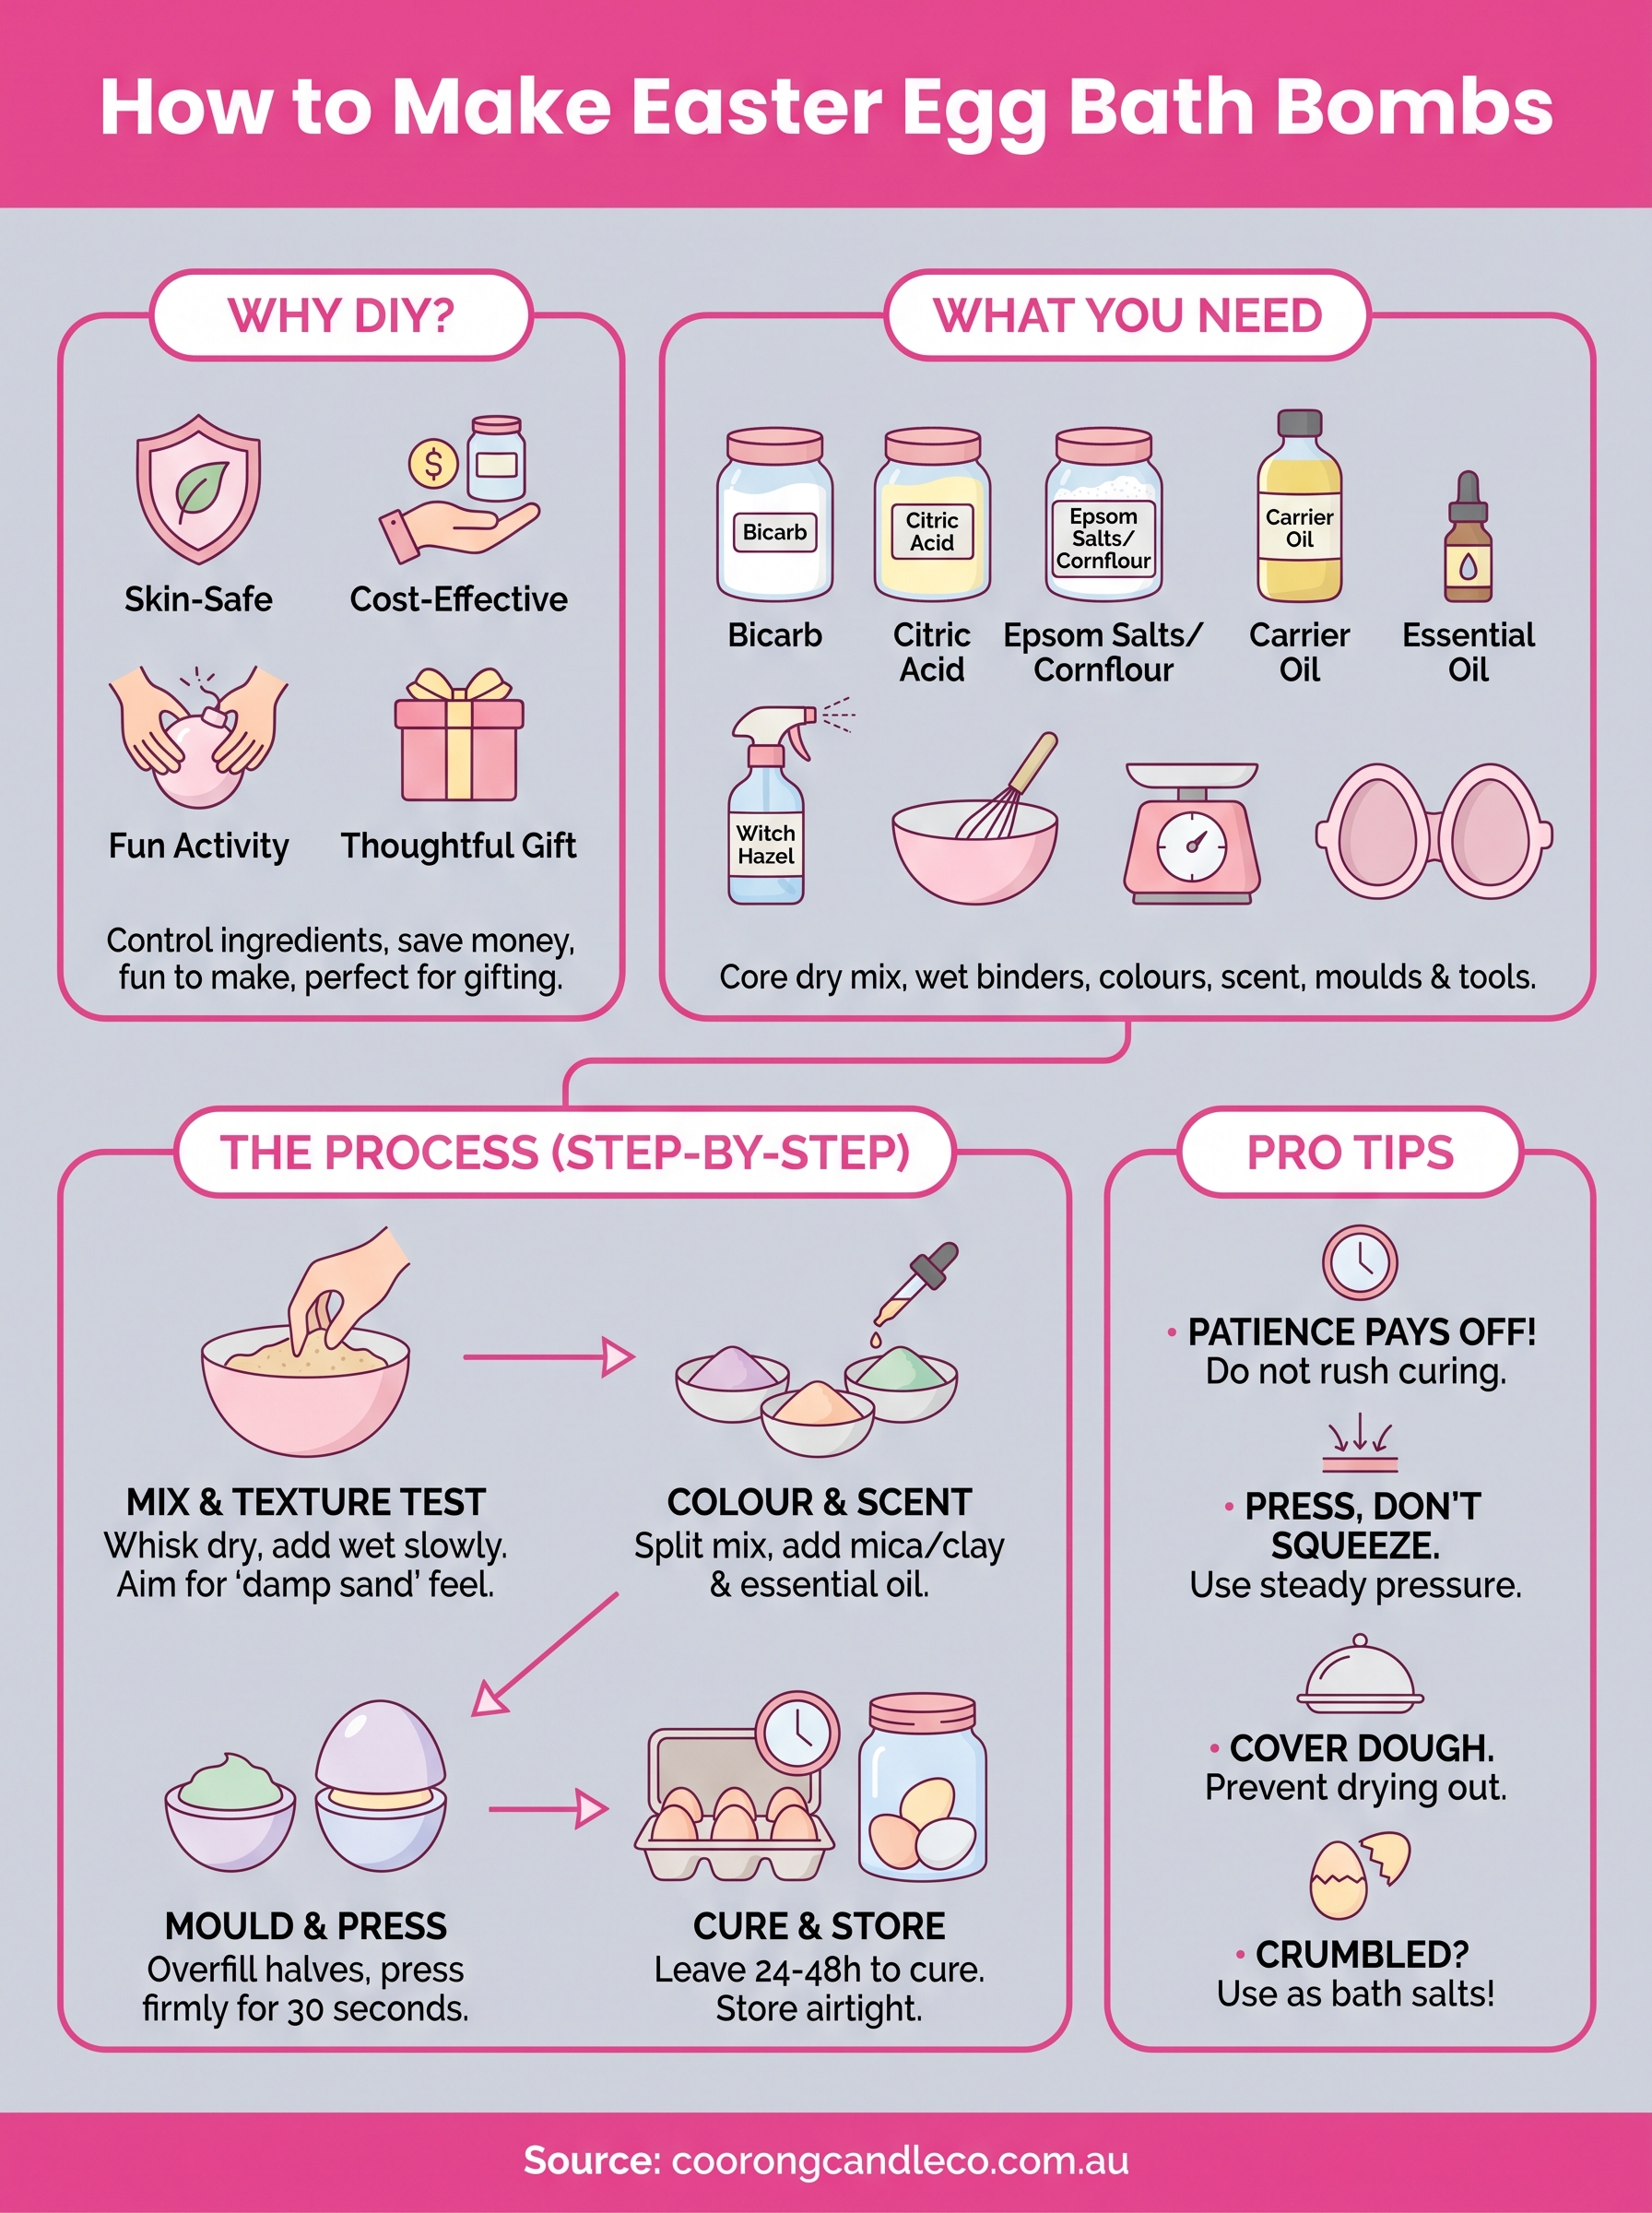
Why make your own Easter egg bath bombs
Most supermarket bath bombs rely on synthetic dyes and harsh foaming agents that can leave sensitive skin irritated, and Easter novelty ranges are often the worst offenders because the packaging trumps the ingredients list. When you make your own easter egg bath bombs, you decide exactly what touches your skin: soy-friendly oils, natural colourants, and essential oils instead of fragrance blends nobody can pronounce. That control matters if anyone in the house has eczema, allergies, or just prefers bath bombs for sensitive skin.
Homemade bath bombs let you swap mystery chemicals for ingredients you can actually name.
Cost is the next obvious win. A boxed set of three or four decorative Easter bath bombs from a big-box retailer can run you $20 to $30, and that is before shipping if you are buying online. Buying bulk citric acid, bicarbonate of soda, and cosmetic-grade colourants lets you produce a dozen or more eggs for roughly the same spend, with plenty of ingredients left over for the next batch. Once you have the basic ratios down, each egg costs cents rather than dollars.
There is also the experience itself. Making bath bombs easter style is a genuinely good school-holiday activity. Kids love watching the fizz reaction when citric acid meets bicarb, and pressing two mould halves together to reveal a perfect egg shape feels like a small magic trick every time. It is messier than a screen, but it is the kind of mess that ends with something you can actually use.
Gifting is where the homemade angle really shines, rivalling any bath bomb gift set you'd find in stores. A basket of hand-poured, pastel-coloured egg bath bombs wrapped in tissue paper reads as thoughtful in a way that a shop-bought multipack never quite manages, especially for grandparents, teachers, or hosts. You can tailor scents to the recipient too, going floral for one person and citrus for another, something no fixed retail range offers.
Finally, homemade bath bombs give you room to experiment with layering and marbling techniques that most commercial products skip entirely because they slow down mass production. Once you understand the base recipe, colour blocking, speckled finishes, and two-tone eggs are all within reach, and that is exactly what the next few steps will show you how to do.
Step 1. Gather your ingredients and equipment
Before you start mixing, lay out everything you need so the process runs smoothly once the citric acid and bicarb start reacting with any stray moisture. Accurate measuring matters more than fancy kit here, so a digital kitchen scale is worth the investment over measuring cups.
Core dry ingredients:
- 1 cup bicarbonate of soda
- 1/2 cup citric acid
- 1/2 cup Epsom salts or cornflour (for a smoother finish)
- 2 to 3 tablespoons cosmetic-grade mica or natural clay powder for colour
Wet ingredients and binders:
- 2 to 3 tablespoons carrier oil, such as sweet almond or fractionated coconut oil
- 1 teaspoon essential oil or fragrance oil (10 to 15 drops, skin-safe)
- A light witch hazel spray in a small bottle
Equipment checklist:
- Egg-shaped silicone bath bomb moulds
- Large mixing bowl and a small whisk
- Rubber gloves, since colourants stain skin
- Piping bag or spoon for packing the moulds
- Drying rack or egg carton for curing
Quality ingredients make the biggest difference to how your egg bath bombs turn out, so avoid table salt substitutes and cheap food colouring, both of which can bleed and stain the tub rather than dissolve cleanly.
Get the ratio of dry to wet ingredients right and everything else about the recipe becomes forgiving.
Sourcing matters too. Buy citric acid and bicarb in bulk from a baking or soap-making supplier rather than small supermarket tins, since the price per gram drops dramatically and you will use more than you expect once you are hooked on making batches. If you are unsure about ratios, the Australian Government's Therapeutic Goods Administration publishes guidance on cosmetic ingredient safety worth checking before buying fragrance oils in bulk.
Step 2. Mix and colour the bath bomb mixture
Whisk your bicarbonate of soda, citric acid, and Epsom salts together in the large bowl first, breaking up any clumps before you introduce liquid. Sifting the dry mix twice through a fine sieve stops small lumps from turning into speckled dents later, which matters if you want smooth, glossy eggs rather than a rustic finish. Once the dry base is uniform, drizzle in your carrier oil a little at a time, whisking constantly, then follow with the essential oil.
A mixture that holds its shape when squeezed, without crumbling or feeling wet, is ready to mould.
Getting the texture right
The classic test for bath bomb dough is the damp sand check: squeeze a handful and it should clump together, then break apart cleanly when you poke it. If it fizzes on contact with your hands, you have added liquid too fast, so stop and let it rest for a minute before continuing. Add witch hazel one light spray at a time if the mix still feels too dry to hold together.
Layering colour for an egg-shell effect
Split your mixture into two or three bowls once the texture is right, then blend a small amount of mica or clay powder into each for pastel shades like blush pink, sage, and soft yellow. For a marbled look inside your easter egg bath bombs, keep the colours slightly separate rather than fully blending them, so streaks show once you slice or use the finished bomb. This is also the stage to test your fragrance strength, since a mixture that smells right in the bowl will smell right in the bath.
Step 3. Mould your Easter egg bath bombs
Packing the mould properly is where most first attempts fall apart, quite literally, so take your time here. Overfilling each half slightly is the trick that separates a solid egg from one with a gap down the middle once it dries. Press your coloured mixture firmly into both sides of the silicone mould, mounding it a little above the rim rather than levelling it off, because the two halves need enough material touching to bond into a single shape.
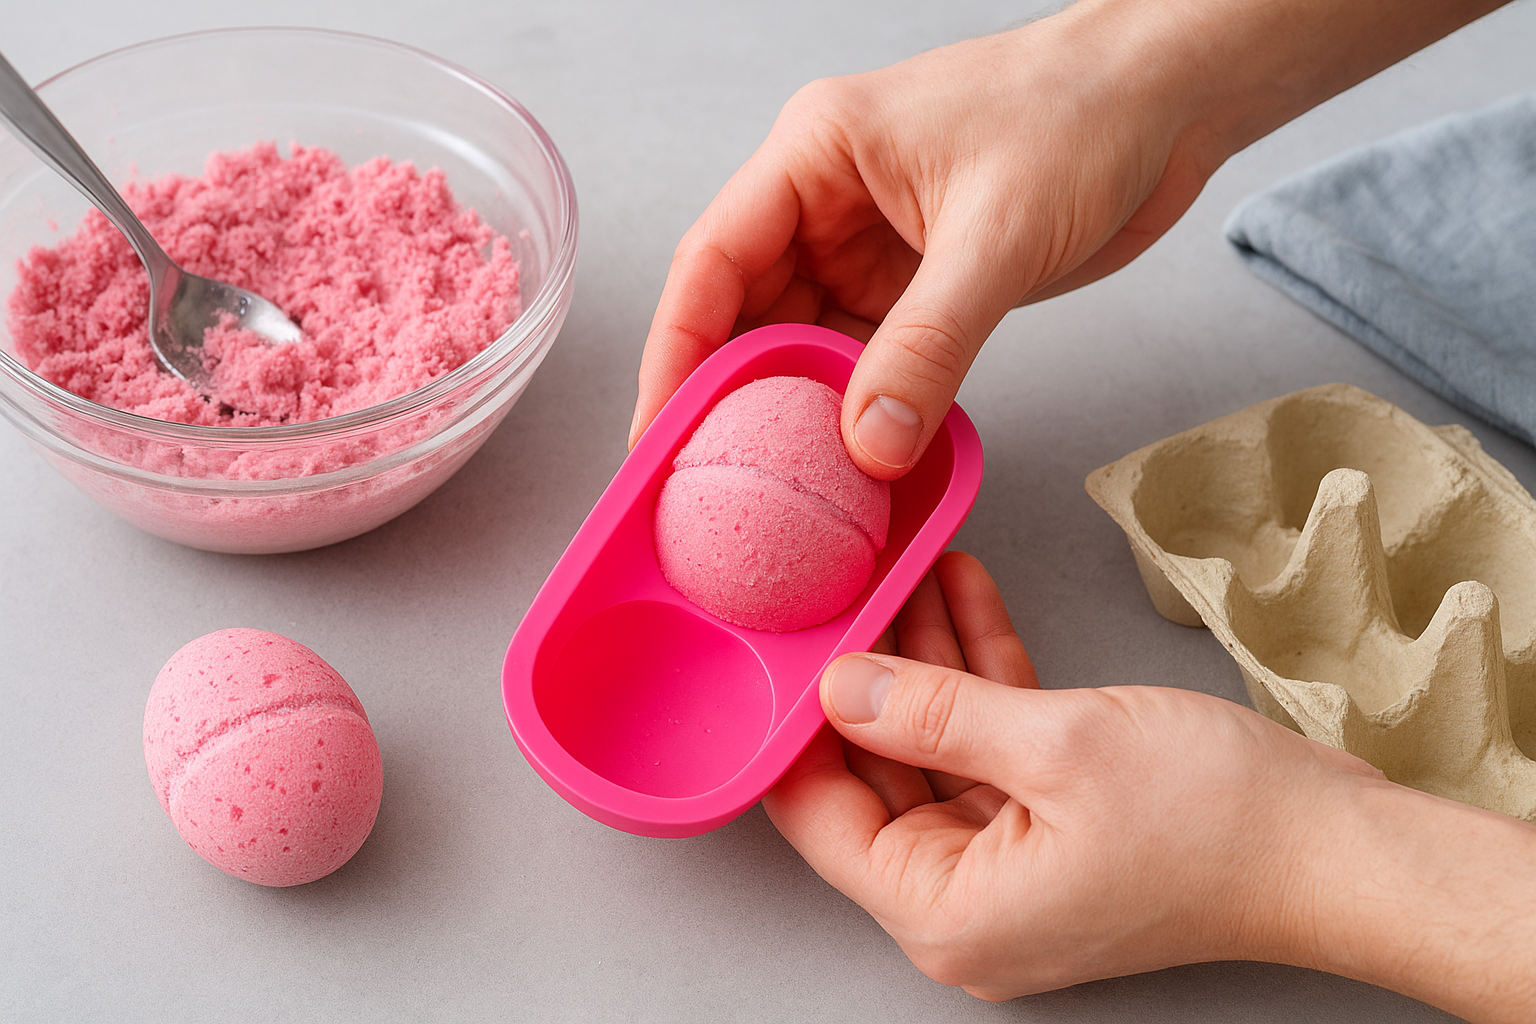
Squeeze the two mould halves together hard and hold, then let the pressure (not the mixture) do the work of fusing the seam.
Spoon your first colour into one half of the mould, then before pressing the halves together, add a pinch of a contrasting shade along the seam edge for a speckled or two-tone finish. Push the two halves together firmly and hold for a full 30 seconds, applying steady pressure rather than a quick squeeze, since that dwell time is what fuses the seam into one smooth egg rather than two visible domes glued at the middle.
Working fast without rushing
Speed matters because the mixture starts drying the moment it is exposed to air, and a dough that has sat too long won't compress cleanly. Mould one egg at a time rather than prepping several mixtures in advance, and keep your bowl of dough covered with a damp tea towel between uses to stop it drying out before you get to it.
Once pressed, leave the mould assembled and set it upright in an egg carton or on a flat tray. Resist the urge to open it straight away. That patience is what Step 4 is all about, since a rushed unmould is the single biggest cause of cracked easter bath bombs.
Step 4. Cure, unmould and store your bath bombs
Leave your moulded eggs untouched for at least 24 hours before you even think about opening them, and 48 hours is safer if your kitchen runs humid. Rushing the cure is the fastest way to end up with two crumbly domes instead of one solid egg, because the mixture needs that time to dry and bond fully across the seam. Resist the temptation to peek, no matter how good the mix felt when you packed it.
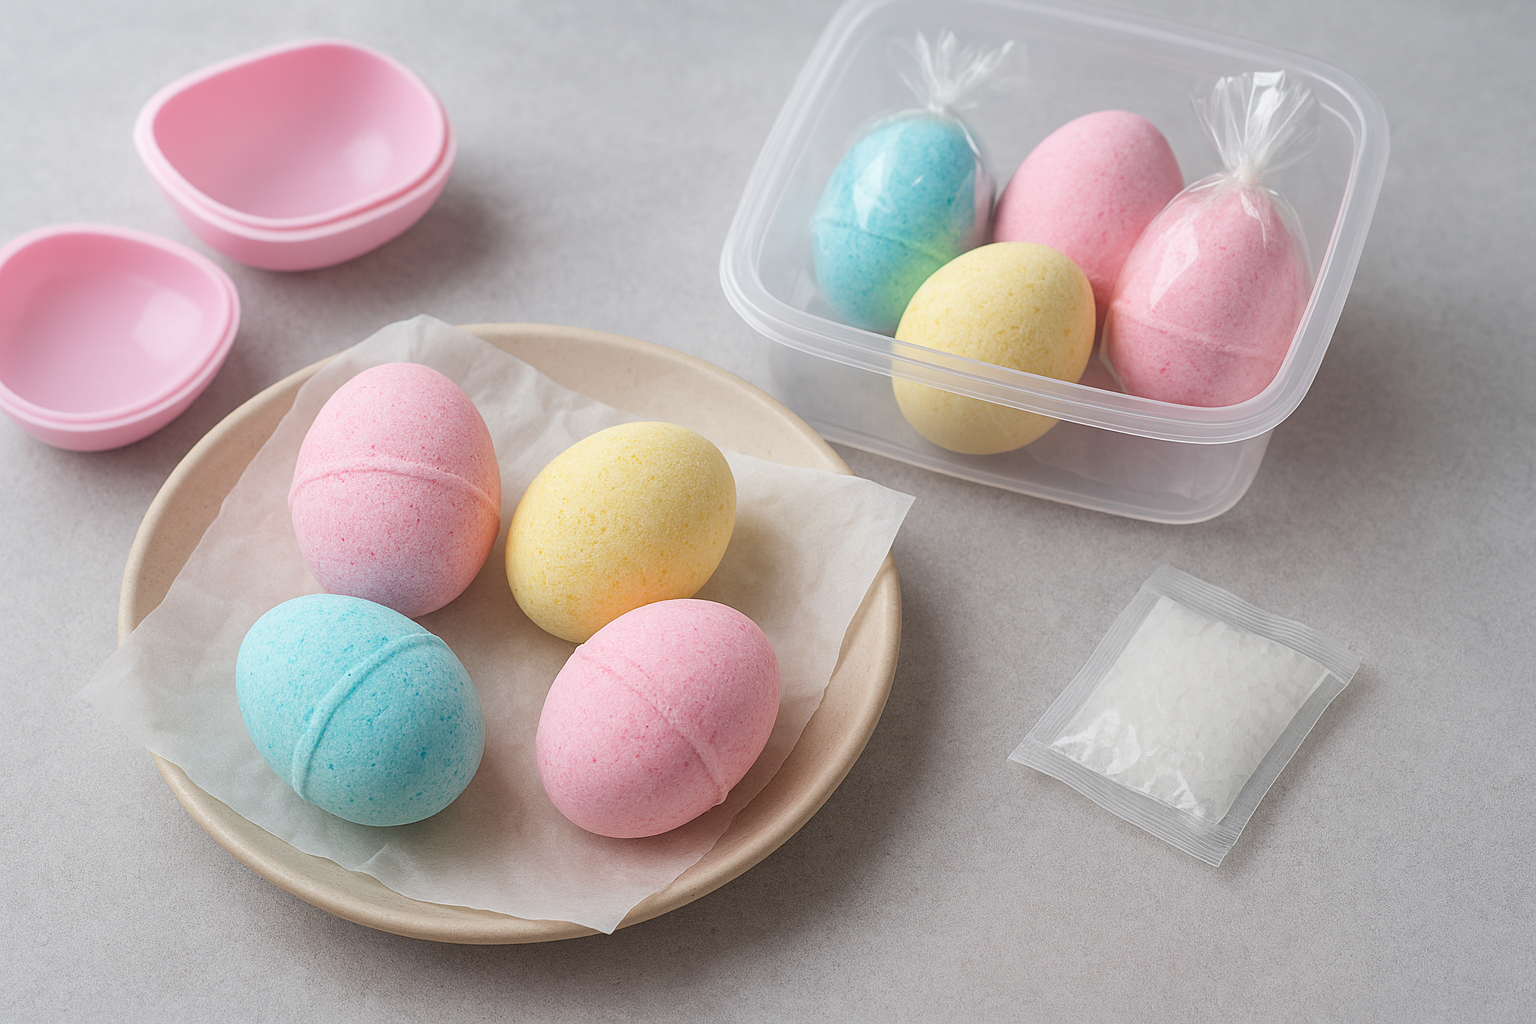
Patience during curing matters more than any ingredient in the recipe.
When the time is up, gently twist the mould rather than pulling it apart, easing one half away first before lifting the egg free. Cracked seams at this stage almost always trace back to a rushed pack in Step 3, so note which eggs held together best and adjust your pressure next time. If an egg does split, don't bin it: crumble it into a jar as fizzing bath salts instead, so nothing goes to waste.
Storing your finished eggs
Once unmoulded, your easter egg bath bombs need to stay completely dry until you're ready to use or gift them. Store them in an airtight container lined with tissue paper, away from steam, sunlight, and humid bathrooms, and they'll hold their scent and colour for two to three months. A few practical tips:
- Wrap each egg individually in cellophane if gifting, to lock in fragrance and stop colours transferring between eggs
- Add a small silica sachet to the storage container if you live somewhere humid
- Label jars with the scent and date made, since fragrance strength fades faster than colour
Handled this way, a single batch of easter bath bombs will easily outlast the Easter long weekend, ready whenever you fancy a soak.
Ready to enjoy your homemade Easter treats
By now you have everything you need to turn a handful of pantry staples into a basket of glossy, pastel easter egg bath bombs that beat anything on a supermarket shelf. Getting the ratios right, packing the mould with real pressure, and giving each egg a full cure are the three habits that separate a crumbly attempt from a proper gift-worthy batch. None of it is complicated, it just rewards patience over rushing.
Maybe you have made your batch and want a matching soak that took the guesswork out entirely, or maybe today was more about the activity than the outcome. Either way, there is no shame in keeping a backup on hand for the weekends when you would rather relax than measure citric acid. If that is where you land this Easter, browse our handmade bath bombs for a fizzing, skin-friendly soak made the same way, just without the washing up.