You've poured what should be a perfect candle, only to find an ugly crater forming around the wick as the wax cools. If you've ever searched how to fix sinkholes in candles, you already know how frustrating these dips and voids can be, especially when you've put real effort into your craft. The good news? They're entirely fixable, and with the right technique, preventable too.
At Coorong Candle Co., we hand-pour every single one of our natural soy candles in small batches here in South Australia. Sinkholes are something we've dealt with hundreds of times over the years, and we've learned exactly what causes them and how to sort them out. Soy wax is particularly prone to this issue because of how it shrinks during cooling, it's one of the trade-offs of working with eco-friendly, natural wax instead of paraffin.
This guide walks you through the practical steps to repair sinkholes in finished candles, whether you're a hobbyist candle maker or just trying to salvage a favourite piece. We'll also cover the root causes behind sinkholes and share the prevention methods we use in our own workshop so you can avoid them altogether next time.
What candle sinkholes are and why they happen
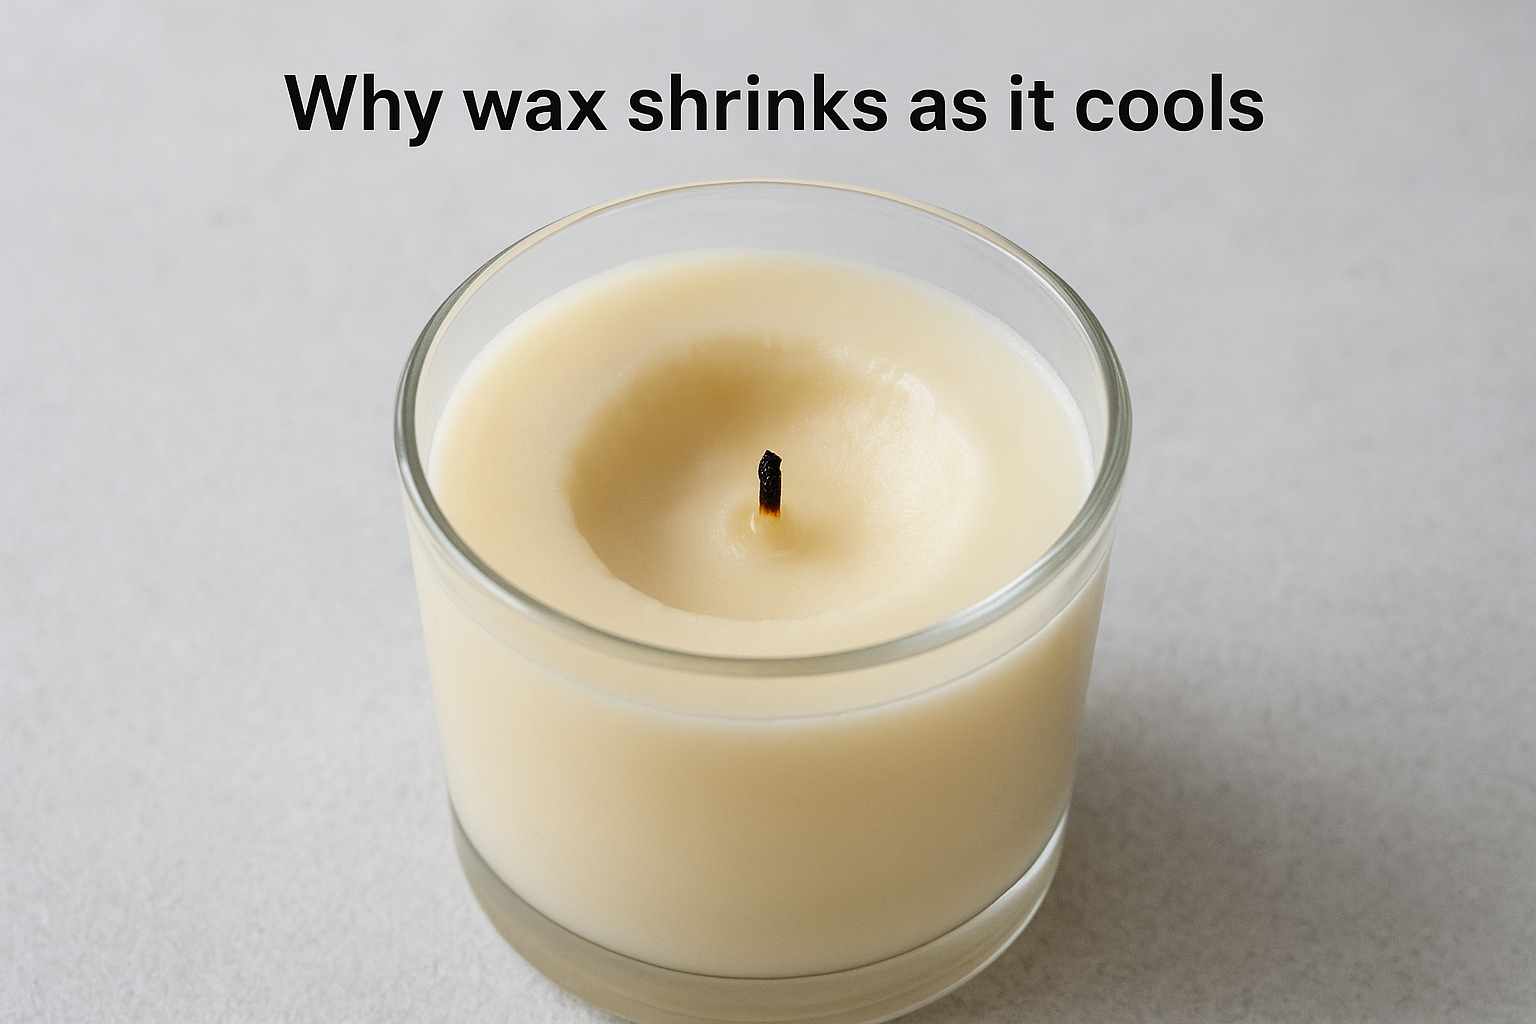
A candle sinkhole is a depression or void that forms in the wax as it cools, typically appearing as a crater around the wick or a sunken centre. Sometimes the void hides beneath an otherwise smooth surface as an internal air pocket you cannot see until you press down on it. Both types affect how your candle burns and can cause an uneven melt pool or a flame that tunnels straight through the wax rather than spreading across it.
Why wax shrinks as it cools
All wax contracts as it moves from liquid to solid, but natural soy wax shrinks more noticeably than paraffin because of its lower solid-state density. The outer wax, sitting against the cooler container wall, hardens first. The wax in the centre stays liquid longer, and when it finally solidifies and contracts, it pulls inward and downward, leaving a void either at the surface or trapped just below it.
This contraction is a natural property of soy wax, not a sign that something went wrong with your recipe or your technique.
Faster cooling makes this worse. If you move candles to a cold bench straight after pouring, the temperature difference between the outer shell and the liquid core becomes more extreme, which widens the gap when the centre finally contracts.
The main causes of sinkholes
Knowing the causes is the foundation for understanding how to fix sinkholes in candles and stopping them from recurring. Several factors can trigger sinkholes, and more than one can apply at the same time:
- Pouring temperature too high: Wax poured very hot contracts more dramatically as it cools.
- Rapid cooling: Cold surfaces, air conditioning, or draughts harden the outer shell while the core lags behind.
- No second pour: Without a top-up, there is no fresh wax to fill the gap left by shrinkage.
- Wide or deep vessels: These hold heat in the centre far longer, increasing the shrinkage gap significantly.
How to fix a sinkhole safely
Before you reach for any tools, gather the right equipment and work somewhere stable with good ventilation. The repair process involves reheating wax, so safety matters: keep a flat, heat-safe surface nearby and never leave melted wax unattended over a heat source. A rushed fix can create a second sinkhole, so take your time with each step.
Always work with wax at the correct temperature range. Overheated wax is a fire hazard regardless of wax type.
What you'll need before you start
Having everything ready before you begin makes the whole process straightforward. Here is what you need to fix sinkholes in candles at home:
- Heat gun or hairdryer (a heat gun gives more control over targeted areas)
- Double boiler or microwave-safe jug for melting reserve wax
- Skewer or toothpick to probe and release hidden air pockets beneath the surface
- Thermometer to monitor your pour temperature accurately
- Reserve wax from the same batch, kept aside for top-ups
Keep your reserve wax at around 10% of your total pour weight so you have enough for a proper fill. Working in a draught-free space also stops your fresh top-up from cooling unevenly and creating new voids.
Step 1. Find the sinkhole and release air
Part of knowing how to fix sinkholes in candles properly starts with identifying what type you are dealing with. Surface sinkholes show up as visible craters or dips around the wick, easy to spot once the candle has fully cooled. Hidden air pockets sit just beneath what looks like a smooth, level surface and are far trickier to find. Press gently across the top of your cooled candle with a fingertip; if the surface flexes or gives slightly, you have a void underneath that needs releasing before you add any fresh wax.
Pouring new wax directly over a hidden air pocket traps the void permanently and makes the problem worse.
How to probe and release the air pocket
Take your skewer or toothpick and insert it straight down into the wax, working in a slow circle roughly 5mm from the wick. You are looking for soft or hollow spots where the tool sinks in without resistance. Once you locate the void, make several small puncture holes to open it up and let the trapped air escape. Wipe the skewer clean between each insertion to keep debris out of the wax.
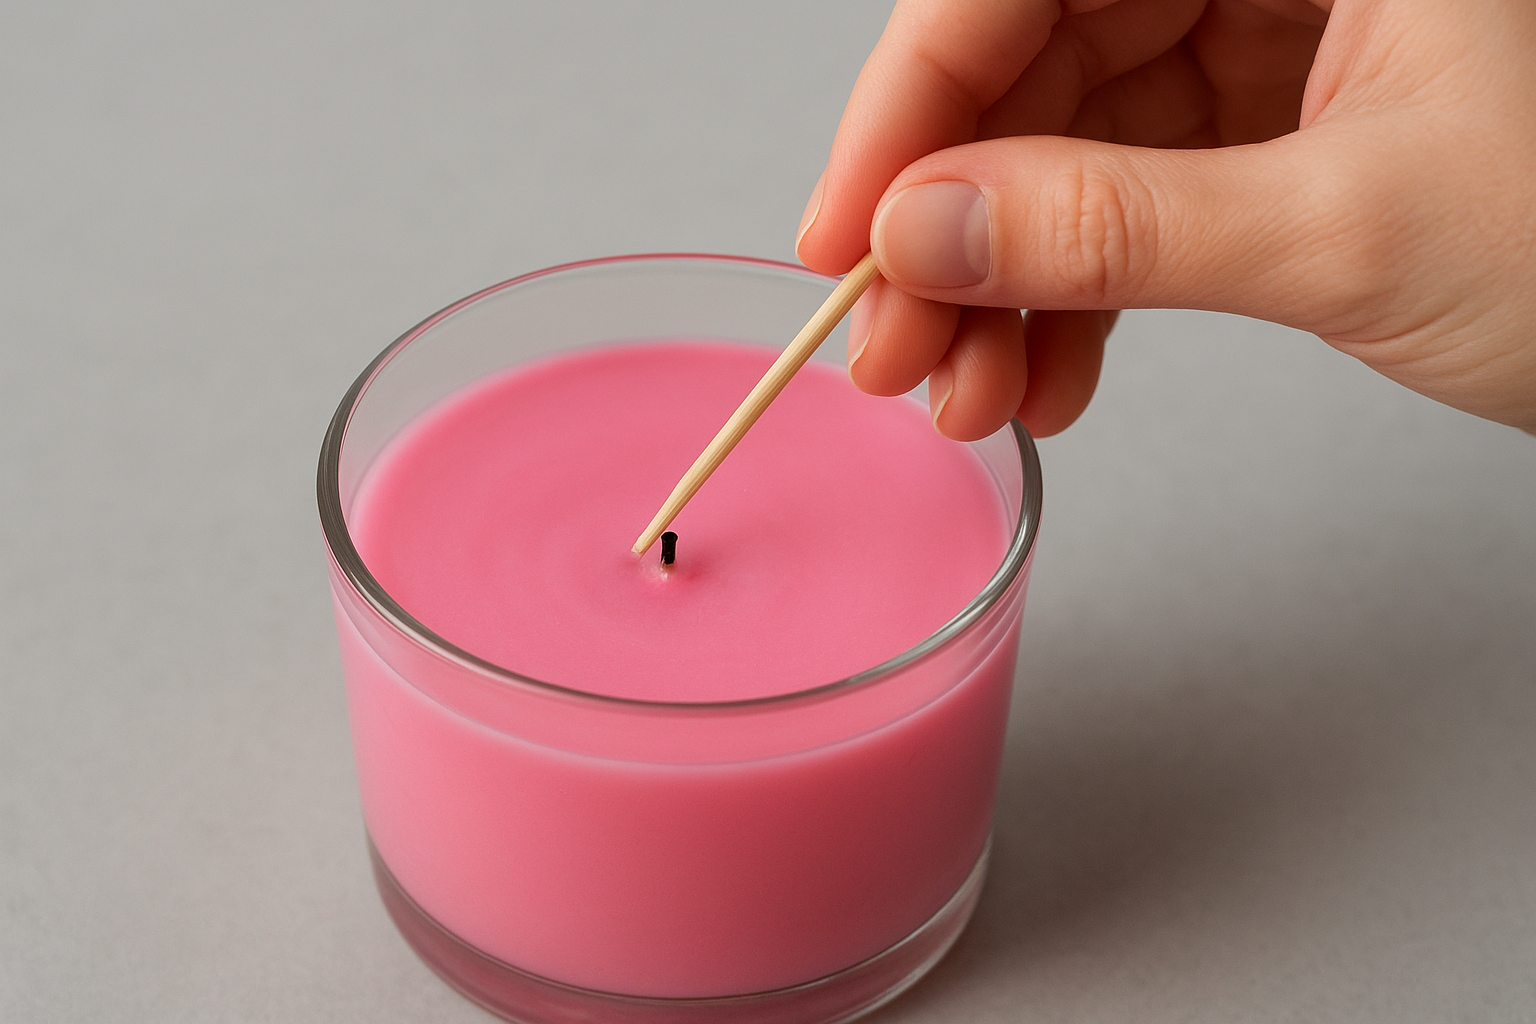
- Insert the skewer vertically, not at an angle
- Work in a circle about 5mm from the wick
- Make 4 to 6 small holes to fully release the air
- Wipe the skewer between each insertion
Step 2. Melt and level the surface
Once you have released any trapped air in Step 1, the next job is to fill the void with fresh wax and create a smooth, even surface. Take your reserve wax and melt it in a double boiler, bringing it to around 5 to 10 degrees above your normal pour temperature. This slightly higher temperature helps the fresh wax bond properly with the cooled candle below, rather than sitting as a visible separate layer.
How to pour the top-up correctly
Pour your melted wax slowly and directly into the sinkhole, filling it just above the existing wax level. The fresh wax will contract slightly as it cools, so overfilling by about 2mm accounts for that shrinkage and leaves you with a flat, even result. If you pour at the right temperature, the two wax layers bond invisibly and the repair becomes undetectable once the candle has fully set.
Avoid doing this top-up pour in a cold room or near a draught, as uneven cooling can produce a second sinkhole directly on top of the first.
Once the top-up has set completely, inspect the surface. If you still notice a slight remaining dip, use a heat gun on a low setting to gently melt the top 1 to 2mm and allow it to self-level naturally before the wax hardens again.
Step 3. Prevent sinkholes in future batches
Now that you know how to fix sinkholes in candles, the better long-term move is stopping them from forming in the first place. Three controllable variables drive most sinkhole problems: your pour temperature, your cooling environment, and whether you reserve wax for a top-up. Adjust all three consistently and you'll see far fewer sinkholes across your batches.
Keeping a simple pour log with temperature, room conditions, and results helps you spot patterns and nail down your ideal process faster.
Key habits to build into every pour
Adopt these practices on every batch and sinkholes become rare rather than routine. Pour temperature should sit between 55°C and 65°C for most soy waxes, cool enough to reduce aggressive shrinkage during setting. Cool your candles at room temperature, away from cold benchtops, draughts, or air conditioning vents.
- Reserve 10% of your wax for a top-up pour
- Wait until the surface starts to firm before adding the top-up
- Pour the top-up at roughly 5°C above your initial pour temperature
- Always cool candles on a wooden board or folded towel to buffer the base from cold surfaces
These small adjustments work together to give the wax a slow, even cooling cycle that minimises shrinkage gaps from the very first pour.

Final checks and next steps
Once your top-up wax has fully set, run a final inspection before you light the candle. Press gently across the entire surface to confirm there are no remaining air pockets, and check that the wick is still centred and upright after the repair. If the surface looks completely level and the wick sits straight, your candle is ready to burn.
Knowing how to fix sinkholes in candles is a genuinely useful skill, but the real win is building a consistent pour routine that stops them forming at all. Keep a simple pour log noting your wax temperature, room conditions, and results after each batch. Over a few sessions, you will identify your ideal settings and sinkholes will become the exception rather than the rule.
If you'd rather skip the trial and error altogether, explore our handcrafted natural soy candles, each hand-poured in small batches here in South Australia to get the result right every time.