
You lit your candle, walked away, and came back to find a narrow well burning straight down the middle, leaving a thick ring of untouched wax around the edges. That's tunnelling, and it's the most common complaint we hear about soy candles, even good ones. Learning how to stop tunnelling in candles matters because a tunnelled candle wastes half its wax and burns through its scent long before its wick gives out.
The good news is that tunnelling is fixable, and in most cases, preventable. You can rescue a candle that's already tunnelling with a couple of simple first-burn corrections, and you can stop it from starting in future burns by paying attention to burn time and wick care. It comes down to giving the wax pool room to reach the edges rather than cutting the burn short.
In this guide, we'll walk through exactly why tunnelling happens in soy wax candles like ours at Coorong Candle Co., how to salvage a candle that's already tunnelled, and the habits that prevent it from the very first light. Follow these steps and you'll get an even burn, a full melt pool, and every last gram of wax working for you.
What causes tunnelling and what you need to fix it
Tunnelling almost always starts with the first burn. Soy wax has a kind of memory: if you blow out the candle before the melt pool reaches the glass edges, the wax locks in that narrow diameter and every burn after follows the same shrinking well. Add a draughty room, a ceiling fan, or an air conditioner vent nearby, and the flame gets pushed sideways, melting one side faster and carving an uneven pit rather than a clean pool.
Tunnelling is a habit the wax learns on its first burn, not a flaw in the candle itself.
Wick size plays a part too. A wick that's too thin for the jar's diameter can't throw enough heat to melt wax right out to the edges, no matter how long you let it burn. That's why cheaper candles with skinny wicks tunnel constantly, while a well-sized cotton wick, like the ones we use across our 350g jars, gives the flame enough fuel to spread heat properly.
What you'll need before you start
Before tackling the fix, gather a few basic items. None of this requires anything specialist, and you've probably got most of it in a kitchen drawer already.
- A sheet of aluminium foil for the edge-melting trick
- A hairdryer or heat gun for stubborn, hardened tunnels
- Wick trimmers or clean nail scissors
- A flat, heat-safe surface away from draughts
- Patience for a burn cycle of at least two to three hours
With those on hand, you're ready to reset the wax and get the flame melting evenly again, starting with the quickest fix: the foil trick.
Step 1. Melt the edges with the aluminium foil trick
Grab a sheet of aluminium foil and wrap it loosely around the top of the candle, leaving only the wick and a small circle of wax exposed in the centre. This traps rising heat around the rim instead of letting it escape into the room, which forces the wax pool to spread outward rather than digging straight down. It's the fastest fix for a candle that's only just started tunnelling, and it works well on our soy jars because the wax is soft enough to respond quickly to extra warmth.
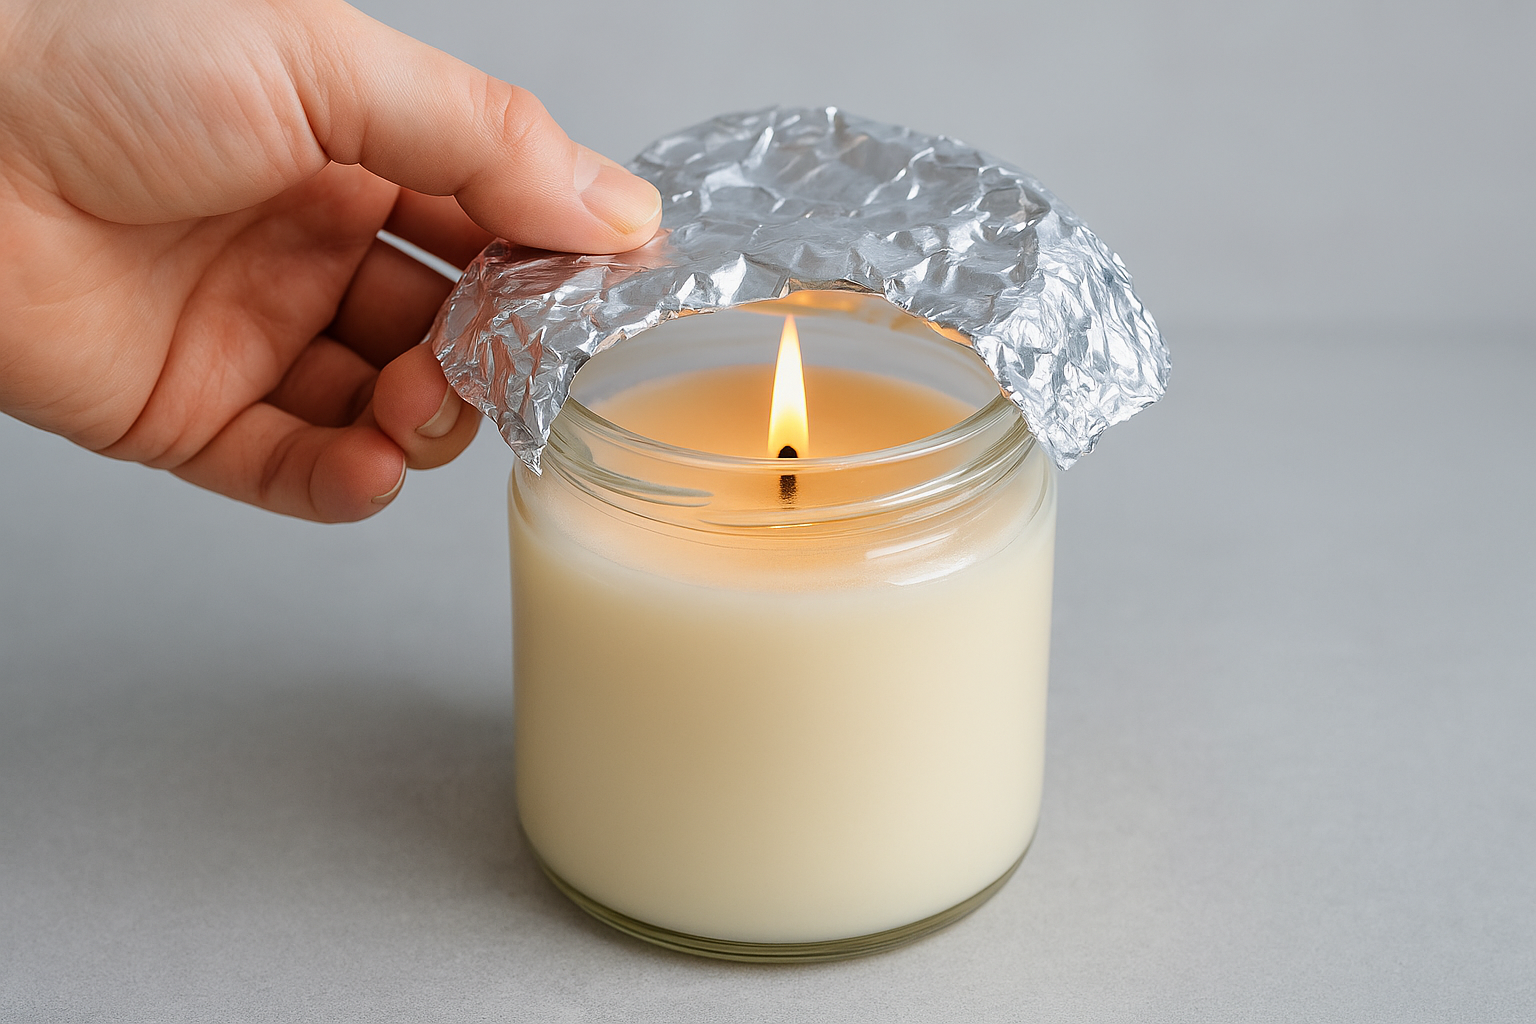
A ring of foil turns wasted heat into the exact push your wax pool needs to reach the glass.
Here's the process:
- Light the candle as normal and let the flame settle for a few minutes
- Fold foil into a collar that sits just above the rim, funnel-style, leaving a gap of a few centimetres over the flame
- Check the pool every 20 to 30 minutes
- Remove the foil once wax reaches the edges evenly
Watch for scorching
Keep an eye on the foil itself. If it starts to darken or the flame grows unusually tall, lift it off, let the candle cool, and try again with a slightly larger gap above the wick.
Step 2. Reset stubborn wax with a hairdryer or heat gun
When a tunnel has hardened over several burns, foil alone won't budge it. Reach for a hairdryer on its hottest setting, or a heat gun if you've got one, and blow warm air directly across the surface of the candle from about 15cm away. Move it in slow circles rather than holding it still on one spot, so the whole surface softens evenly instead of pooling in the middle again.
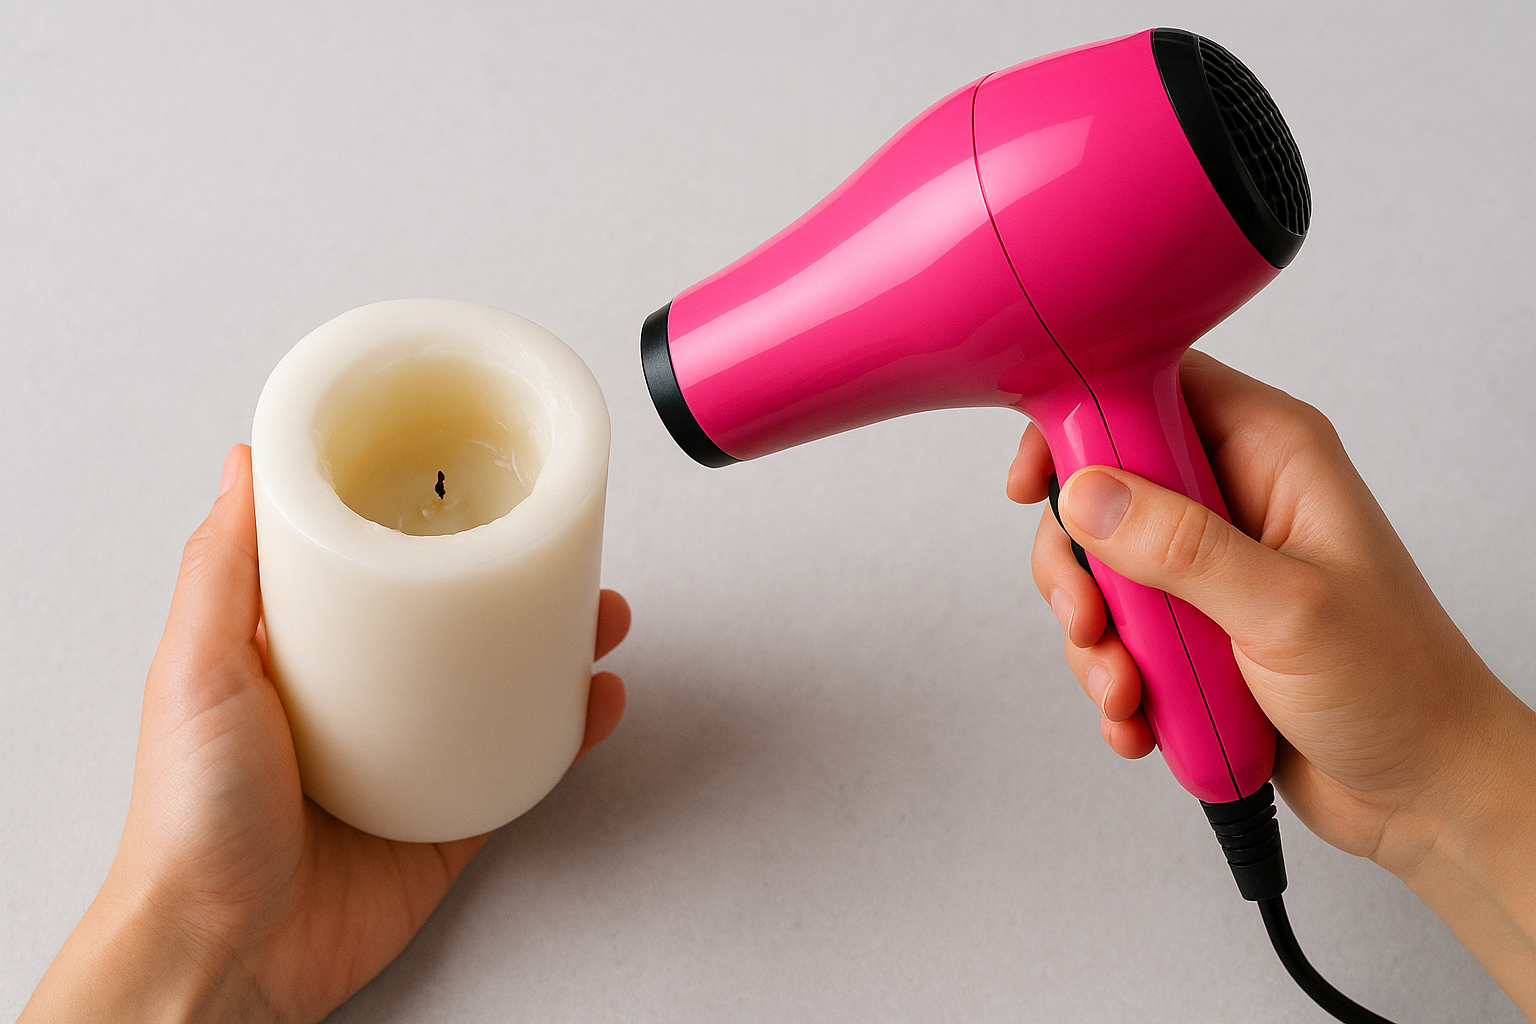
A hairdryer gives you the control a naked flame never can, softening wax exactly where the tunnel needs it most.
Keep the candle away from the heat source's cord and any flammable surfaces while you work, and never leave it unattended mid-melt. Here's what to do:
- Extinguish the flame and let the candle cool slightly so it's stable, not scorching hot
- Aim the hairdryer or heat gun across the rim, not straight down the tunnel
- Work in slow passes for two to three minutes, checking progress often
- Stop once the wax looks glossy and level from edge to edge
Relight once the surface has smoothed out. This method resets deep, stubborn tunnels that foil can't reach, and it's a good one to know for any soy candle that's gone a few burns without proper care.
Step 3. Get the first burn right every time
Once you've reset a tunnelled candle, the real work is making sure it never happens again, and that starts with the first burn. Soy wax sets a diameter memory in that opening session, so your job is simple: let the flame run until the melt pool reaches the glass on all sides, edge to edge, before you even think about blowing it out.
Get the first burn right and every burn after follows the same full, even pattern.
For a standard 350g jar, that usually takes two to three hours. Skip it, and you've locked in a narrow well for the candle's whole life.
A simple first-burn checklist
- Place the candle on a flat, draught-free surface away from vents, fans, or open windows
- Light it and check the pool every 30 minutes
- Don't extinguish until melted wax touches the glass on every side
- Note the time it took, so you know the minimum for future burns
- Trim the wick to 5mm before relighting next time
Follow this once and the wax remembers it correctly, giving you a full, even burn for every session that follows.
Why this matters more with soy
Soy wax is softer and more responsive to heat than paraffin, which is exactly why it tunnels faster when rushed, but also why it corrects itself so readily when you give it that proper first melt.
Step 4. Trim the wick and choose the right candle
Good habits between burns matter as much as the first light. Trimming the wick to 5mm before every relight keeps the flame small and controlled, which stops it from tunnelling into the wax faster than the heat can spread sideways. A long, floppy wick throws a tall flame that eats straight down the centre, undoing all the work you did getting that first burn right.
A 5mm trim before every burn is the cheapest insurance against tunnelling you'll ever find.
Match the wick to the jar
If you're shopping for candles rather than fixing one you already own, check that the wick suits the jar's width. A skinny wick in a wide jar simply can't throw enough heat to melt wax out to the glass, no matter how patiently you burn it.
| Jar diameter | Wick type needed |
|---|---|
| Under 6cm (165g tins) | Single cotton wick, thin |
| 6cm to 9cm (350g jars) | Single cotton wick, medium to thick |
| Over 9cm | Double wick or wooden wick |
Quick between-burn checklist
- Trim wick to 5mm every time, using proper trimmers rather than fingers
- Keep candles away from draughts, vents, and fans
- Burn for at least two to three hours each session
- Check jar width matches wick thickness before buying
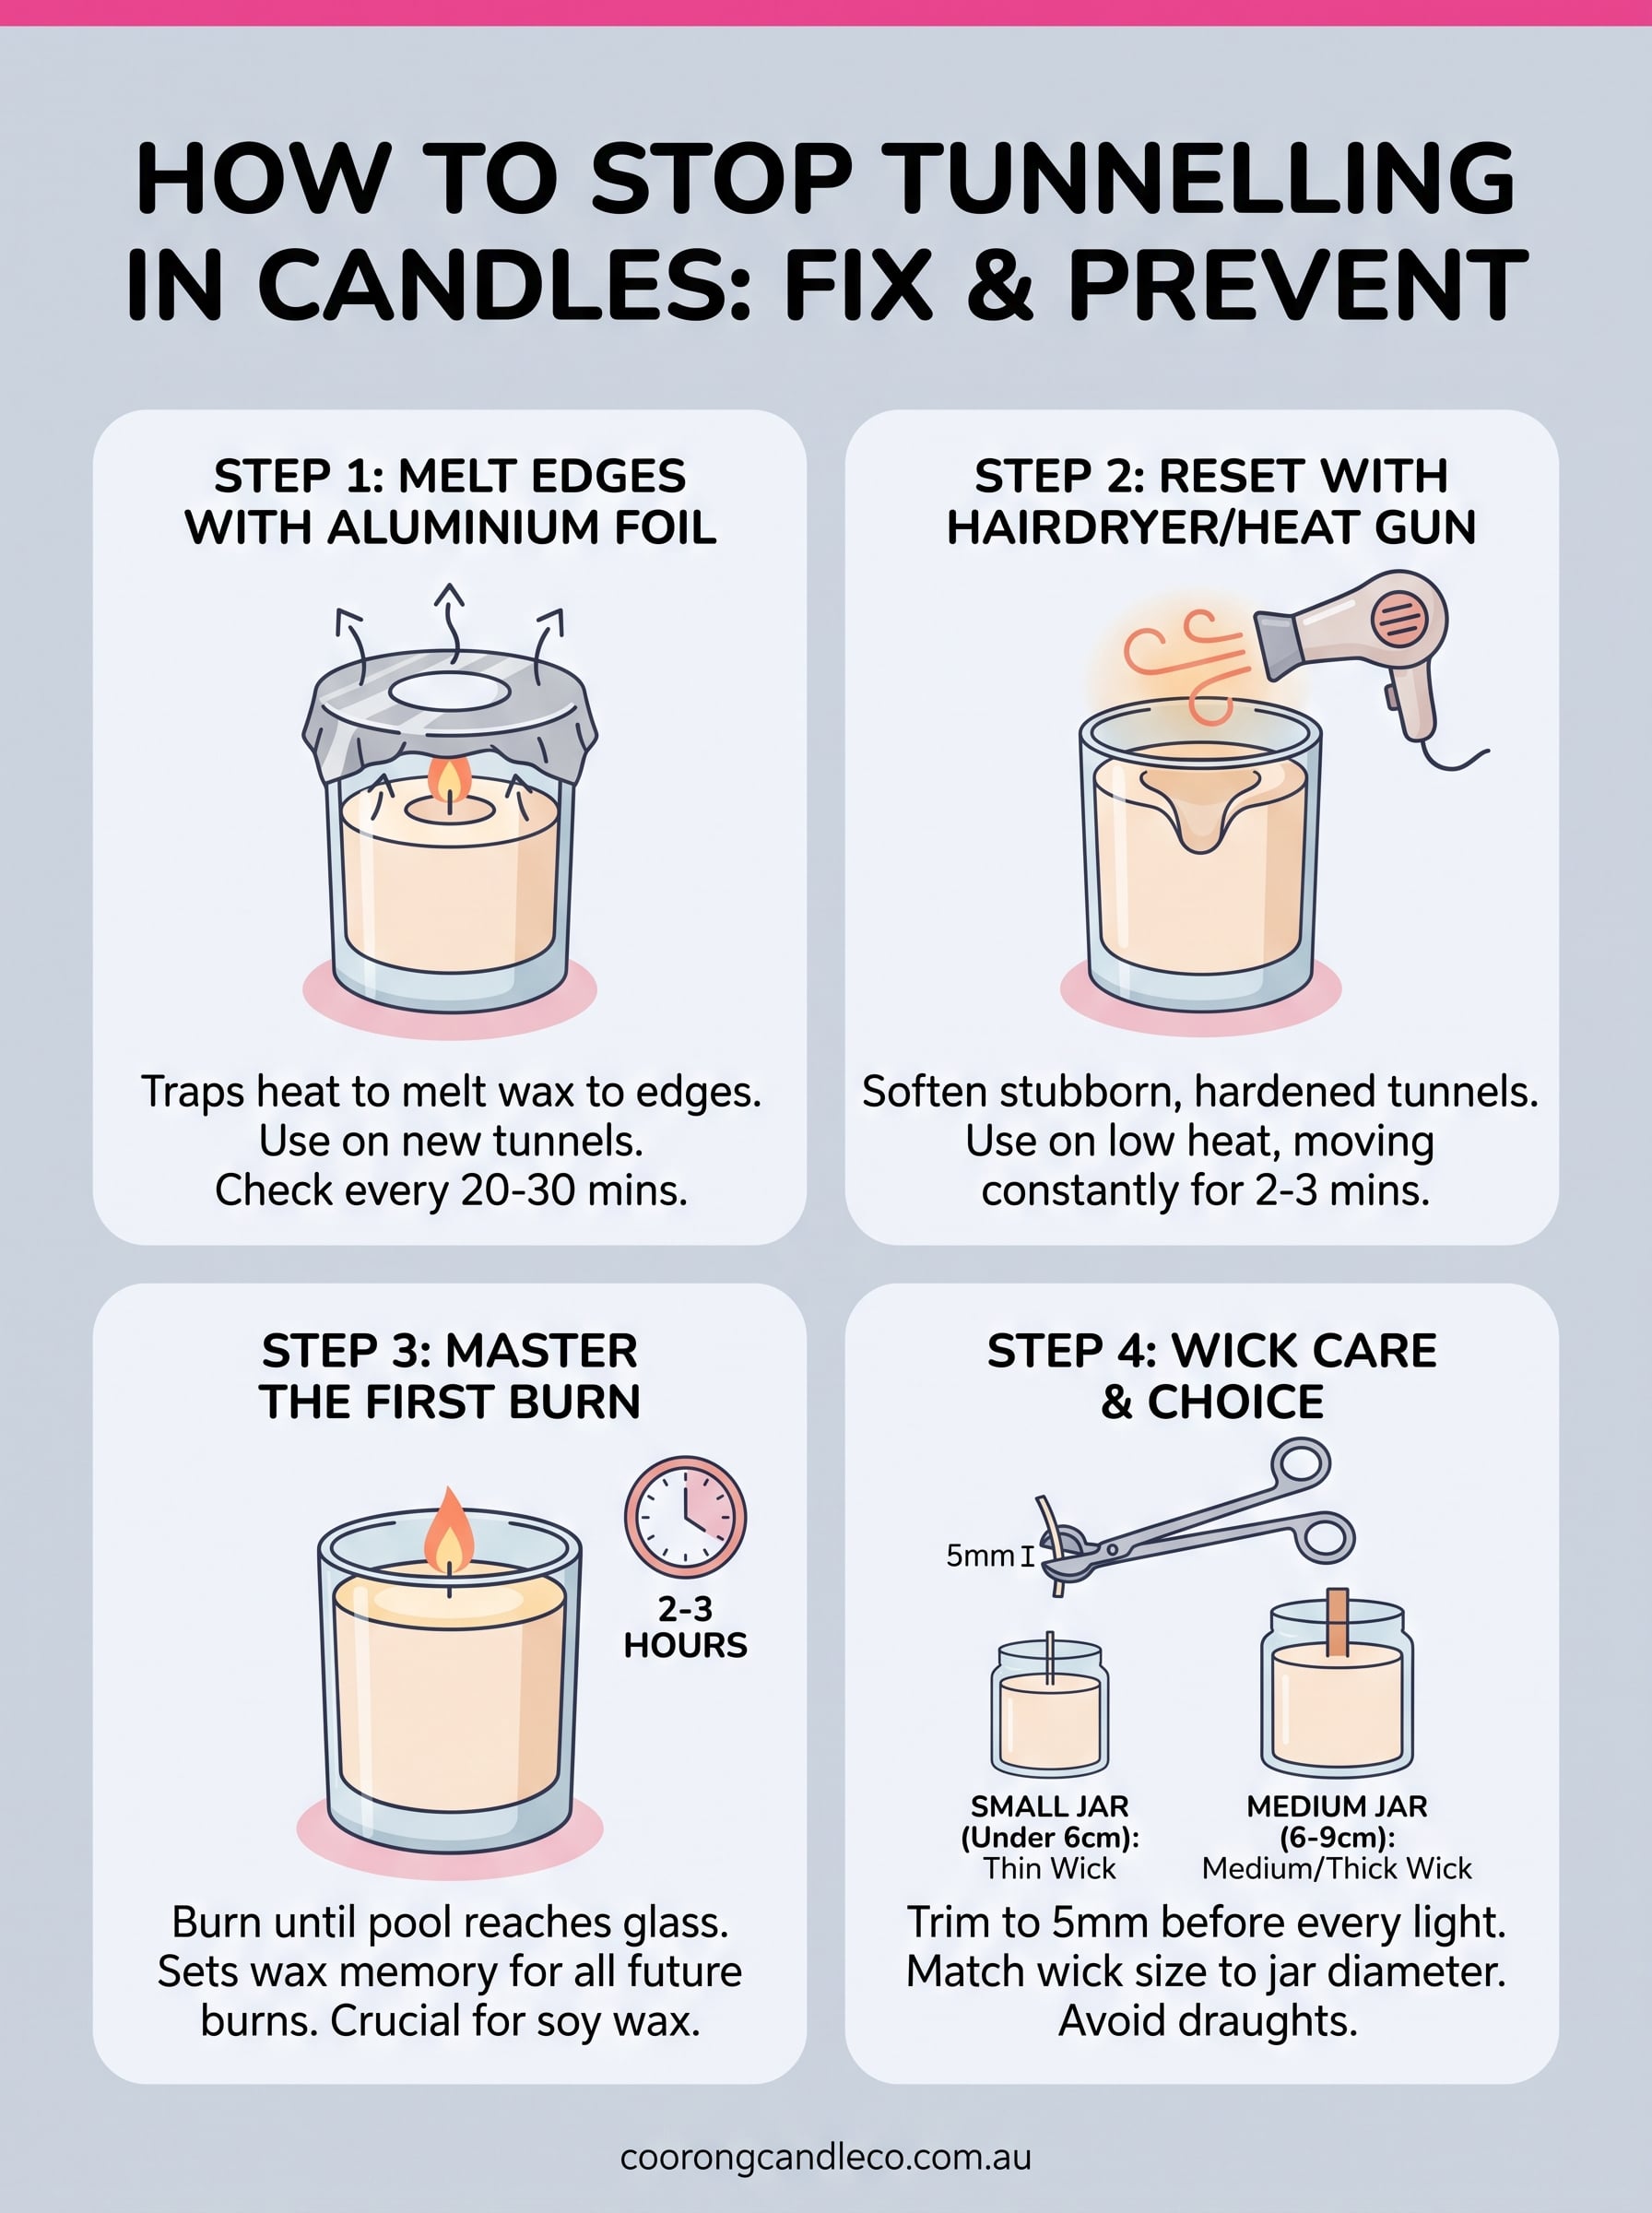
Enjoy a full, even burn from every candle
Tunnelling isn't a flaw you're stuck with, it's a pattern you can break. Foil collars and a hairdryer rescue a candle that's already dug a well, while a proper first burn and a 5mm trim before every relight stop the problem before it starts. Get those habits right and every jar burns the way it should, edge to edge, with none of the wax wasted around the rim.
That consistency matters most when the candle itself is well made. Our hand-poured soy candles use correctly sized cotton wicks for each jar, so you're not fighting a skinny wick from the first light. If your current candle is past saving, it's worth starting fresh with one built to burn evenly from day one. Browse our range of natural soy candles and set yourself up for a full, fragrant burn every single time.