You've picked out a beautiful candle, lit the wick, and now you're wondering, how long should you burn a candle for before blowing it out? It's a question we get asked regularly at Coorong Candle Co., and the answer matters more than most people realise. Burn too short and you'll end up with a tunnelled mess. Burn too long and you risk safety issues, an overheated vessel, and a wick that starts mushrooming.
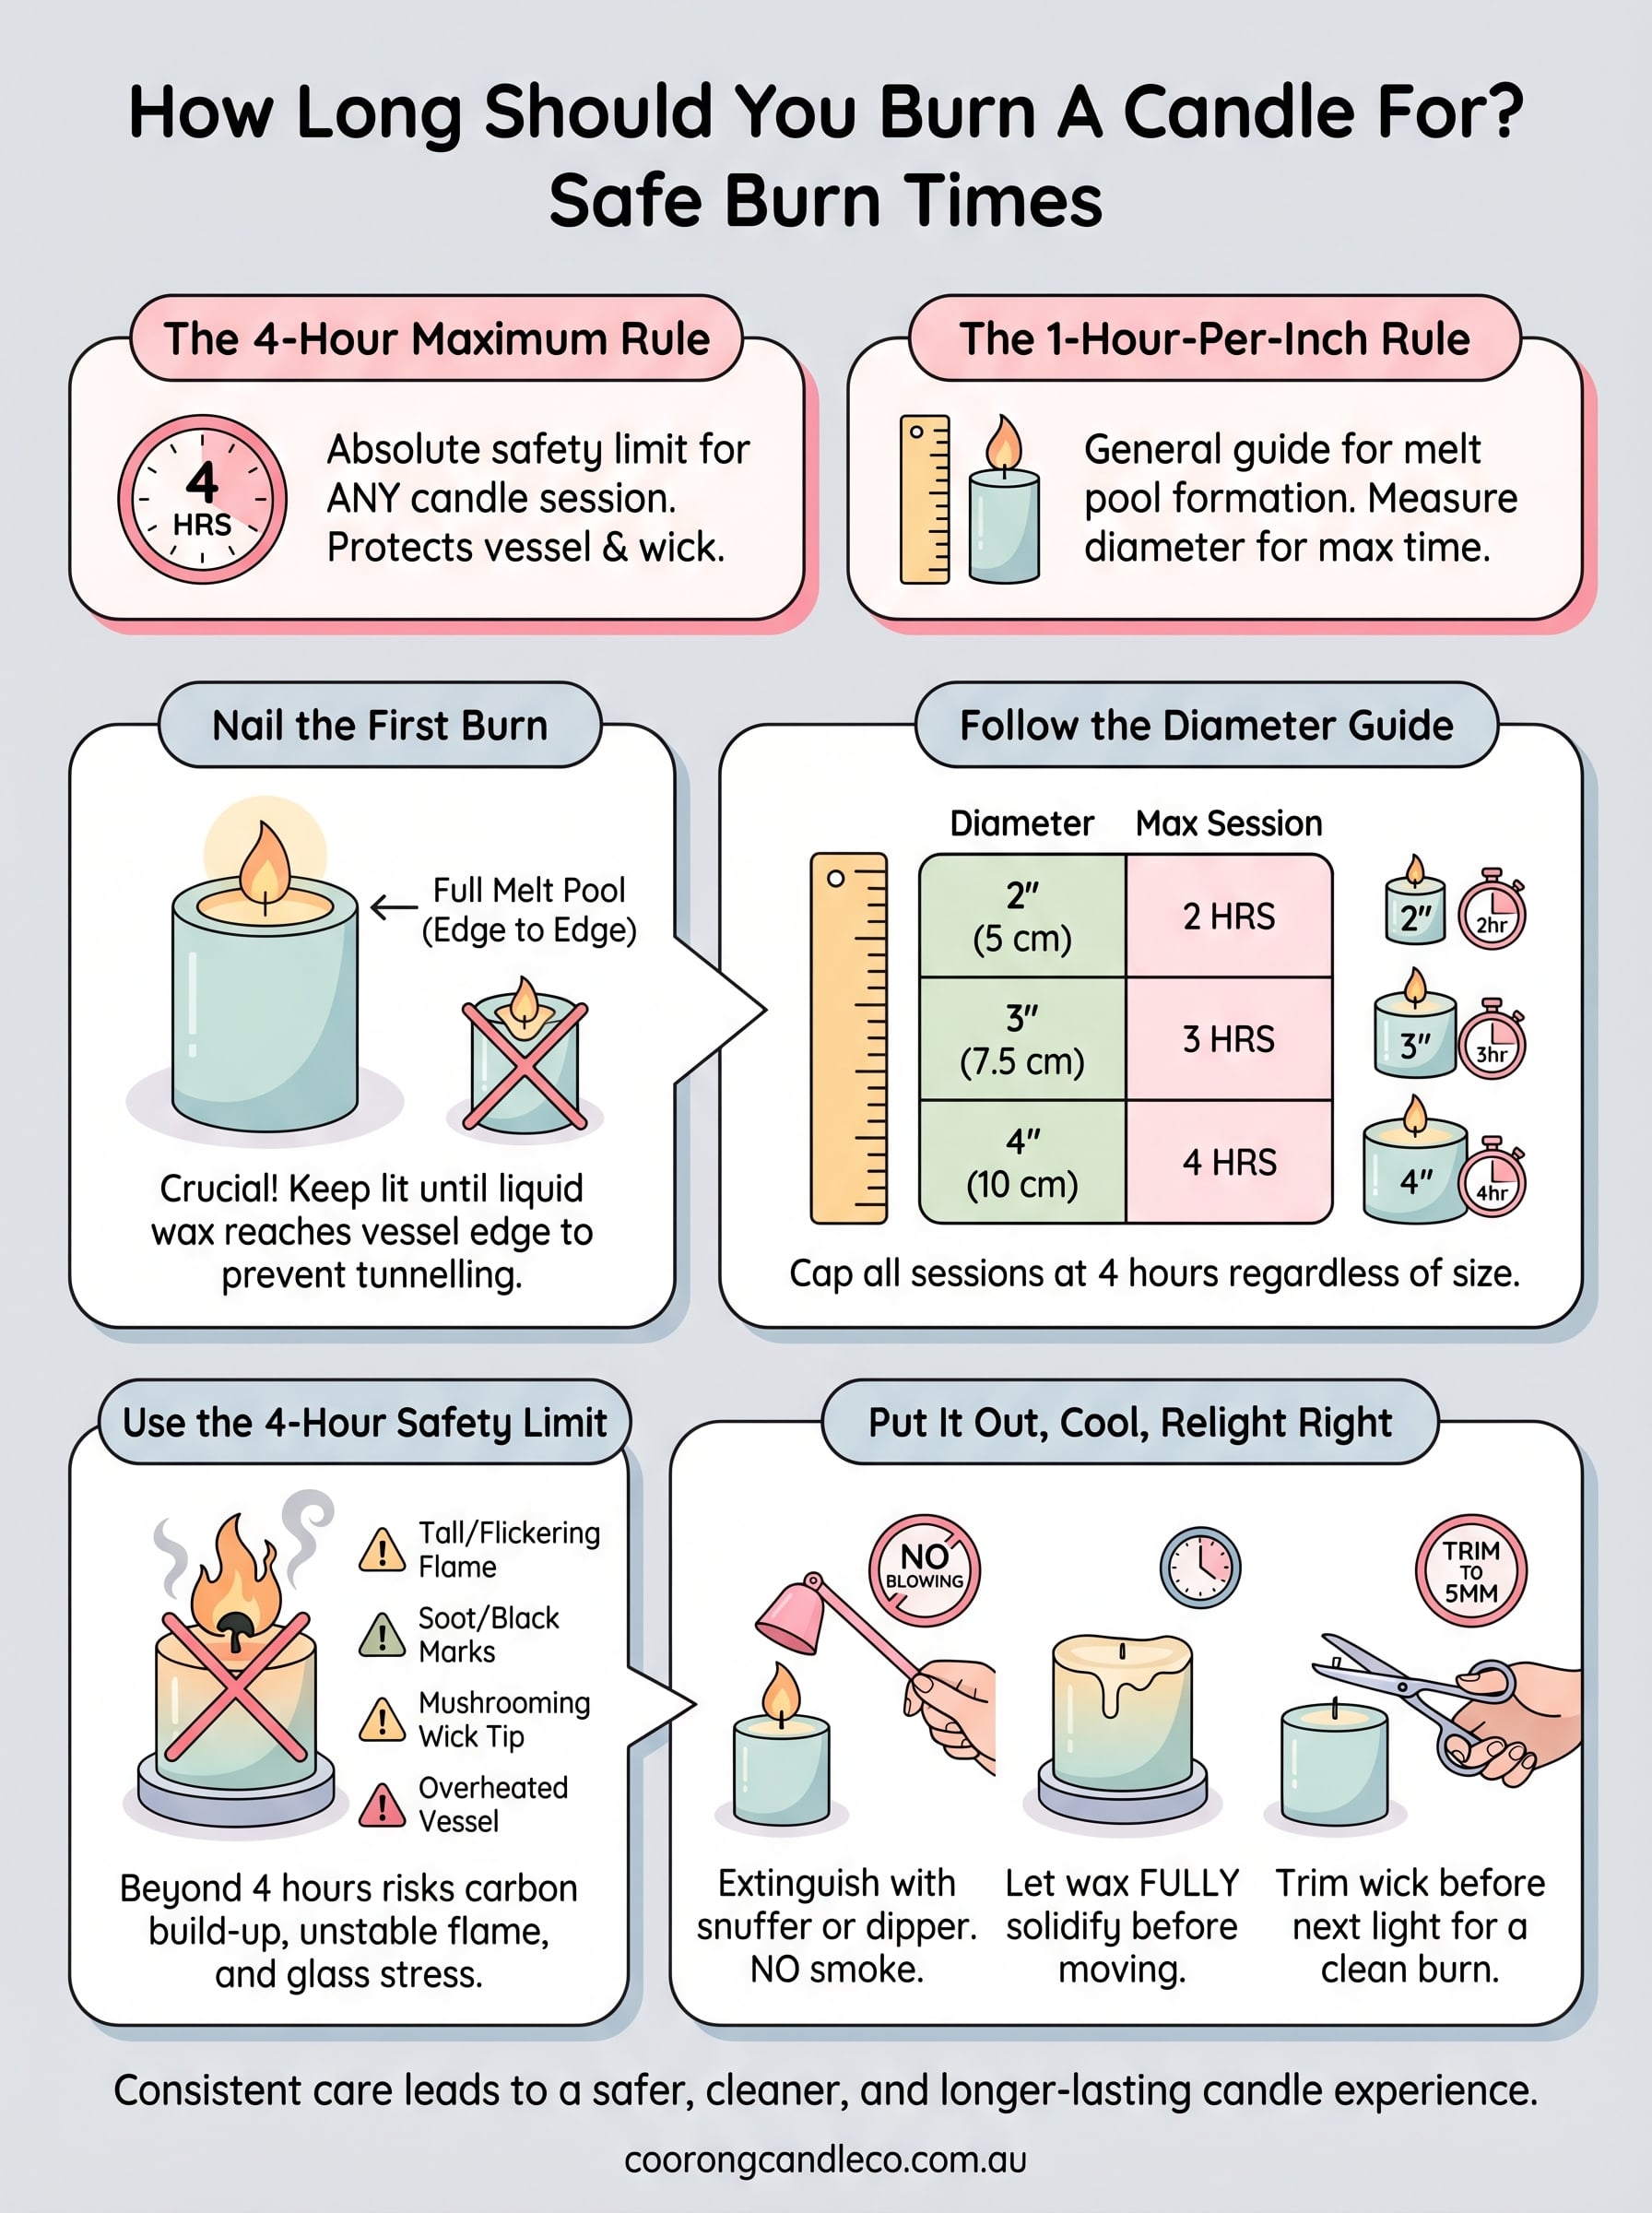
The good news is that there are two simple rules, the 4-hour maximum rule and the 1-hour-per-inch rule, that cover almost every situation. Whether you're lighting one of our soy candles after a long day or gifting one to a friend, knowing these guidelines will help you get a cleaner burn, a stronger scent throw, and every last hour of wax out of the jar.
Below, we'll break down exactly how long to burn your candle at each stage, why these timeframes exist, and what happens when you ignore them.
What decides burn time for a candle
Before you can answer how long should you burn a candle for in any specific situation, you need to understand what actually drives that number. Burn time is not a fixed figure that applies to every candle equally. It shifts depending on the materials, the construction, and even the conditions in the room. Getting familiar with these variables helps you make smarter decisions every single session.
Candle diameter and wax volume
The diameter of the candle is one of the biggest factors affecting how long each burn session should last. A wider candle needs more time to develop a full melt pool that reaches edge to edge, while a narrower candle gets there much faster. Wax volume determines the total hours you'll get across a candle's full life, but diameter is what governs the length of each individual session.
Here's how diameter typically maps to the time needed to form a full melt pool:
| Candle Diameter | Time to Full Melt Pool |
|---|---|
| 5 cm or less | 1 to 1.5 hours |
| 6 to 8 cm | 1.5 to 2 hours |
| 9 to 10 cm | 2 to 3 hours |
Never cut a session short before the melt pool reaches the edges on the first burn. That single decision shapes every burn that follows.
Wax type and fragrance load
Soy wax burns cooler and more slowly than paraffin, which directly affects how long the candle takes to form a full melt pool and how long you can safely run it. Coorong Candle Co. candles use natural soy wax precisely because that slower, cleaner burn gives you more control and a longer total burn life compared to paraffin alternatives.
Fragrance load also plays a role. A candle with a high fragrance oil concentration can affect how evenly the wax melts and, in some cases, raises the temperature of the wax pool. That's one reason following safe burn limits matters regardless of how strong the scent throw is.
Wick size and vessel shape
The wick thickness controls how much fuel feeds the flame at any given moment. An oversized wick burns hotter and faster, meaning the melt pool forms quickly but can overheat the vessel. A correctly sized wick paired with the right vessel shape keeps the flame stable and the burn consistent throughout the candle's life.
Jar candles trap heat differently to pillar candles. Because the glass vessel holds warmth around the wax, jar candles develop melt pools faster and can build up significant heat if you run them without a break. That's exactly why the four-hour rule exists, which we'll cover in detail shortly.
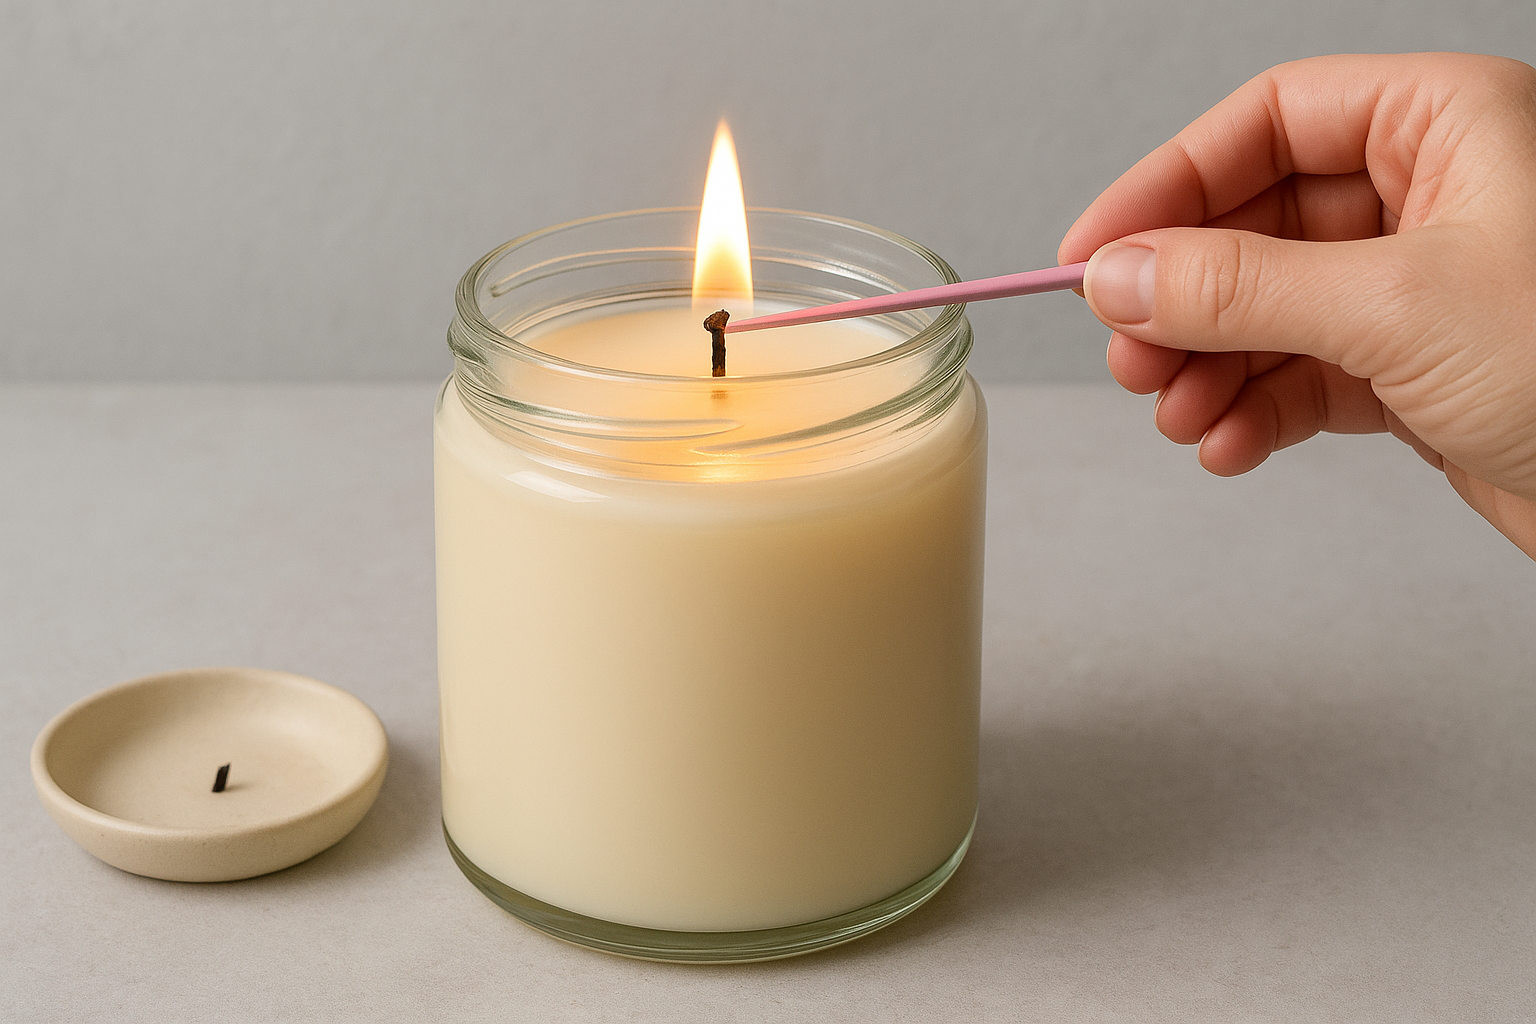
Step 1. Nail the first burn to stop tunnelling
The first burn is the most important session your candle will ever have. Wax has a memory, which means it melts along the same path every single time. If you cut the first session short, the wax sets in a narrow ring around the wick, and every future burn follows that same tunnel deeper into the candle, wasting the outer wax entirely.
What tunnelling actually does to your candle
Tunnelling wastes a significant portion of the wax you've already paid for. Once a tunnel forms and sets, the wick eventually drowns in its own well, the flame struggles to stay alight, and you lose hours of fragrance throw in the process. With a Coorong Candle Co. soy candle in a 350g jar, that untouched outer wax can represent up to a third of your total burn life sitting permanently around the edges.
Skipping a proper first burn is the single most common reason candles underperform, regardless of quality.
How to get the first burn right
Knowing how long should you burn a candle for on its first session comes down to one goal: achieving a full melt pool. That means keeping the candle lit until the liquefied wax reaches the full edge of the vessel, with no solid wax left around the rim. Use the diameter guide from the previous section to estimate your timing, and always pick a draught-free location so the heat spreads evenly across the entire surface.
Follow these steps every time you light a new candle:
- Trim the wick to 5mm before the first light
- Place the candle on a flat, heat-resistant surface
- Burn until the melt pool reaches edge to edge before extinguishing
- Keep the session under four hours, even on this first burn
- Let the wax fully solidify before relighting for the next session
Step 2. Follow the 1 hour per inch guide
Once you've nailed the first burn, the 1-hour-per-inch rule becomes your go-to guide for every session that follows. The principle is straightforward: for every inch of candle diameter, burn for a maximum of one hour. A candle with a two-inch diameter burns for up to two hours per session; a three-inch diameter candle burns for up to three hours. This keeps the melt pool forming correctly without overworking the wick or overheating the vessel.
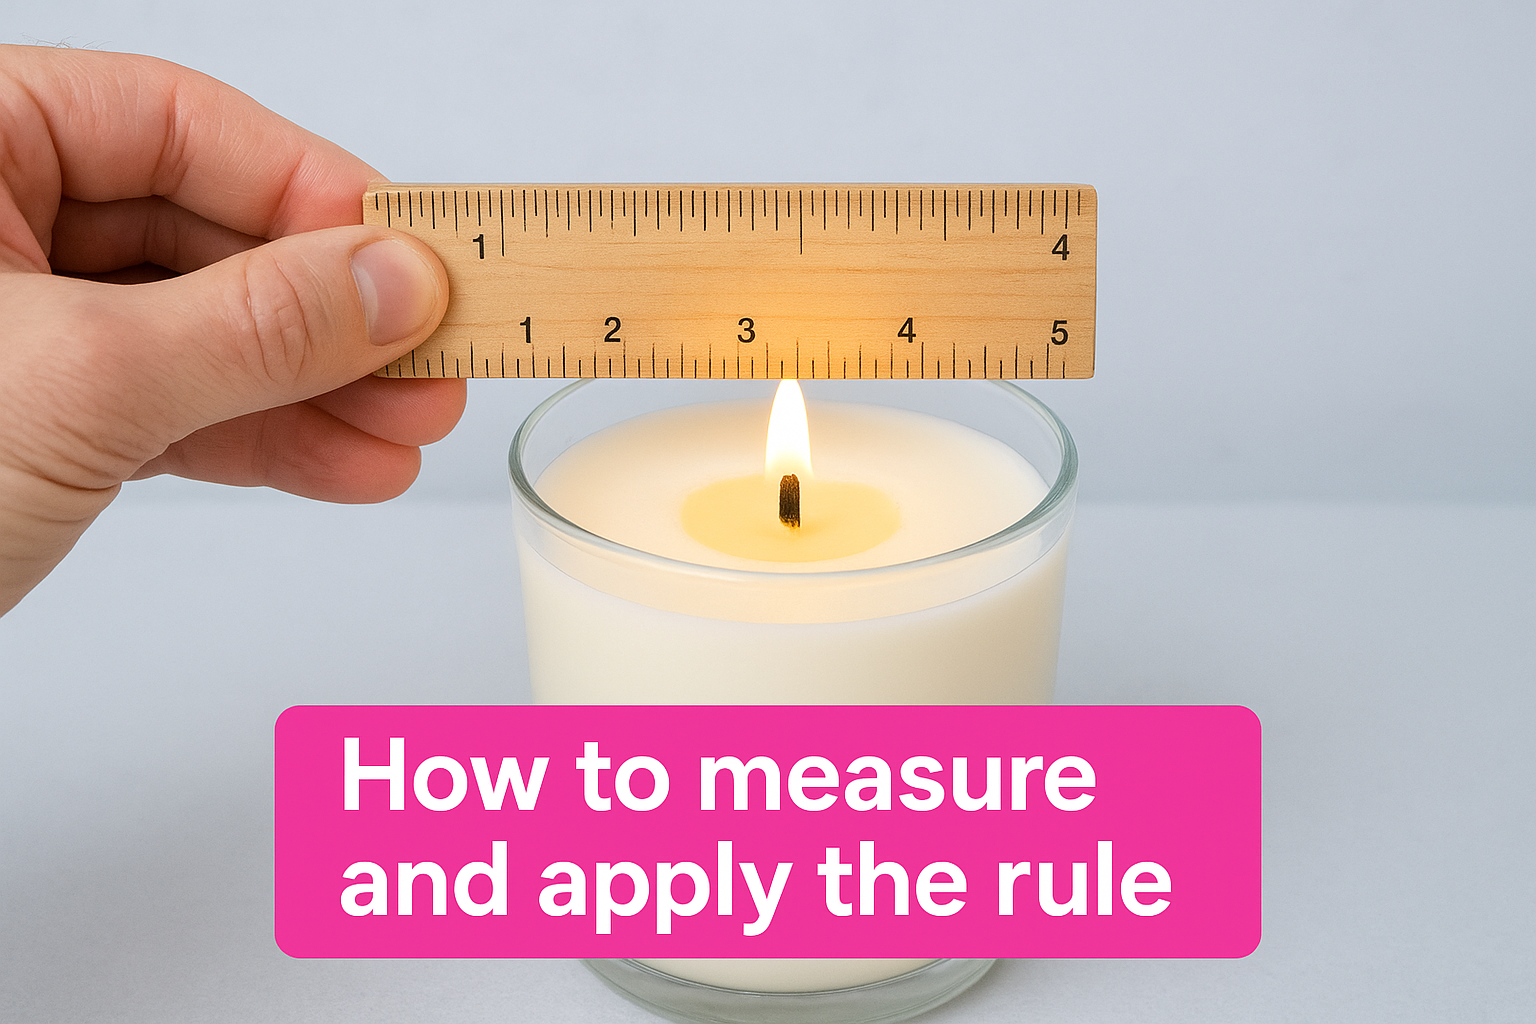
How to measure and apply the rule
Measuring your candle takes about ten seconds. Grab a ruler and measure the inner diameter of the vessel at the widest point of the wax surface, not the outside of the glass. Round to the nearest half-inch for a practical session limit. Here's how that plays out across common candle sizes:
| Candle Diameter | Max Session Length |
|---|---|
| 2 inches (5 cm) | 2 hours |
| 2.5 inches (6.5 cm) | 2.5 hours |
| 3 inches (7.5 cm) | 3 hours |
| 3.5 inches (9 cm) | 3.5 hours |
If your candle diameter works out to more than four hours, always cap the session at four hours regardless.
What happens when you burn beyond the guide
Running your candle past the recommended session length does more than waste wax. The wax pool deepens beyond the point where the fragrance throw is at its peak, and the wick starts to overheat and build carbon at the tip. Understanding how long should you burn a candle for in each session prevents all of this and keeps every burn as clean and fragrant as the first.
Watch for these warning signs that your session has run too long:
- Flame growing taller than 3 cm or flickering irregularly
- Soot or black marks appearing on the inside of the glass
- A mushrooming wick tip forming a visible carbon ball
- The base of the vessel becoming too hot to touch comfortably
Step 3. Use the 4-hour safety limit
No matter what the 1-hour-per-inch rule tells you, four hours is the absolute ceiling for any single burn session. This limit is not about fragrance performance or melt pool quality. It is a safety boundary that applies to every candle, every wax type, and every vessel size. Knowing how long should you burn a candle for means understanding that this hard cap exists to protect your home, not just your candle.
Why four hours is the hard limit
After four continuous hours, a candle's wick has been drawing heat long enough that the carbon build-up at the tip becomes significant. That carbon ball, called mushrooming, makes the flame grow unstable and increases soot output sharply. At the same time, the glass vessel has been absorbing heat the entire session. Running past the four-hour mark pushes the base temperature into a range where heat stress can crack the glass or transfer dangerous warmth to the surface underneath it.
Four hours is the point where risk climbs faster than any benefit you get from keeping the flame going.
How to track and manage your burn sessions
Setting a phone timer before you light the candle is the simplest method. You do not need to rely on memory when a 30-second habit handles it for you. If you regularly burn candles in the evening, build a simple session log so you can track how many hours remain in each candle.
Use this template to manage your candles:
| Candle Name | Diameter | Max Session | Date Last Lit | Hours Used | Hours Remaining |
|---|---|---|---|---|---|
| Coorong Dawn 350g | 7.5 cm | 3 hours | 14 Apr | 6 hours | ~44 hours |
| Travel Tin 165g | 5 cm | 2 hours | 12 Apr | 4 hours | ~21 hours |
Tracking each session takes under a minute and ensures you never accidentally run a candle into an unsafe state.
Step 4. Put it out, cool it, relight it right
How you end a burn session matters almost as much as how you start one. Blowing out a candle pushes the wick sideways, scatters hot wax, and sends a plume of smoke straight into the room. Developing proper extinguishing habits closes the loop on everything the previous steps have built and protects both the candle and the surface underneath it.
Extinguish without blowing
The right tool here is a candle snuffer or wick dipper, both of which cut the flame cleanly without disturbing the wax pool. A snuffer starves the flame of oxygen, while a wick dipper bends the wick briefly into the melt pool and lifts it back upright, which coats the wick in wax and makes relighting easier next time. Neither method produces smoke, and both keep the wick centred and ready for the next session.
Blowing out a candle is the most common cause of crooked wicks and smoky rooms, and both are straightforward to avoid.
Give the wax time to set
After you extinguish the flame, leave the candle completely untouched until the wax solidifies. This typically takes one to two hours depending on the vessel diameter and room temperature. Moving or covering a candle before the wax sets creates an uneven surface that throws off the next melt pool.
Once the wax is fully solid, replace the lid or use a dust cover to keep debris off the wax surface and slow fragrance loss between sessions.
Prep before the next light
Knowing how long should you burn a candle for in the next session starts with a quick pre-light routine every time you relight. Run through these steps before striking a match:
- Trim the wick back to 5mm using wick trimmers or small scissors
- Inspect the base and sides of the vessel for cracks or stress marks
- Remove any carbon flakes or wick debris from the wax surface
- Confirm the candle sits on a flat, heat-resistant surface away from draughts
A safer, cleaner burn every time
The four steps above give you everything you need to answer how long should you burn a candle for at every stage of a candle's life. Nail the first burn, follow the diameter guide, respect the four-hour limit, and extinguish cleanly every time. These habits take seconds to build and they protect both your candle and your home across every session that follows.
Good candles deserve good care from the moment you light them. Choosing a natural soy candle from a maker who uses lead-free cotton wicks and carefully tested fragrance loads gives you a strong starting point, but your technique carries it the rest of the way. Every session you manage well adds up to more hours of fragrance, less wasted wax, and a safer space for everyone in it.
Ready to put these habits into practice? Explore the Coorong Candle Co. soy candle collection and find a fragrance that suits your space.