
Standing in the kitchen with baking soda, citric acid, and a mixing bowl scattered across the bench, you start to wonder what actually turns this pile of powder into something that fizzes in the tub. That's the exact question behind every search for bath bombs ingredients, and it's simpler to answer than most tutorials make it sound. Once you know the core dry components and the handful of extras that add scent, colour, and moisture, you're most of the way to a working recipe.
This guide walks through exactly what goes into a bath bomb, why each ingredient matters, and the basic ratios that give you a reliable fizz every time. We'll cover the essentials, from citric acid to Epsom salts, plus the oils and fragrances that turn a plain mixture into a genuine sensory experience.
We make small-batch bath bombs here at Coorong Candle Co. using natural oils and skin-friendly additions, so we know firsthand which combinations hold together and which ones crumble in the mould. Read on for a straightforward ingredient list and simple steps to start making your own at home.
What you need to make bath bombs at home
Before you melt anything or measure a single gram, get your ingredients and tools sorted on the bench. Making bath bombs is closer to baking than to candle making for beginners. It's a chemical reaction, not a slow melt, so precise measuring matters more than it does with most craft projects. Once you've got the right components in front of you, the actual mixing takes less than twenty minutes.
The core dry ingredients
Every bath bomb recipe starts with the same two-ingredient reaction: an acid and a base. Citric acid and bicarbonate of soda (baking soda) are what create that satisfying fizz once the bomb hits water, the same reaction behind what a bath fizzer is. Get the ratio wrong and you'll either get a weak fizz or a mixture that won't hold its shape.
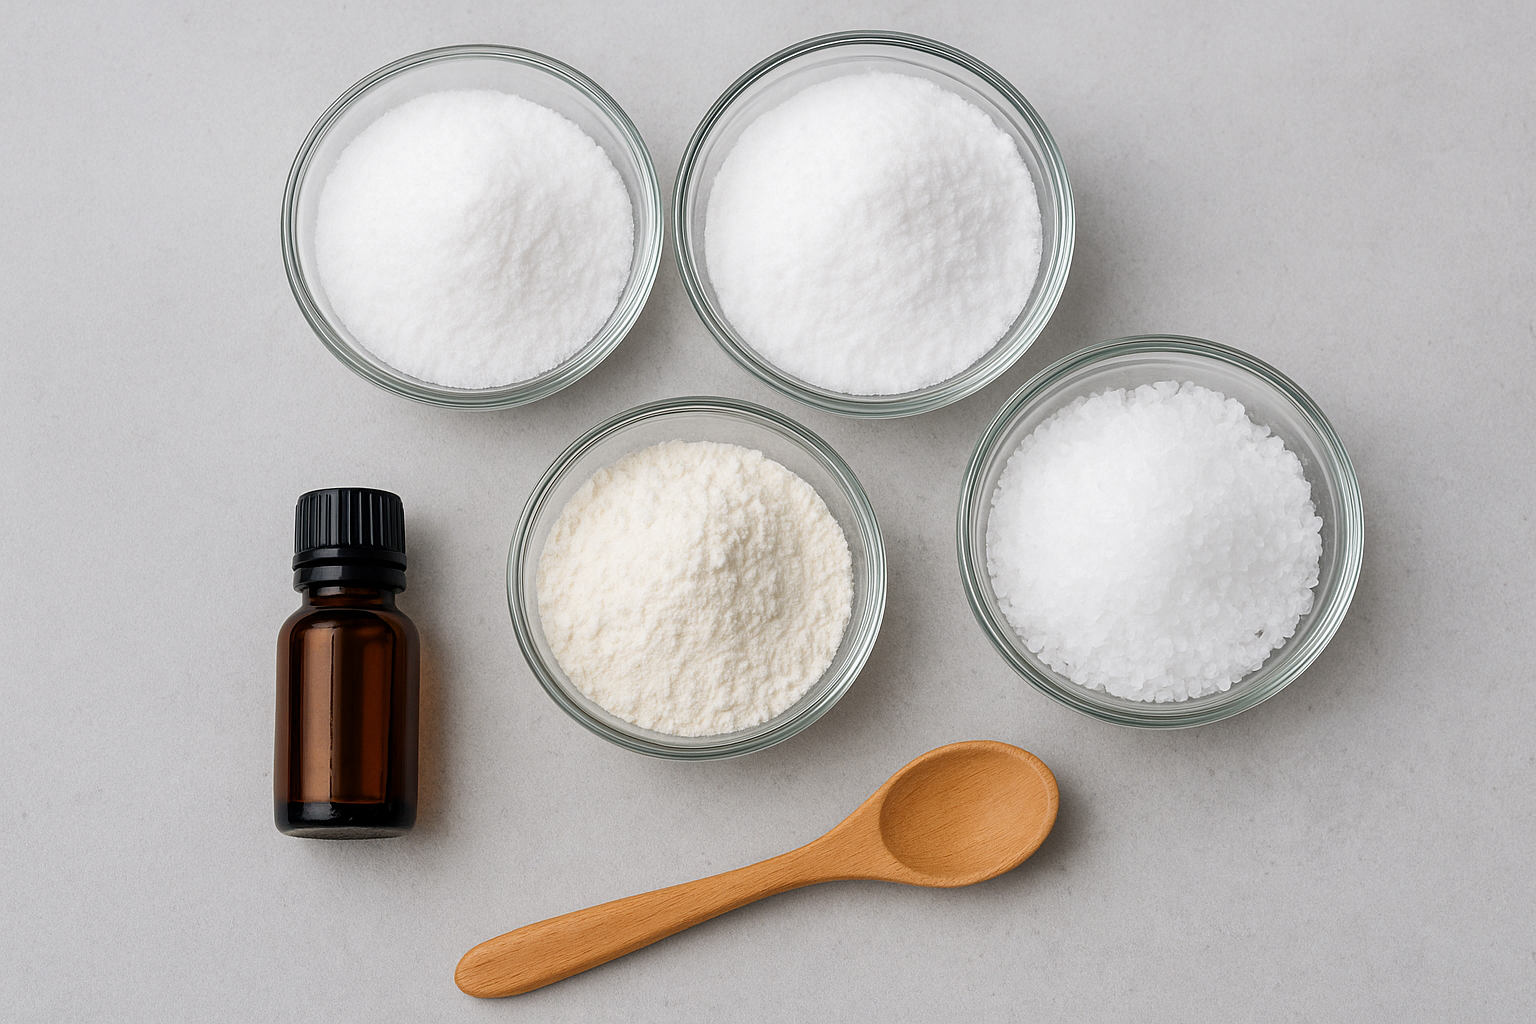
A bath bomb is really just an acid and a base waiting for water to set them off.
| Ingredient | Role | Typical ratio (by weight) |
|---|---|---|
| Bicarbonate of soda | Base, bulk of the mix | 2 parts |
| Citric acid | Acid, drives the fizz | 1 part |
| Cornflour or arrowroot | Binder, slows the reaction | 1 part |
| Epsom salts | Skin-softening, adds bulk | 1 part |
Cornflour isn't essential, but it slows the fizzing reaction down so your bath bomb lasts longer in the tub instead of dissolving in ten seconds flat.
Wet ingredients you'll need
Alongside the dry mix, you'll need a light oil, such as coconut oil or sweet almond oil, to bind everything together and leave even sensitive skin feeling soft rather than dry. A witch hazel or water spray bottle is essential too, since you need just enough moisture to make the mixture hold together without triggering the fizzing reaction too early.
Extras for scent and colour
Fragrance and colour are where you make the recipe your own. A few drops of essential oils, such as eucalyptus, lavender, or citrus blends, add scent without the synthetic edge of fragrance oils, and it's worth knowing how essential oils and fragrance oils differ before you choose. Soap-safe mica powder or a pinch of natural clay gives colour without staining the tub.
Equipment checklist
- Digital kitchen scales (accuracy beats guesswork here)
- Large mixing bowl
- Whisk or gloved hands for combining
- Spray bottle for witch hazel or water
- Spherical bath bomb moulds
- Airtight container for curing and storage
Gather all of this before you start, and the four steps below will go a lot more smoothly.
Step 1. Mix your dry ingredients
Start by weighing your bicarbonate of soda on the digital scales rather than eyeballing it. Even a small imbalance in the acid-to-base ratio changes how your bath bomb performs in water, so accuracy here saves you frustration later. For a standard batch, use 200g of bicarbonate of soda, 100g of citric acid, 100g of cornflour, and 100g of Epsom salts.
Sifting matters more than most people expect. Bicarbonate of soda clumps easily, and any lumps left in the mix will show up as pockets of uneven fizz once your bath bomb hits the tub. Push everything through a fine sieve into your mixing bowl before you go any further.
Get the dry mix right and the wet stage almost looks after itself.
Once sifted, whisk the dry ingredients together thoroughly. This is the point where you're building the base for the whole recipe, so don't rush it. A patchy mix means patchy fizzing, and you'll notice the difference the moment the bath bomb hits water.
Dry mix (standard batch):
200g bicarbonate of soda
100g citric acid
100g cornflour or arrowroot
100g Epsom salts
Gathering the right ingredients for bath bombs is only half the job. How you combine them determines whether you end up with a smooth, even fizz or a mixture riddled with dry pockets. Take your time here, because rushing the dry mix is the single most common reason home-made bath bombs fizzle unevenly. Once everything is sifted, weighed, and whisked into a uniform pale mixture with no visible clumps, you're ready to move on to the wet ingredients that bring it all together.
Step 2. Blend and add your wet ingredients
Now that your dry mix is smooth and lump-free, it's time to bring in the oils and moisture that turn powder into a mouldable dough. Melted coconut oil or sweet almond oil goes in first, drizzled slowly while you stir with gloved hands or a whisk. Work the oil through evenly rather than dumping it all at once, otherwise you'll end up with greasy patches instead of a consistent texture.
Too much liquid too fast, and your dry mix starts fizzing before it ever sees a bath.
Adding oil and fragrance
Pour in roughly 2 tablespoons of oil per standard batch, along with 15 to 20 drops of your chosen essential oils or one of the best-performing scents for bath bombs. Fold gently rather than beating the mixture, since aggressive mixing traps air and weakens the finished bomb. This is also the stage to add mica powder or clay for colour, a teaspoon at a time until you reach the shade you want.
Spritzing in the moisture
Reach for your spray bottle of witch hazel or water and mist the mixture lightly, one or two spritzes at a time. Squeeze a small handful after each spray; when it holds together like damp sand and doesn't crumble apart, you've added enough moisture. Overdo it and the citric acid reacts early, fizzing away in the bowl instead of the tub.
Test the texture before moving on to the moulds:
- Squeeze a handful; it should hold its shape without crumbling.
- Release it; the surface should stay intact, not sticky or wet.
- If it fizzes faintly, you've added too much liquid; mix in a little extra dry powder to rebalance.
Get this stage right, and shaping the bombs in the next step becomes far easier.
Step 3. Mould and shape your bath bombs
Once your mixture holds together like damp sand, work fast: this stage rewards speed and firm pressure, not gentle handling. Overfill both halves of your spherical bath bomb mould slightly, mounding the mixture higher than the rim rather than levelling it off. That extra bit of pressure is what fuses the two halves into a solid ball instead of two crumbly cups.
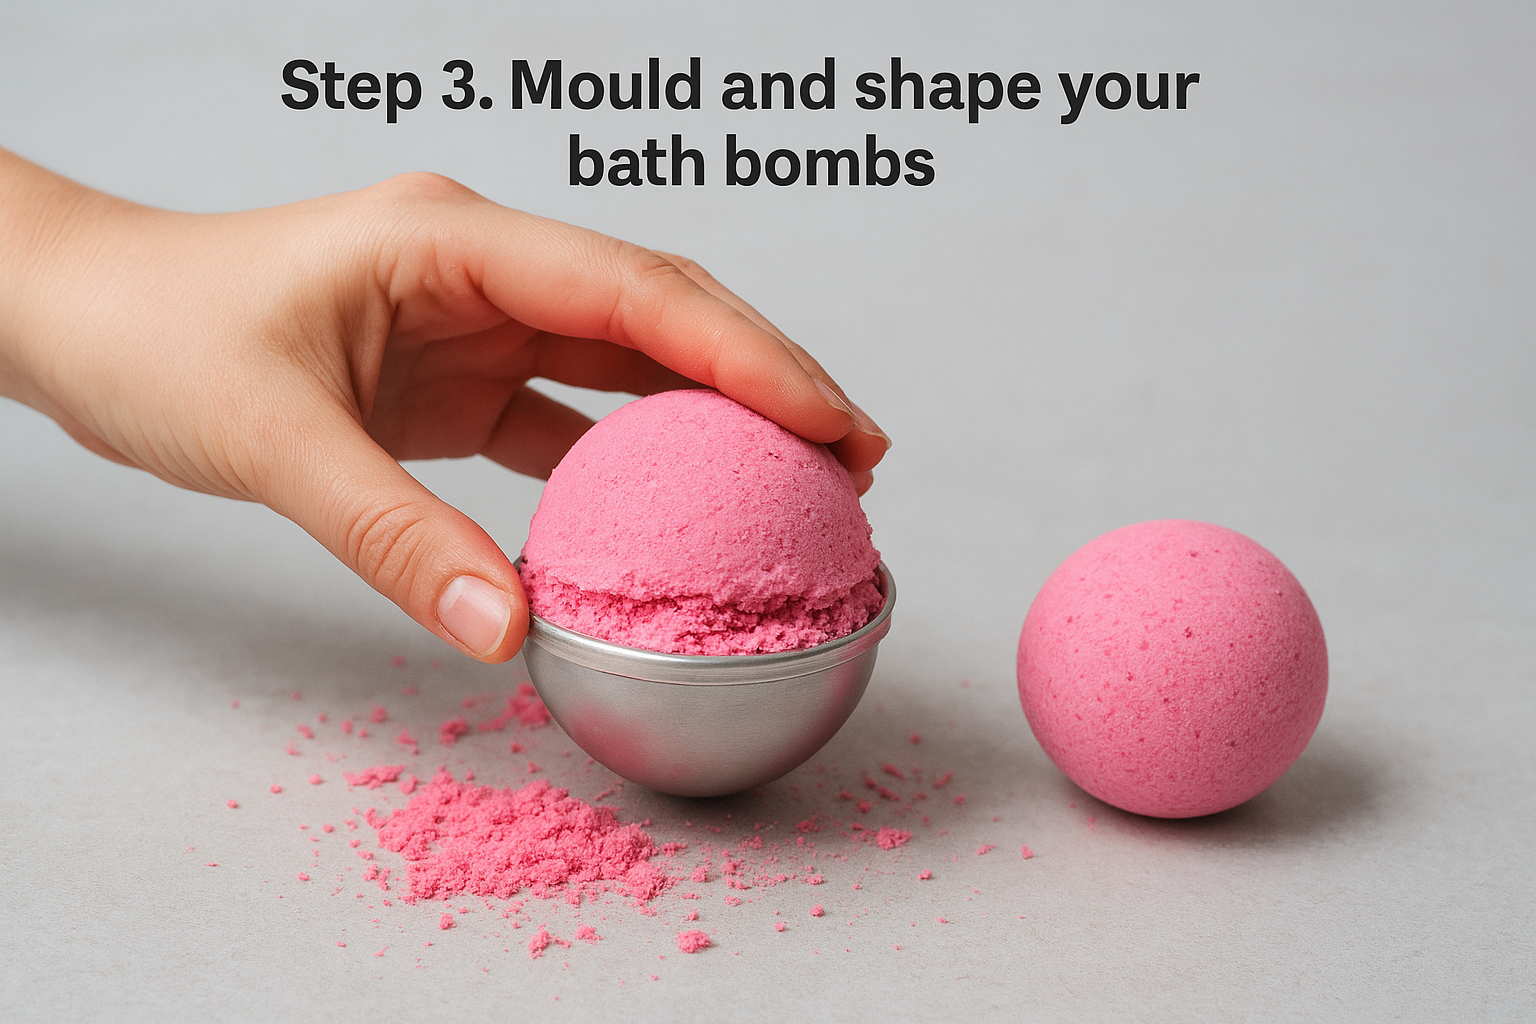
A bath bomb that isn't packed tight enough will crack the moment you unmould it.
Packing the mould
Press each half firmly with your thumbs, then squeeze the two sides together with a slight twisting motion. Hold that pressure for a good ten seconds; this is where a rushed job shows up later as cracks or crumbling edges. If any mixture squeezes out around the seam, that's actually a good sign; it means you've packed enough in.
Releasing your bath bomb
Leave the mould closed for two to three minutes before you attempt to release it. Tap the mould gently on the bench first, then lift one half slowly, checking the bomb hasn't stuck to the plastic. If it comes apart, don't panic, just re-pack it and try again with slightly firmer pressure next time.
A few things worth checking before you set the mould aside:
- Both halves feel evenly weighted, with no obvious hollow spots
- The seam line is smooth, not gaping
- The surface holds its shape when you run a finger over it lightly
Get the packing right here and you'll set yourself up for a clean, even fizz once these hit water, exactly the kind of result you'll find in our own pack of three handmade bath bombs.
Step 4. Dry, cure and store your bath bombs
After unmoulding, resist the urge to touch your bath bombs too much. Set them somewhere cool and dry, away from direct sunlight or humidity, and leave them undisturbed for at least 24 hours. Moisture in the air is the enemy here; a muggy bathroom or a steamy kitchen bench will soften the surface and undo all the packing work from the last step.
A bath bomb needs patience as much as pressure, rushing the dry stage cracks what firm packing built.
Curing time and conditions
Given that most home recipes for bath bombs ingredients rely on a simple acid-base reaction, curing is really just letting excess moisture evaporate so the two halves harden into one solid sphere. Leave them on a tray lined with baking paper, spaced apart so air reaches all sides. Turning them gently after 12 hours helps them dry evenly, especially the base where they've been sitting.
Storing your finished bath bombs
Once fully cured and rock hard to the touch, wrap each bath bomb individually in cling film or pop it into a small cellophane bag. This step matters more than people expect, since exposed bath bombs pull moisture from the air and start fizzing away their potency in storage.
A few storage habits worth building in:
- Store in an airtight container away from bathroom steam
- Keep individually wrapped if gifting or stacking multiple bombs
- Avoid direct sunlight, which fades colour and weakens fragrance oils
- Use within three months for the strongest scent and fizz
Properly cured and stored, a bath bomb will keep its fizz and fragrance for months, ready whenever you want to use one in the bath for the best soak.
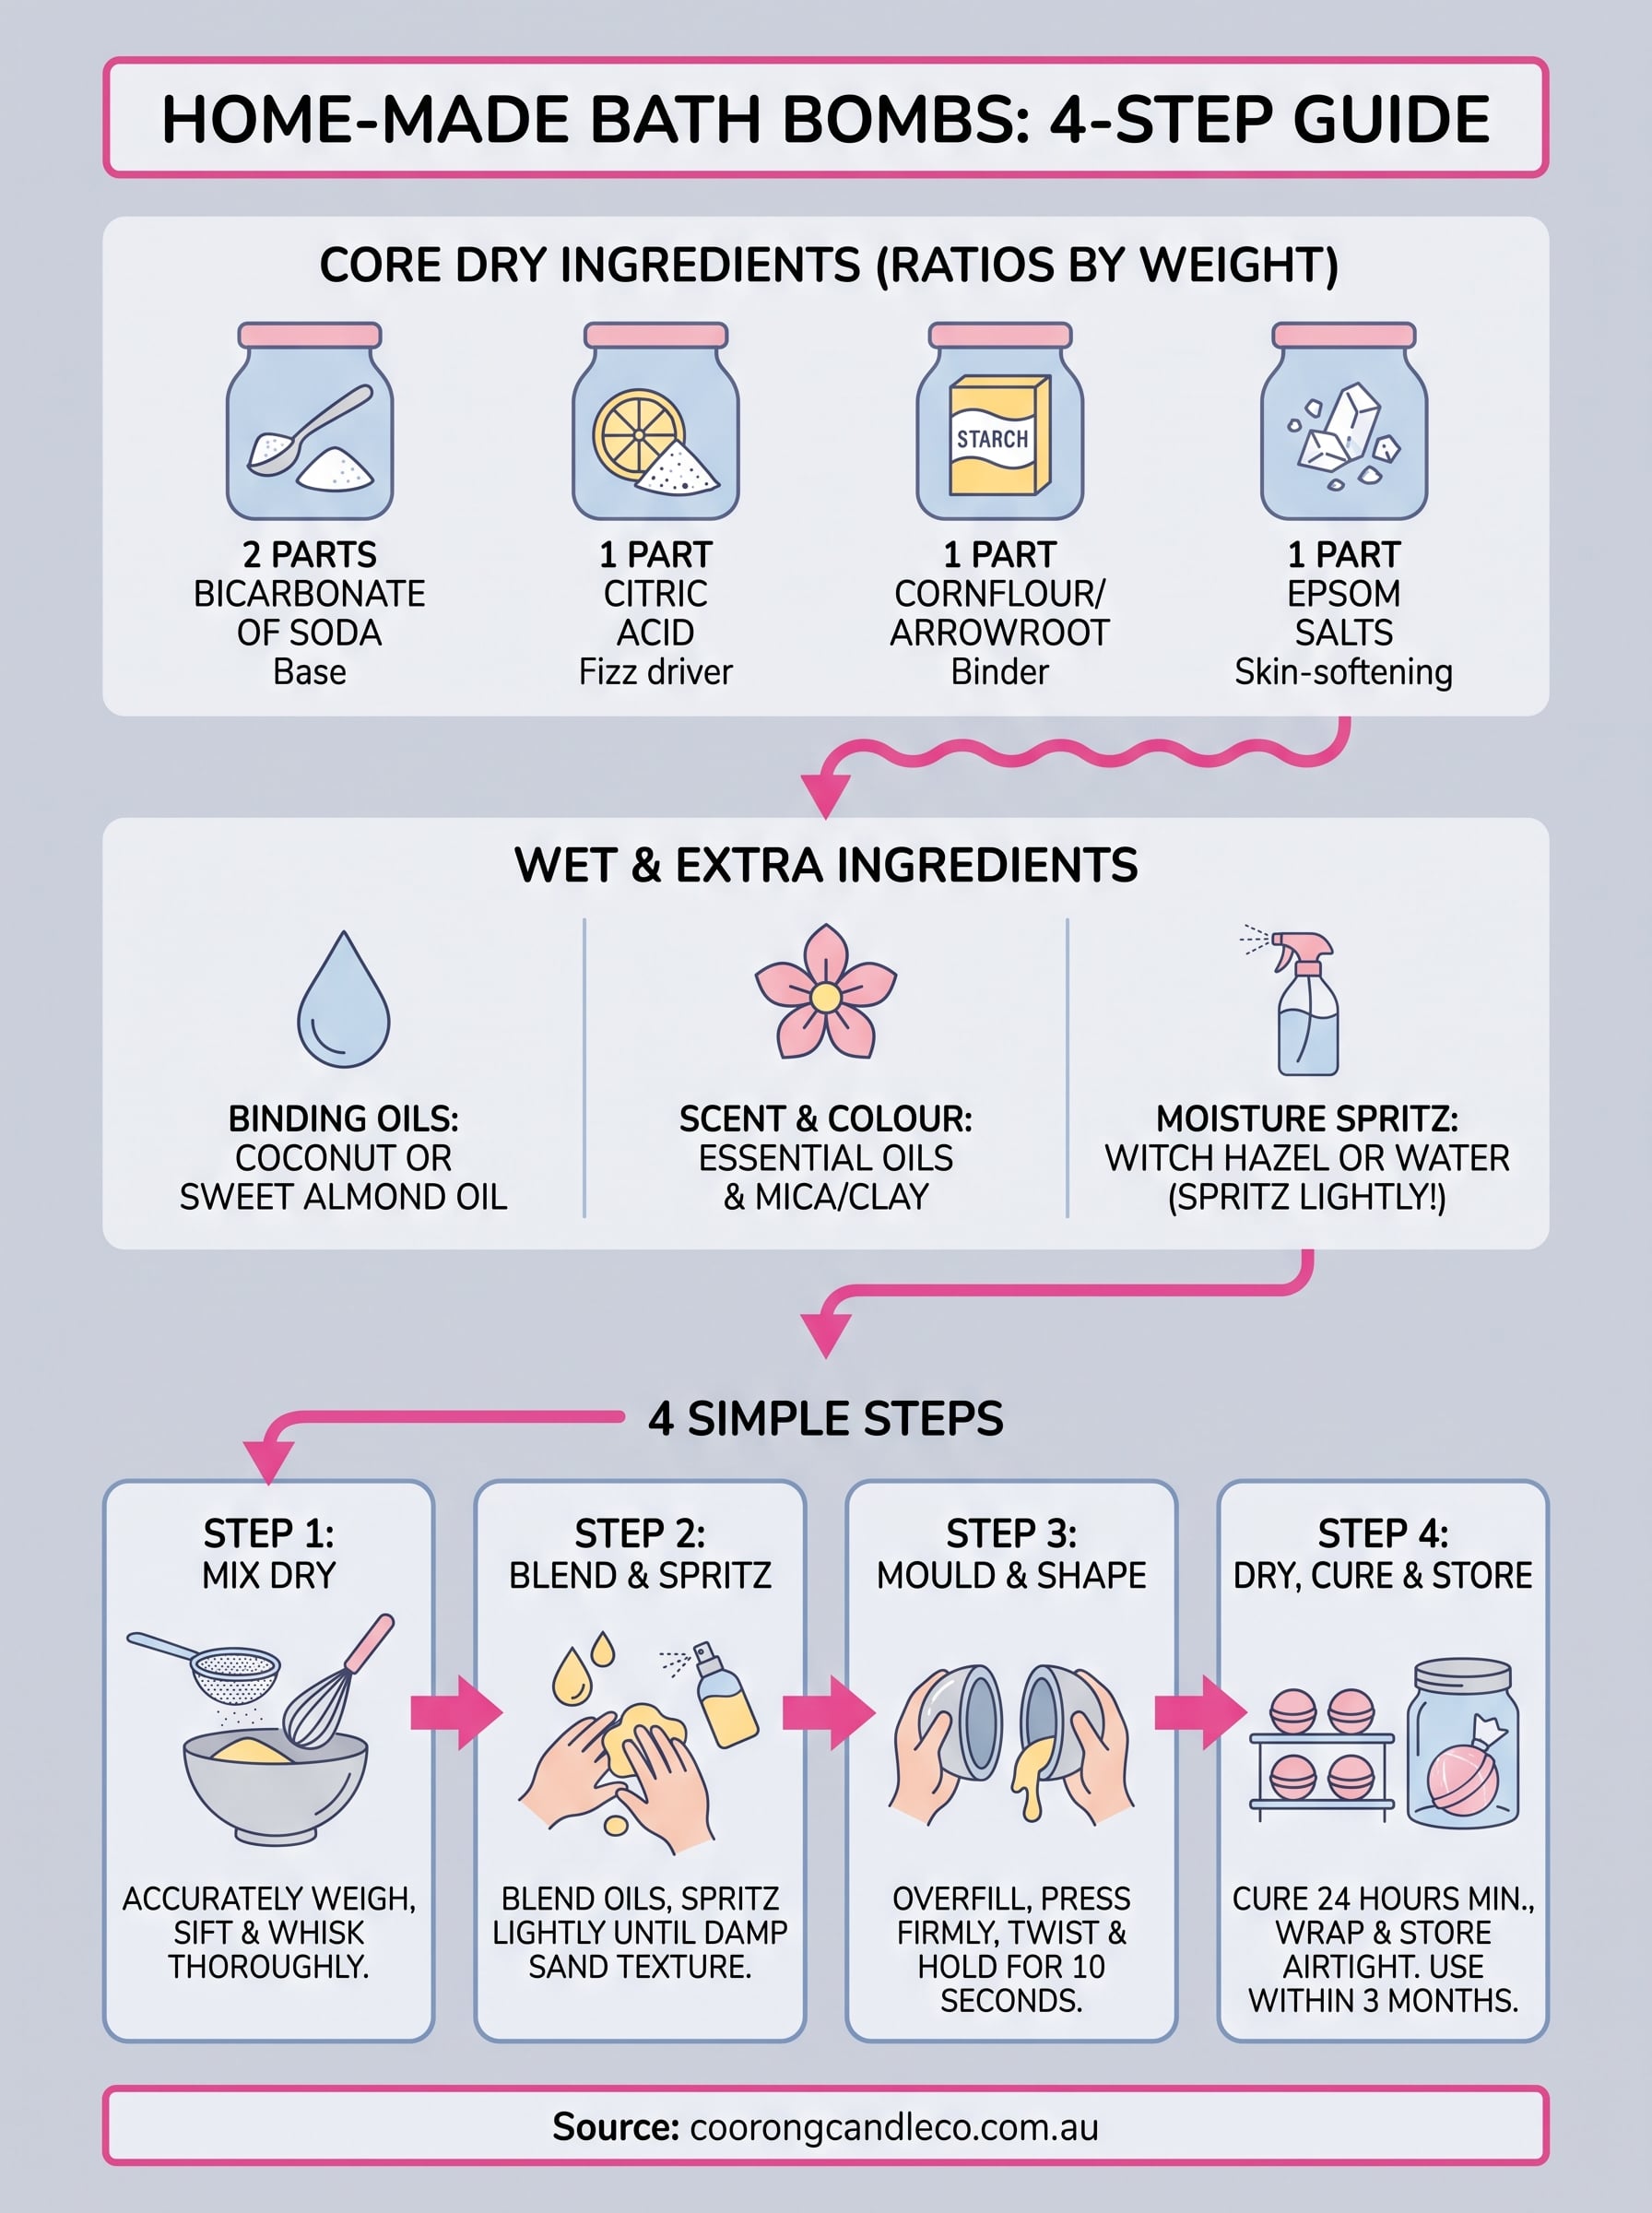
Time to run a bath
Making your own bath bombs really does come down to those two core reactions: an acid, a base, and enough moisture to bind them without setting them off early. Once you've measured your dry ingredients, worked in oil and fragrance without overdoing the spritz, and packed the mould with real conviction, the hard part is over. Curing and storage are just patience dressed up as a step, and they matter just as much as the mixing itself.
If your first batch cracked or fizzled flat, don't scrap the whole idea. Adjust your ratios, sift a little more carefully, and try again with a firmer pack next time. Or, if you'd rather skip the kitchen mess altogether, we've already done the trial and error for you. Run a bath, drop one in, and feel the difference our small-batch, naturally scented handmade bath bombs make to an ordinary evening soak.