
You lit your candle, walked away for an hour, and came back to find a narrow well burning straight down the middle while wax sits untouched around the edges. That's tunnelling, and it's the most common complaint we hear about soy candles. If you're searching for how to fix candle tunnelling, the good news is you can usually rescue it tonight, without tossing out a candle you paid good money for.
The fix depends on how far the tunnel has gone. A shallow one can often be corrected with a single long burn and some careful trimming, while a deep tunnel needs a bit more intervention, like wrapping foil around the top to redirect heat back to the edges. Either way, the goal is the same: get that melt pool burning level, edge to edge, so none of your candle goes to waste.
In this guide, we'll walk you through exactly how to rescue a tunnelled candle step by step, then show you how to stop it happening again with your soy candles. We'll cover proper burn times, wick care, and a few small habits that make a real difference to how evenly your candle performs from the first light to the last.
Understanding candle tunnelling before you start
Before you reach for the hairdryer, it helps to know why tunnelling happens in the first place. A candle has what candle makers call wax memory: whatever diameter the melt pool reaches on that crucial first burn becomes the shape the candle wants to repeat every time after. Light it for twenty minutes, blow it out, and the wax "remembers" that narrow circle. From then on, the flame keeps eating straight down that same track, leaving hard wax around the rim untouched.
A candle's first burn sets its melt pool for life, get it wrong once and it tunnels every time after.
What causes candle tunnelling
Once you understand wax memory, the usual culprits make sense. Most tunnelling comes down to one of these:
- Short burn times, blowing out the candle before the wax melts fully to the edges
- Draughty rooms, where airflow pushes the flame and heat off-centre
- Wrong wick size for the vessel, common in cheaper mass-produced candles
- Skipping wick trims, which lets soot build up and weakens the flame's heat spread
Any one of these on its own can start a tunnel. Stack a few together, and it gets worse fast.
Why soy wax tunnels more than paraffin
Soy wax behaves differently to paraffin, and that matters here. Because soy wax has a lower melting point and a softer structure, it's more forgiving to fix once tunnelling starts, but it's also quicker to set a bad habit if you rush the early burns. That's actually good news for you: the same softness that makes soy candles prone to tunnelling also makes them respond well to the corrections coming up in the next steps.
Step 1. Trim the wick and clear away debris
Grab your wick trimmer or a sharp pair of scissors before you do anything else. A long, mushroomed wick burns hotter on one side and drags the flame off-centre, which only feeds the tunnel further. Trimming first means every step after this actually has a chance to work.
Get the wick to the right height
Snip the wick down to roughly 6mm, measuring from the surface of the wax rather than the rim of the jar. Too short and the flame struggles to stay lit; too long and you're back to the same lopsided burn. Check the trim against this quick list before lighting:
- Wick sits at 5 to 7mm above the wax
- Cut is straight, not angled
- No frayed or curled ends left behind
Clear soot and old debris from the wax pool
Use a cotton bud or the edge of a spoon to lift out any blackened wick trimmings, ash, or hardened soot sitting in the tunnel. Leftover debris chokes the flame and clouds the glass.
Clean wax and a short wick give the flame room to spread heat evenly, without either, no fix will hold.
Wipe the jar's inner walls gently if soot has built up there too.
Step 2. Even out the wax with a hairdryer or heat gun
Once the wick's trimmed, point a hairdryer or heat gun at the hardened wax rim on its lowest heat setting. Hold it roughly 10cm from the surface and sweep slowly around the untouched edges, not the tunnel itself. The warm air softens that stubborn ring so it starts melting alongside the centre next time you light the candle, rather than sitting there like a wall.
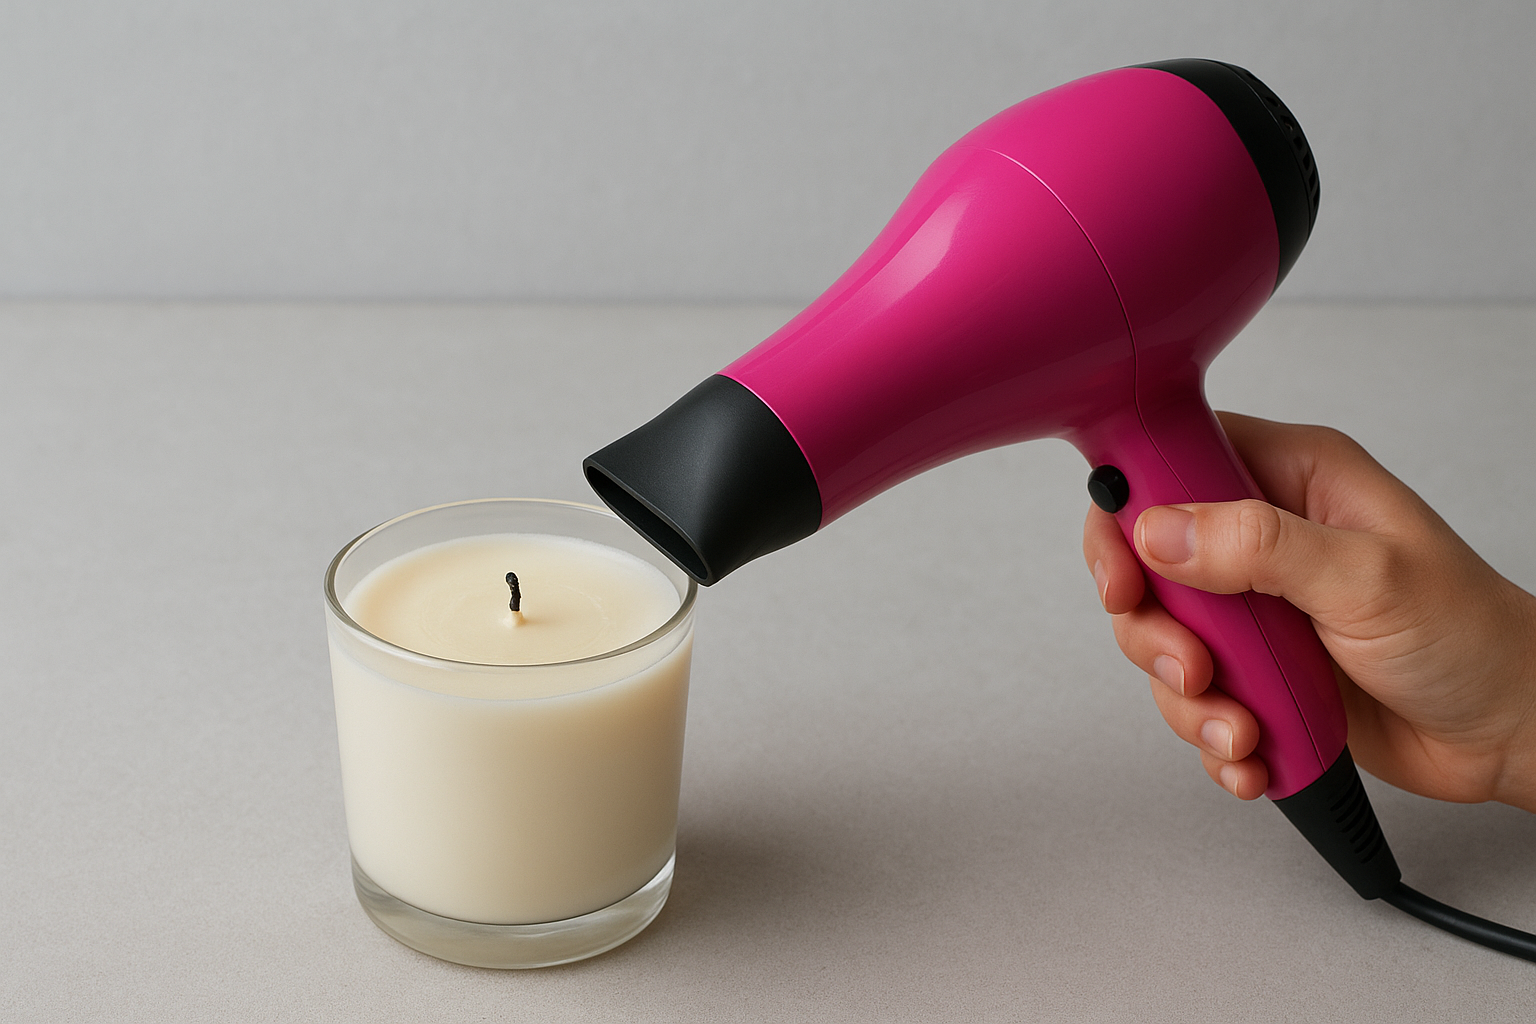
Melt the edges, not the middle, and the wax pool corrects itself within one burn.
Setting the right heat and distance
Getting this step right matters more than it sounds. Follow this quick checklist before you switch the heat off:
- Keep the dryer moving, never hovering in one spot
- Stay on low or medium heat, never the hottest setting
- Watch for a thin, glossy sheen forming on the hard wax
- Stop once the whole surface looks level, not glassy-wet
Watching the melt pool level out
Within a few minutes you should see the once-hard rim turning soft and slightly translucent, blending into the tunnel's edge. Relight the wick straight after this treatment and let it burn properly, following the timing advice further down, so the softened wax actually melts through rather than re-hardening into the same shape.
Step 3. Try the foil method for deeper tunnels
When a hairdryer alone doesn't shift a stubborn ring of hard wax, wrap aluminium foil around the top of the jar to trap and redirect heat back toward the edges. This trick works because it turns the whole candle into a mini oven, forcing warmth that would normally escape upward to bounce sideways into the untouched wax instead. It's the go-to fix for tunnels deeper than a centimetre or so, where gentle heat guns just can't reach far enough down.
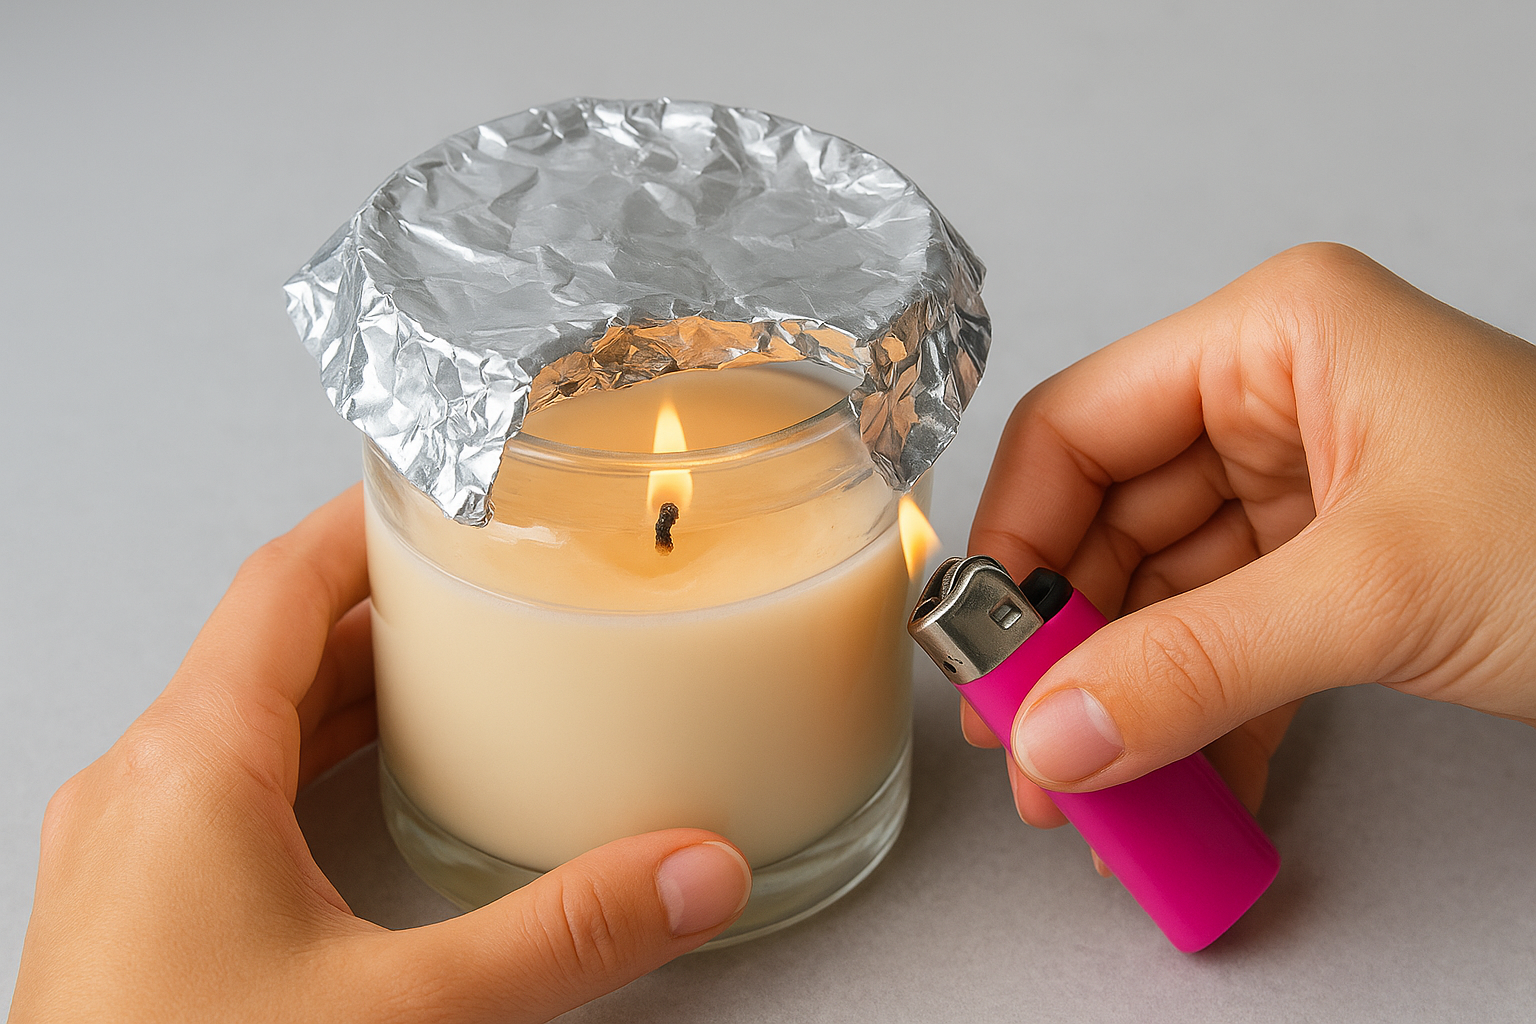
Wrapping foil around the jar
Tear a sheet of foil long enough to circle the jar with some overlap, then follow these steps:
- Trim the wick first, as in Step 1
- Wrap the foil around the rim, leaving a small opening above the flame
- Tuck the edges snugly so heat can't escape sideways
- Light the wick and let it burn undisturbed
Trapped heat does the work a hairdryer can't reach, melting a deep tunnel from the inside out.
How long to leave the foil on
Leave the foil in place for two to three hours, checking every thirty minutes to make sure the melt pool is spreading evenly rather than scorching the wick. Remove the foil once wax reaches the glass on all sides, then let the candle burn a little longer unwrapped so the surface settles flat before you extinguish it.
Step 4. Burn correctly to stop tunnelling returning
Getting a tunnelled candle level again is only half the job. Unless you change how you burn it going forward, the same narrow well will creep back within a few nights. The habit that matters most is giving every burn enough time to reach a full melt pool, edge to edge, before you blow it out.
The one-hour-per-inch rule
Work out how long to leave a candle burning by measuring the jar's diameter, then follow this guide:
- 7cm jar: burn for at least 2 hours
- 9cm jar: burn for at least 3 hours
- Never extinguish before wax reaches the glass on all sides
A candle needs one hour of burn time per inch of diameter, cut that short and tunnelling starts again.
Trimming between every burn
Before relighting, always trim the wick back to 6mm. A long wick from the previous burn drags heat off-centre and undoes the levelling you just achieved. Pair this with steering the candle away from draughty windows or ceiling fans, since airflow pushes the flame sideways and starts a fresh tunnel even on a perfectly even wax pool.
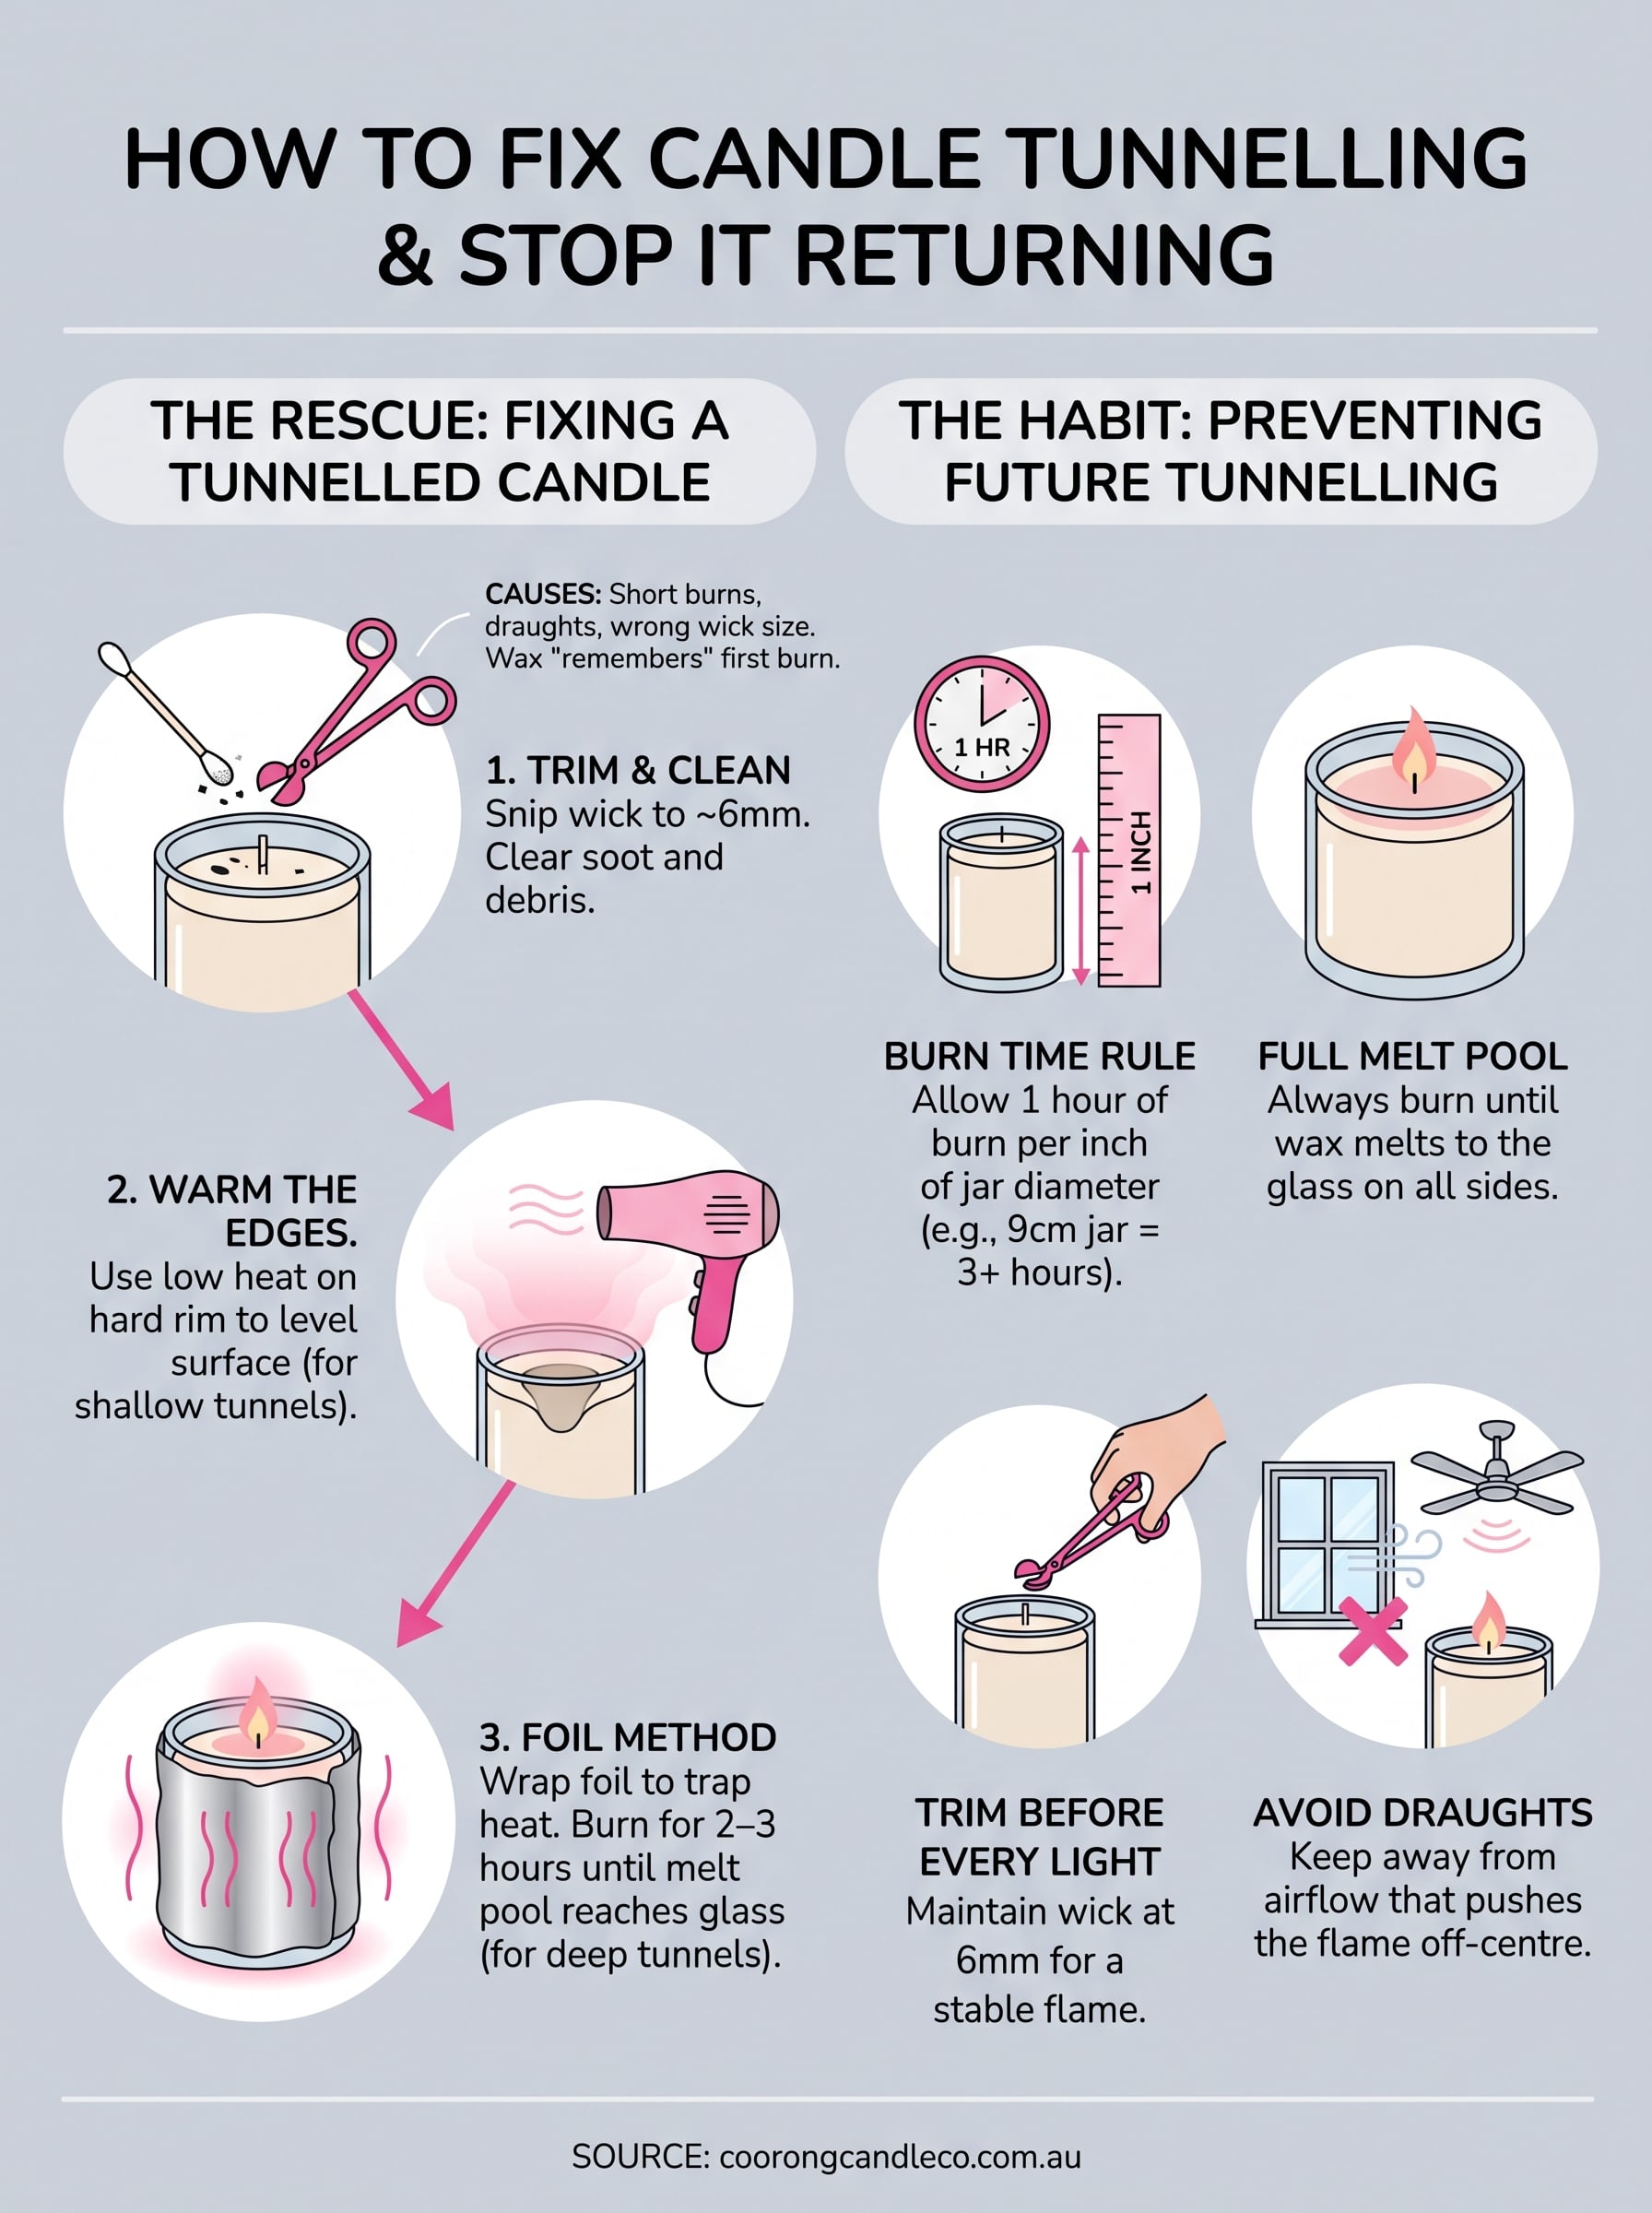
Enjoying an evenly burning candle again
A tunnelled candle isn't ruined, it just needs a bit of patience and the right technique. Trim the wick, warm the edges, wrap foil around stubborn tunnels, then commit to proper burn times going forward. Do those four things and you'll get a full melt pool every time, right to the glass.
Good habits from here matter more than the rescue itself. Give each burn the time it needs, keep the wick short, and keep your candle away from draughts. Follow that routine and tunnelling won't come back.
If your current candle is too far gone to save, or you're ready to build better habits from the first light, browse our range of natural soy wax candles and start fresh with a wick and wax blend designed to burn evenly from day one.