You've invested in a quality soy candle, now make sure you're getting the most out of it. Whether it's one of our Coorong-inspired hand-poured candles or another soy wax favourite, following proper soy candle care instructions makes a real difference to how long your candle lasts, how cleanly it burns, and how well it fills your space with fragrance. Skipping a few simple steps is often the reason candles tunnel, smoke, or burn unevenly.
At Coorong Candle Co., we hand-pour every candle in small batches using natural soy wax and lead-free cotton wicks. We design our candles to perform well, but even the best-made candle needs a bit of care from you to reach its full potential. That's something we tell every customer, because it genuinely extends your burn time by hours.
This guide covers everything you need to know: first burn technique, wick trimming, burn times, storage, and safety. Each tip is straightforward and takes seconds to do, but together they'll give you clean, even burns from the first light to the last. Let's get into it.
What to know before you light a soy candle
Before you strike a match, it helps to understand how soy wax behaves compared to paraffin. Soy wax has a lower melting point and a softer texture, which means it pools more readily and responds more noticeably to how you burn it. The decisions you make in the first few burns set the pattern for every burn after that, so getting familiar with a few basics upfront saves you from common problems later.
Check your candle's condition
When you receive or buy a new candle, take a moment to inspect it before the first light. Look at the wick position to make sure it sits centred in the wax, because a wick that's off to one side will cause uneven melting from the start. Check the wax surface for any cracks or deep sinkholes from transit, which are normal but worth noting before you begin. If the wick has a small paper tab or wrapper, remove it fully.
Know your burn window
Every candle has an ideal burn time per session, and soy candles are no different. Burning for too short a time leaves a ring of unmelted wax around the edges, a problem called tunnelling. Burning for too long risks overheating the vessel and producing excess soot. A practical rule for most soy candles is one hour of burn time for every 2.5 cm of container diameter. A standard 350g jar, for example, needs at least two to three hours per session to achieve a full melt pool across the surface.
Never burn a soy candle for more than four hours at a time, as the wick can become unstable and the glass vessel too hot to handle safely.
These basics apply across all proper soy candle care instructions, regardless of the brand or scent you're burning.
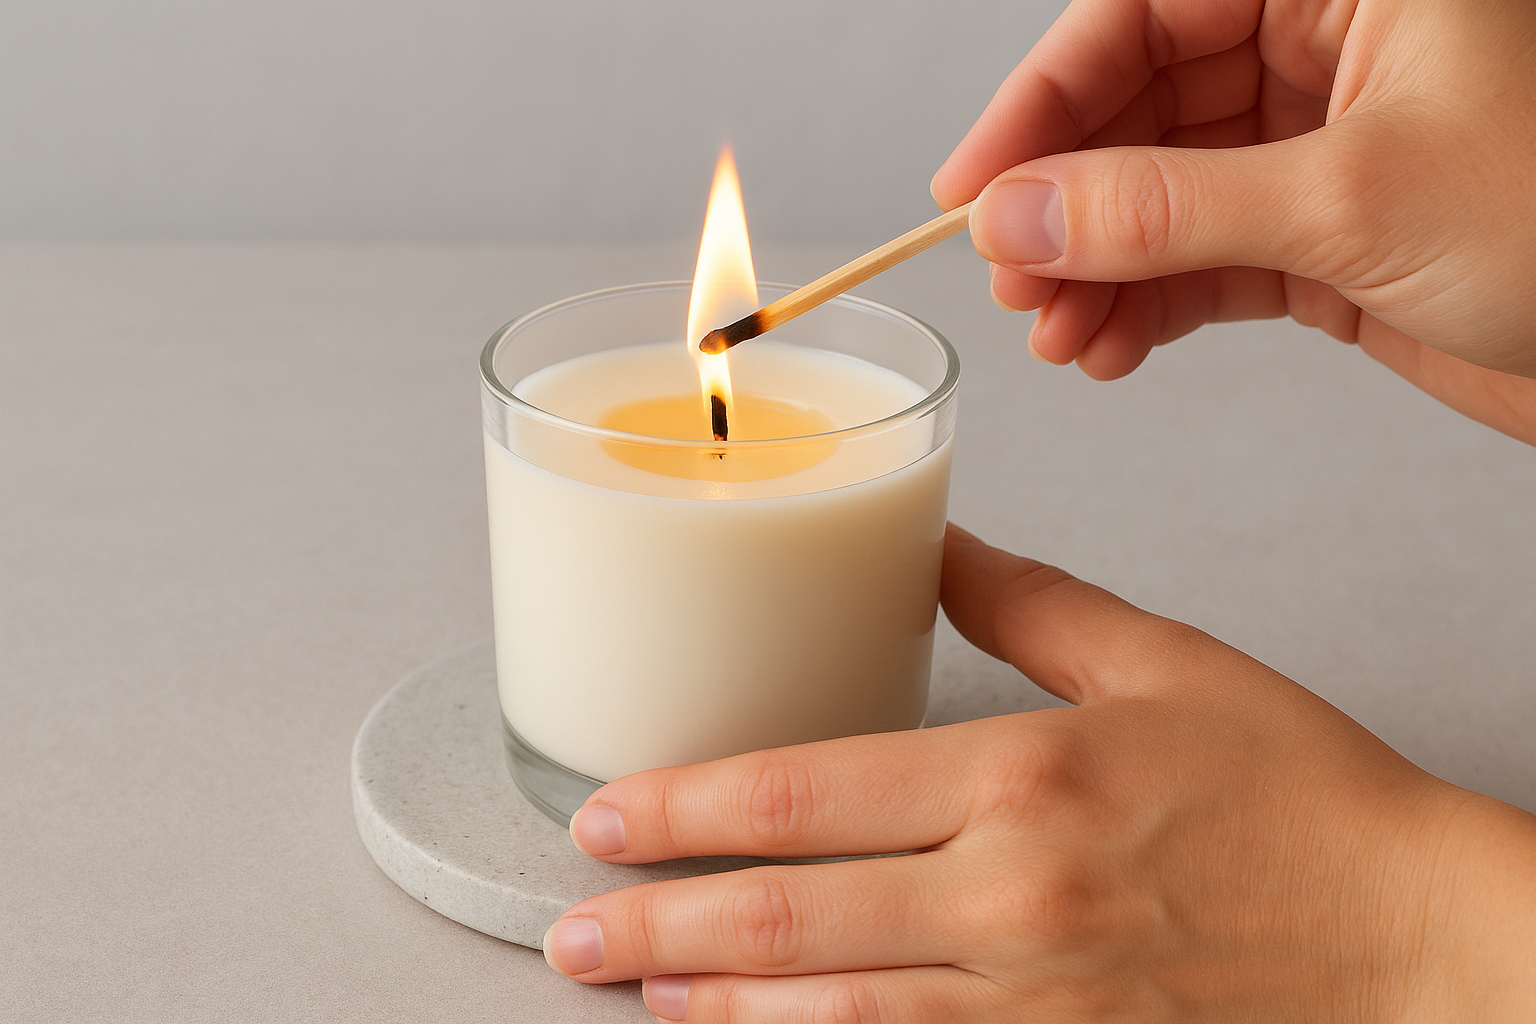
Step 1. Get the first burn right
The first burn is the most important session your candle will ever have. Soy wax has a memory, meaning the melt pool from your first burn sets a pattern that every future burn follows. Skip this step carelessly and tunnelling becomes almost impossible to reverse.
Give your candle enough time on the first burn, and it will produce even, consistent melts for its entire life.
Set the scene before you light it
Before striking a match, run through a few quick checks to give your candle the best possible start:
- Trim the wick to 5mm using scissors or a dedicated wick trimmer
- Position the candle on a flat, heat-resistant surface away from draughts, fans, and air conditioning vents
- Remove any packaging or debris from the wax surface
Moving air will tilt the flame and cause the wax to melt unevenly from the very first light.
Let the melt pool reach the edges
Allow the wax to melt all the way to the container's edge before you extinguish the flame. For a standard 350g jar, that takes roughly two to three hours. Stopping short creates a wax ridge that traps every future burn, and fixing it later is exactly what proper soy candle care instructions are designed to help you avoid.
Step 2. Trim and centre the wick
A 5mm wick is the sweet spot for soy candles. Before every single burn, trim your wick down to this length using scissors or a wick trimmer. Skipping this step is the leading cause of black soot on the glass, mushrooming, and an oversized flame that burns through your wax far too quickly.
Trimming the wick before each burn is one of the simplest soy candle care instructions to follow, yet it's the step most people skip after the very first light.
What to do if the wick drifts off-centre
Sometimes the wick shifts position while the wax is still warm and liquid. An off-centre wick melts wax on one side of the jar faster than the other, creating an uneven surface and wasted wax. While the wax is still soft after extinguishing the flame, use a dedicated wick tool or a clean toothpick to gently nudge the base of the wick back to the middle.
Hold the wick in position for around 30 seconds and let the wax begin to reset around it. Do this promptly after each burn, because wax hardens quickly and repositioning a set wick without disturbing the surface becomes much harder once it cools completely.
Step 3. Burn safely and stop at the right time
Safe burning protects your home and preserves the quality of each session. Good soy candle care instructions always include knowing when to act and when to leave the flame alone. Keep your candle on a flat, heat-resistant surface, positioned well away from curtains, paper, open windows, and any flammable materials nearby.
Never leave a burning candle unattended, and always keep lit candles out of reach of children and pets.
Watch for warning signs during the burn
A small, steady flame is what you're aiming for throughout every session. If you notice any of the following warning signs, extinguish the candle carefully and address the issue before relighting:
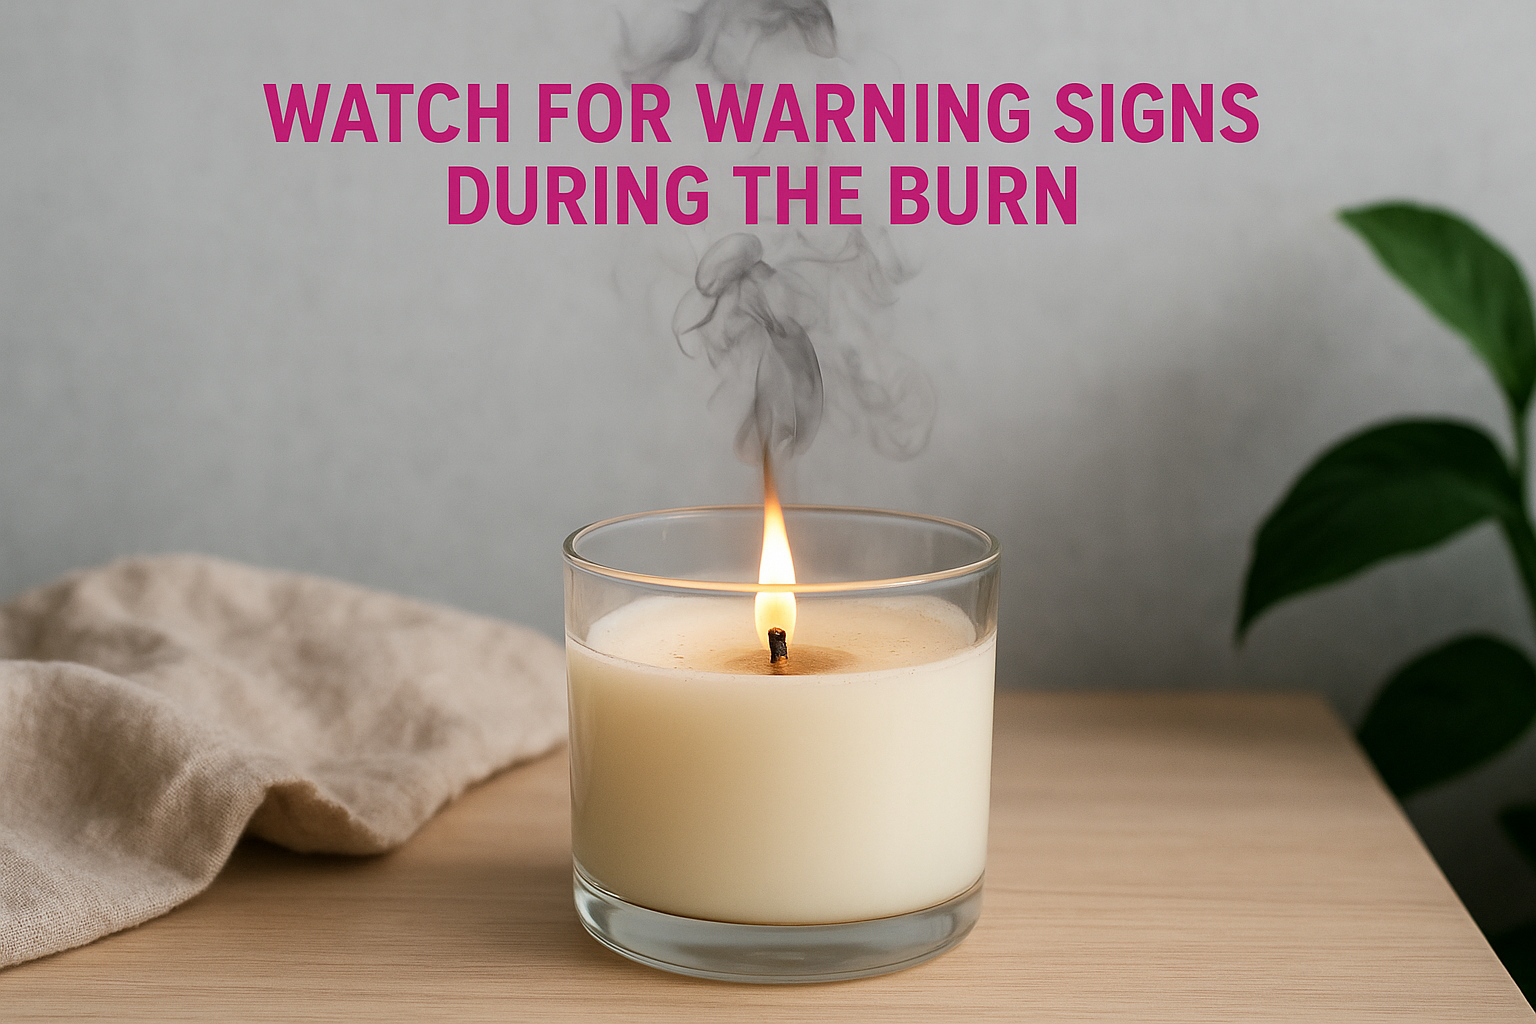
- Flame growing unusually tall or flickering aggressively
- Thick black smoke rising from the wick
- Visible soot building up on the inside of the glass
Each of these signals points to a specific fix, whether that's trimming the wick or moving the candle away from a draught.
Know when to stop burning
Stop each session when approximately 1cm of wax remains at the base of the vessel. Burning below this level can overheat the glass and cause it to crack. Once your candle reaches this point, let it cool completely and then repurpose the clean jar for storage, small plants, or whatever purpose suits you.
Step 4. Fix common soy candle problems
Even with the best care routine, problems occasionally appear. Knowing how to identify and fix them quickly is part of any solid set of soy candle care instructions, and most issues have a straightforward solution.
The sooner you address a problem, the less wax you lose to it.
Tunnelling
Tunnelling happens when a ring of hard wax forms around the edges of the jar, leaving the centre burning hollow. Fix it using the foil method:
- Wrap the outside of the jar in aluminium foil, leaving the top open
- Light the candle and burn for two to three hours
- The trapped heat encourages the wax rim to melt level with the centre
Soot and smoking
A sooty flame almost always comes back to wick length. Extinguish the candle, let it cool fully, then trim the wick to 5mm before relighting.
If black marks have already built up on the glass, wipe the inside with a damp cloth once the wax has cooled completely. Moving your candle away from draughts and open windows will stop the flame flickering and prevent soot from forming in the first place.

Enjoy longer-lasting burns
Soy candles reward a little attention with noticeably longer burn times and a better fragrance throw. Following these soy candle care instructions consistently, trimming the wick before every burn, allowing a full melt pool, and stopping at the 1cm mark, adds hours to your candle's life and keeps every session clean and even.
The steps in this guide are simple habits that take seconds each time, but together they make a genuine difference. Whether you burn your candle daily or save it for quiet evenings at home, consistent care means you spend less time troubleshooting and more time enjoying the scent filling your space.
When you're ready to put these tips into practice with a quality candle, browse our hand-poured natural soy candles. Each candle is small-batch crafted in South Australia using eco-friendly soy wax and lead-free cotton wicks, designed to perform beautifully from the first light to the last drop.