
Shop-bought diffusers add up fast, and most rely on synthetic fragrance oils rather than the real thing, so it helps to know the key differences between essential oils and fragrance oils before you start. If you have been searching for a way to fill your home with genuine botanical scent without the artificial edge, essential oil reed diffusers are worth the effort, and making your own is far simpler than most people expect.
This guide walks you through exactly how to build a reed diffuser with essential oils that actually throws scent, using a proper carrier base, the right reed material, and oil ratios that work in Australian conditions rather than a European climate. You will learn why straight essential oil in a jar rarely diffuses well on its own, and what to mix it with so it does.
We will cover the materials you need, the step-by-step method, how to pick reeds that pull fragrance efficiently, and troubleshooting tips for when your essential oils reed diffuser stops throwing scent after a week or two. If you would rather skip the DIY altogether, we will also point you towards our handmade South Australian diffusers, made the way this guide describes, minus the mess on your kitchen bench.
What you need to make a reed diffuser at home
Before you start blending, get your materials sorted so the whole process takes twenty minutes rather than an afternoon of hunting through cupboards. Essential oil reed diffusers rely on three things working together: a reed diffuser base that carries scent up the reeds, oil that actually smells like something, and reeds that draw both. Skip any one of these and you end up with a jar that looks nice but barely perfumes the room.
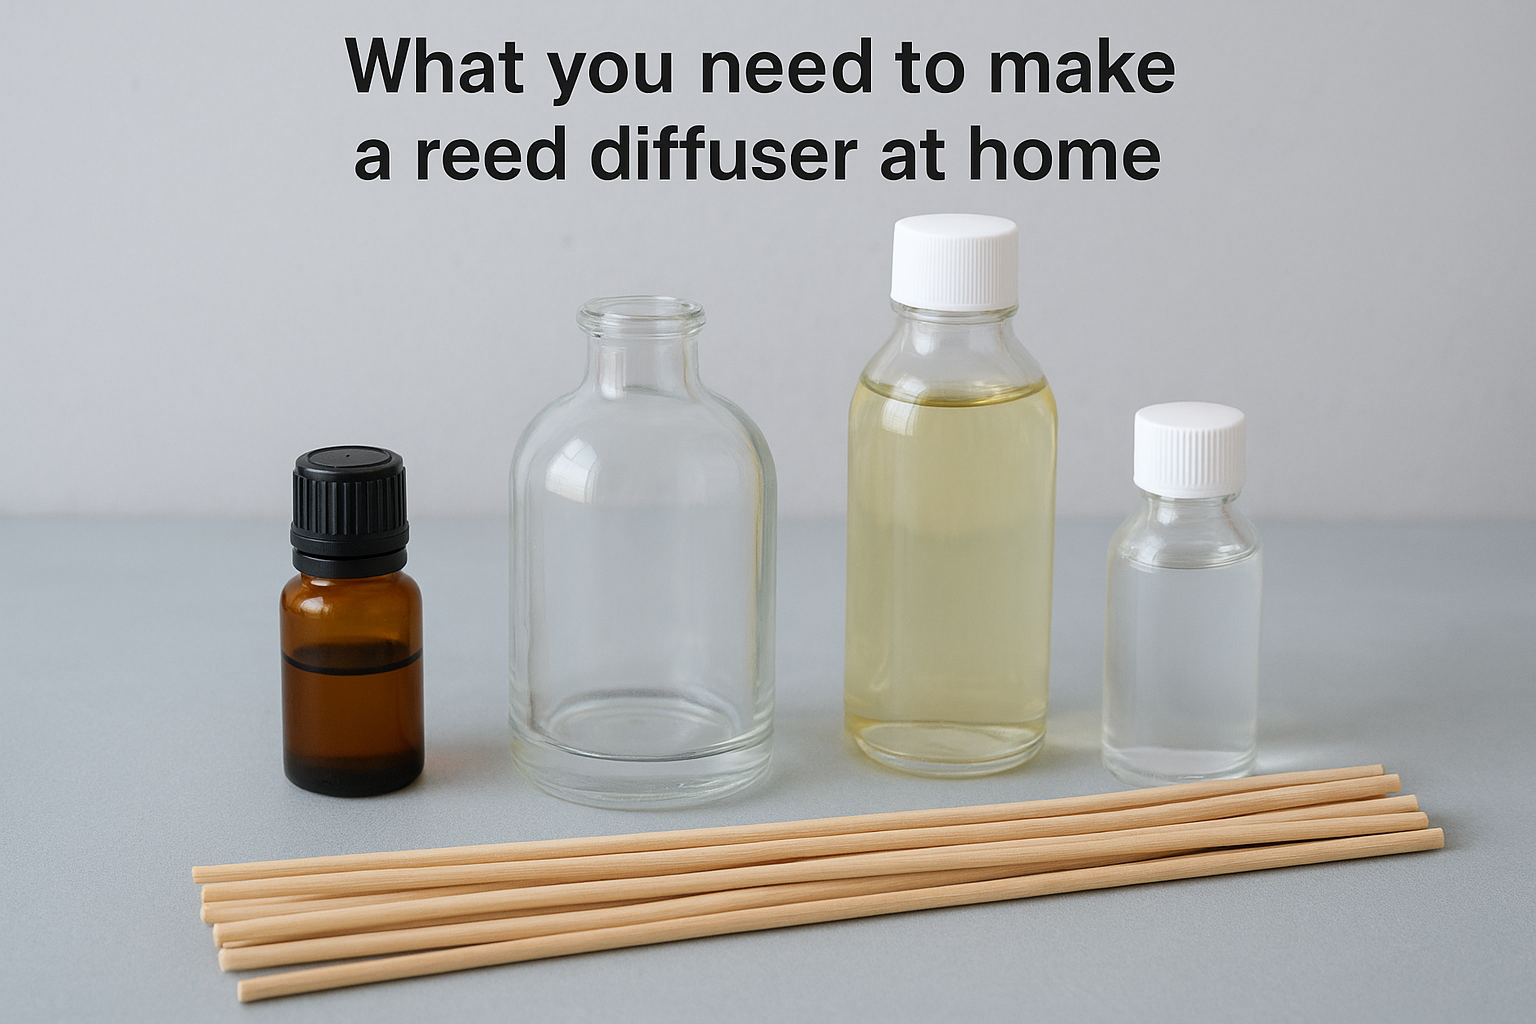
The core ingredients
You do not need specialist equipment, most of this is available from a chemist, supermarket, or oil supplier. The table below covers what to buy and roughly how much for a standard 200ml diffuser.
| Material | Quantity | Where to find it |
|---|---|---|
| Carrier oil (sweet almond, fractionated coconut, or safflower) | 150ml | Health food shop, chemist |
| Essential oil (or blend) | 20 to 30ml | Oil supplier, pharmacy |
| Isopropyl alcohol or vodka | 20ml | Supermarket, bottle shop |
| Glass or ceramic container with narrow neck | 1 | Homewares store |
| Rattan reeds, 3mm diameter | 8 to 10 | Craft store, online |
Why carrier oil matters more than the essential oil itself
Most first-time makers assume more essential oil means more fragrance, but essential oils alone are too thin and volatile to climb a reed steadily. A carrier oil slows evaporation and gives the reeds something viscous enough to travel up consistently, which is exactly what separates a diffuser that lasts six weeks from one that fades in three days.
A reed diffuser without carrier oil is just perfumed water with extra steps.
Choosing reeds and containers
Reed thickness changes how much scent gets pulled through, thinner reeds throw less, thicker ones throw more but drain the oil faster. Natural rattan works better than synthetic reeds because its internal channels are more porous, drawing liquid up through capillary action rather than sitting inert in the jar, which is worth knowing when choosing reed sticks for a diffuser. Container shape matters too, a narrow neck slows evaporation and stops the whole room smelling overpowering within the first hour. If sourcing and calibrating all this feels like more trouble than it is worth, our handmade reed diffusers use the same principles already dialled in.
Step 1. Gather your diffuser materials
Line everything up on the bench before you start pouring anything. Working with a reed diffuser essential oil blend goes much faster when you are not mid-mix and realising you are short on alcohol or reeds. Measure your carrier oil first, since it makes up the bulk of the liquid, then set your essential oils and alcohol beside it so you can add them in sequence without stopping to search cupboards.
Run through this checklist before you touch the essential oils:
- 150ml carrier oil (sweet almond, fractionated coconut, or safflower)
- 20 to 30ml essential oil, either a single note or a blend
- 20ml isopropyl alcohol or vodka to thin the mix and help it travel
- A clean glass or ceramic container with a narrow neck, at least 200ml capacity
- 8 to 10 natural rattan reeds, 3mm diameter
- A small funnel and a set of measuring spoons
Sourcing matters here too. Cheap essential oils cut with synthetic fragrance will smell fine in the bottle but flatten out fast once diffused, so buy from one of the top essential oil brands in Australia that lists botanical origin and extraction method rather than just a scent name. If you are working with essential oils in reed diffuser recipes for the first time, stick to single notes like eucalyptus, lavender, or lemon myrtle before attempting a blend, since it is easier to judge strength and balance one oil at a time, and our guide to the best essential oils for reed diffusers covers which ones hold up longest. Once your materials are measured and within reach, you are ready to combine them properly.
Step 2. Blend your carrier oil and essential oils
Pour your measured carrier oil into the container first, then add the essential oil slowly while swirling gently rather than shaking, which introduces air bubbles that slow absorption into the reeds. Working in this order means the heavier carrier oil settles as your base before the lighter, more volatile essential oil goes in, giving you a cleaner blend that does not separate later.
Getting the ratio right
Ratio decides whether your reed diffuser and essential oils combination is barely noticeable or overwhelming. As a rough guide for a 200ml batch:
| Scent strength | Essential oil | Carrier oil |
|---|---|---|
| Light, subtle rooms | 15ml | 165ml |
| Standard living areas | 25ml | 155ml |
| Strong throw, larger rooms | 35ml | 145ml |
Too much essential oil clogs the reeds; too little leaves you with an expensive jar of oil that does nothing.
Australian homes with good cross-ventilation or ceiling fans running most of the year generally need the stronger end of that range, since airflow disperses scent faster than it does in sealed European interiors.
Mixing single notes versus blends
Single-note oils like lemon myrtle or eucalyptus are forgiving, since there is nothing else in the mix to throw off balance. Blending two or three oils takes more care. Start with your dominant note at the full measured amount, then add supporting notes in smaller increments, testing the smell on a cotton tip between each addition rather than guessing. Notes like sandalwood or cedar work well as a base under brighter citrus or floral oils, giving the blend depth without masking the top notes entirely.
Step 3. Add alcohol and fill your container
Once your carrier oil and essential oil are properly combined, pour in the isopropyl alcohol or vodka and give the mix another gentle swirl. This step gets skipped by a lot of first-time makers, but alcohol thins the blend enough for capillary action to actually work, without it your reed diffuser essential oils mix stays too thick and the reeds barely draw anything up. Vodka works nearly as well as isopropyl alcohol if that is what you have on hand, though the neutral spirit smell fades within a day and will not affect the fragrance.
Why the alcohol ratio matters
Adding roughly 10 percent alcohol by volume loosens the surface tension of the oil, which is what lets it climb the reed rather than sitting stagnant at the base, and it is worth understanding how reed diffusers work before you adjust it. Skip this step and you will find your diffuser looks full for months but never actually scents the room.
A diffuser that never runs dry is a diffuser that was never going to work in the first place.
Filling the container properly
Use your funnel to transfer the finished blend into your chosen container, leaving at least two centimetres of headspace at the top. Filling right to the rim causes oil to seep out around the reeds once they are inserted, which wastes product and leaves a sticky residue on the neck of the jar. Give the container a final swirl once everything is in, then let it sit for a few minutes so any air bubbles settle before you move on to placing the reeds.
Step 4. Insert the reeds and find the right spot
Drop the reeds into the container one at a time, spacing them evenly rather than bunching them against one side of the jar. Eight to ten reeds is plenty for a 200ml blend, more than that and you risk pulling the fragrance up too fast, which shortens how long your reed diffuser essential oil mix lasts overall. Let the reeds sit for a few hours before flipping them, since natural rattan needs time to saturate fully before it starts pushing scent back out into the room.
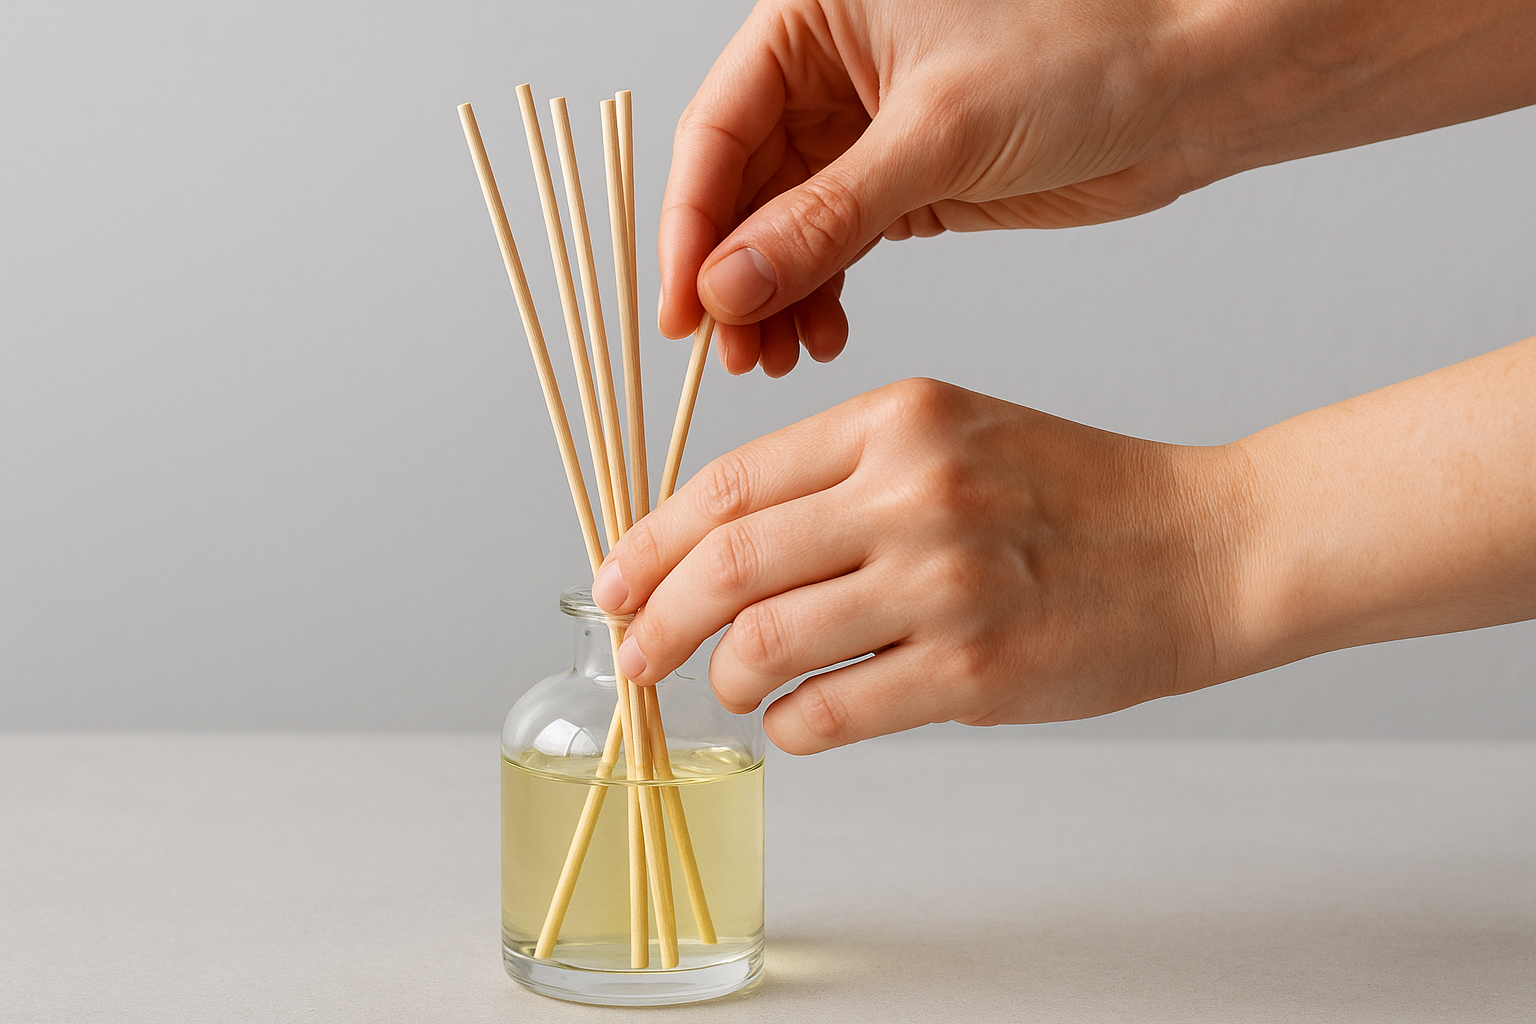
Flipping and refreshing the reeds
Once the reeds have soaked, flip them so the wet end faces up and out of the jar. This is what actually releases fragrance, capillary action draws liquid to the exposed tip where it evaporates into the air. Flip them again every three to five days to keep the throw consistent, and swap the reeds entirely every four to six weeks once they start looking clogged or discoloured, one of several ways to make reed diffusers last longer.
A diffuser only smells as good as its last reed flip.
Choosing where to place it
Position matters as much as the blend itself. Keep these points in mind when picking a spot:
- Avoid direct sunlight, which breaks down essential oils faster
- Stay clear of air conditioning vents and ceiling fans that scatter scent before it settles
- Place it at nose height, on a hallway table or bathroom shelf, rather than low on the floor
- Keep it away from open windows in windy South Australian conditions, where cross breezes pull fragrance outside before it has a chance to fill the room
A still, moderately warm spot gives your essential oil reed diffuser the best chance of throwing scent evenly for weeks rather than fading within days.
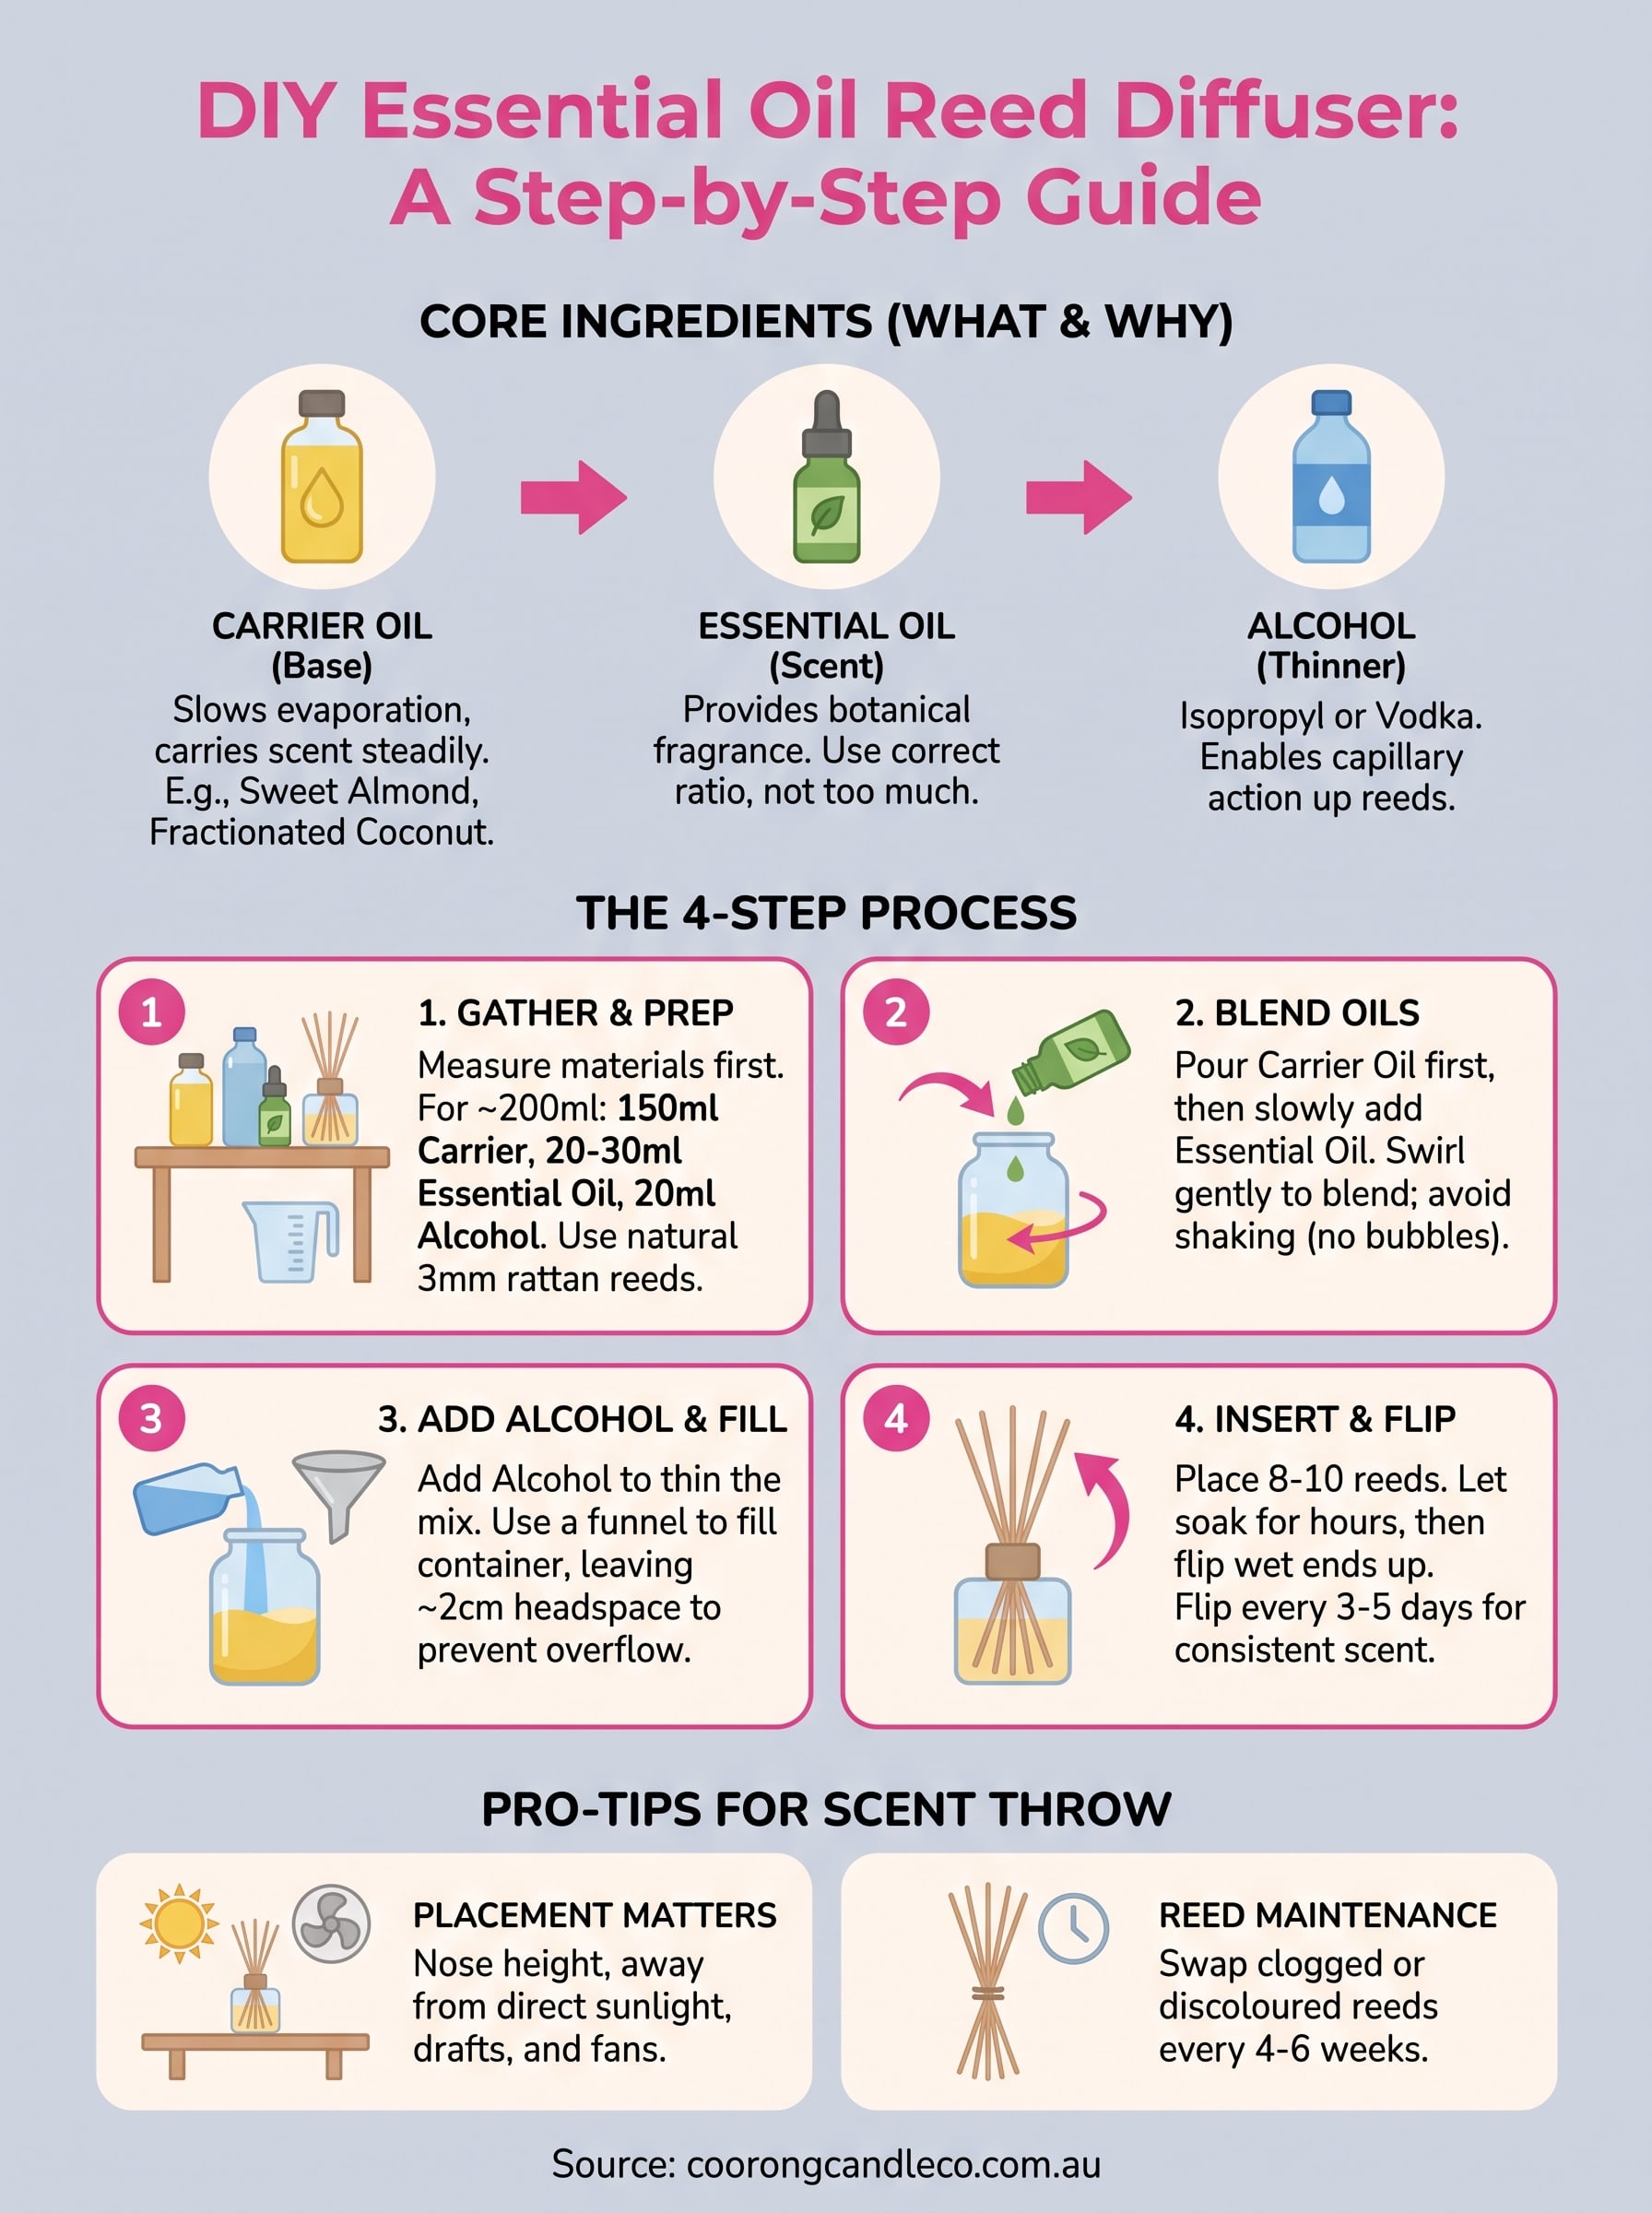
A fragrant finish
Making your own essential oil reed diffuser comes down to four things done properly: a real carrier oil base, the right ratio of essential oil, a splash of alcohol to thin it, and reeds flipped often enough to keep the scent alive. Get those right and you have a diffuser that outperforms most supermarket versions at a fraction of the synthetic smell.
Still, there is a reason artisan makers spend years dialling in ratios and reed types, and a bit of trial and error at home is part of the deal. If you would rather skip the measuring spoons and cotton tips altogether, our natural reed diffusers are blended in South Australia using the exact principles covered here, with fragrances drawn straight from the Coorong landscape. Either way, your home is about to smell a lot better than it did this morning.