
Your reed diffuser has gone quiet and you're standing in the aisle wondering whether you need a whole new bottle or just a reed diffusers refill. It happens to almost everyone eventually. Reed diffusers don't last forever on one fill, but the vessel, reeds, and cap you already own can usually keep working long after the original oil runs dry.
Buying the right oil reed diffuser refill comes down to matching the fragrance oil to your existing setup and knowing when your reeds need swapping too. Get the volume, scent strength, and reed condition right, and you'll get weeks more fragrance without spending on a whole new diffuser set.
This guide walks you through choosing a refill for reed diffuser vessels of any brand, how to top up without spills or wasted oil, and when it's time to replace the reeds rather than just the liquid. We've built our own refillable reed diffusers around Coorong-inspired scents, so we know exactly what makes a refill worth buying, and what to check before you commit to one.
What you need before refilling your diffuser
Before you order a reed diffuser refill, take five minutes to look properly at what's sitting on your shelf. Most refill mistakes happen because someone grabs a bottle of oil without checking the vessel size, the reed condition, or how much fragrance is actually left in the bottom. A bit of prep now saves you from a mismatched scent, a sticky bench, or reeds that won't draw oil properly once you've topped up.
Take stock of your current diffuser
Start by checking the glass or ceramic vessel itself. Note the opening width, because narrow-necked bottles need thinner reeds and pour more slowly than wide-mouthed jars. Check whether the original reeds are still flexible or have gone hard and waxy at the tips, since hardened reeds won't wick fresh oil no matter how good the refill is, and it helps to know how to choose reed sticks for a diffuser before you buy replacements.
If your reeds feel stiff or brittle, replace them. No refill oil will travel through a clogged reed.
Here's a quick checklist to run through before you buy anything:
- Bottle size: measure or estimate the volume in millilitres (most home diffusers hold between 100ml and 250ml).
- Reed condition: flexible and pale means reusable; hard, dark, or dusty means replace.
- Leftover oil: note the colour and clarity of what's left, cloudy or discoloured oil should be tipped out.
- Neck width: wide necks accept thicker reeds and pour faster; narrow necks need care when topping up.
Match volume to bottle size
Getting the volume right matters more than people expect. Too little reed diffuser oil and the reeds sit dry at the bottom, throwing almost no scent. Too much and you risk overflow once the reeds are reinserted and oil rises up the sides.
| Vessel size | Typical refill volume | Reed count |
|---|---|---|
| Small (100-150ml) | 100ml refill | 4-6 reeds |
| Medium (150-200ml) | 150-180ml refill | 6-8 reeds |
| Large (200-250ml) | 200ml refill | 8-10 reeds |
Our own refillable reed diffusers are built around these standard volumes, so if you already own one of ours, matching a refill bottle is straightforward. If you're refilling a diffuser from another brand, measure the empty vessel with water first so you're not guessing.
Gather your refill tools
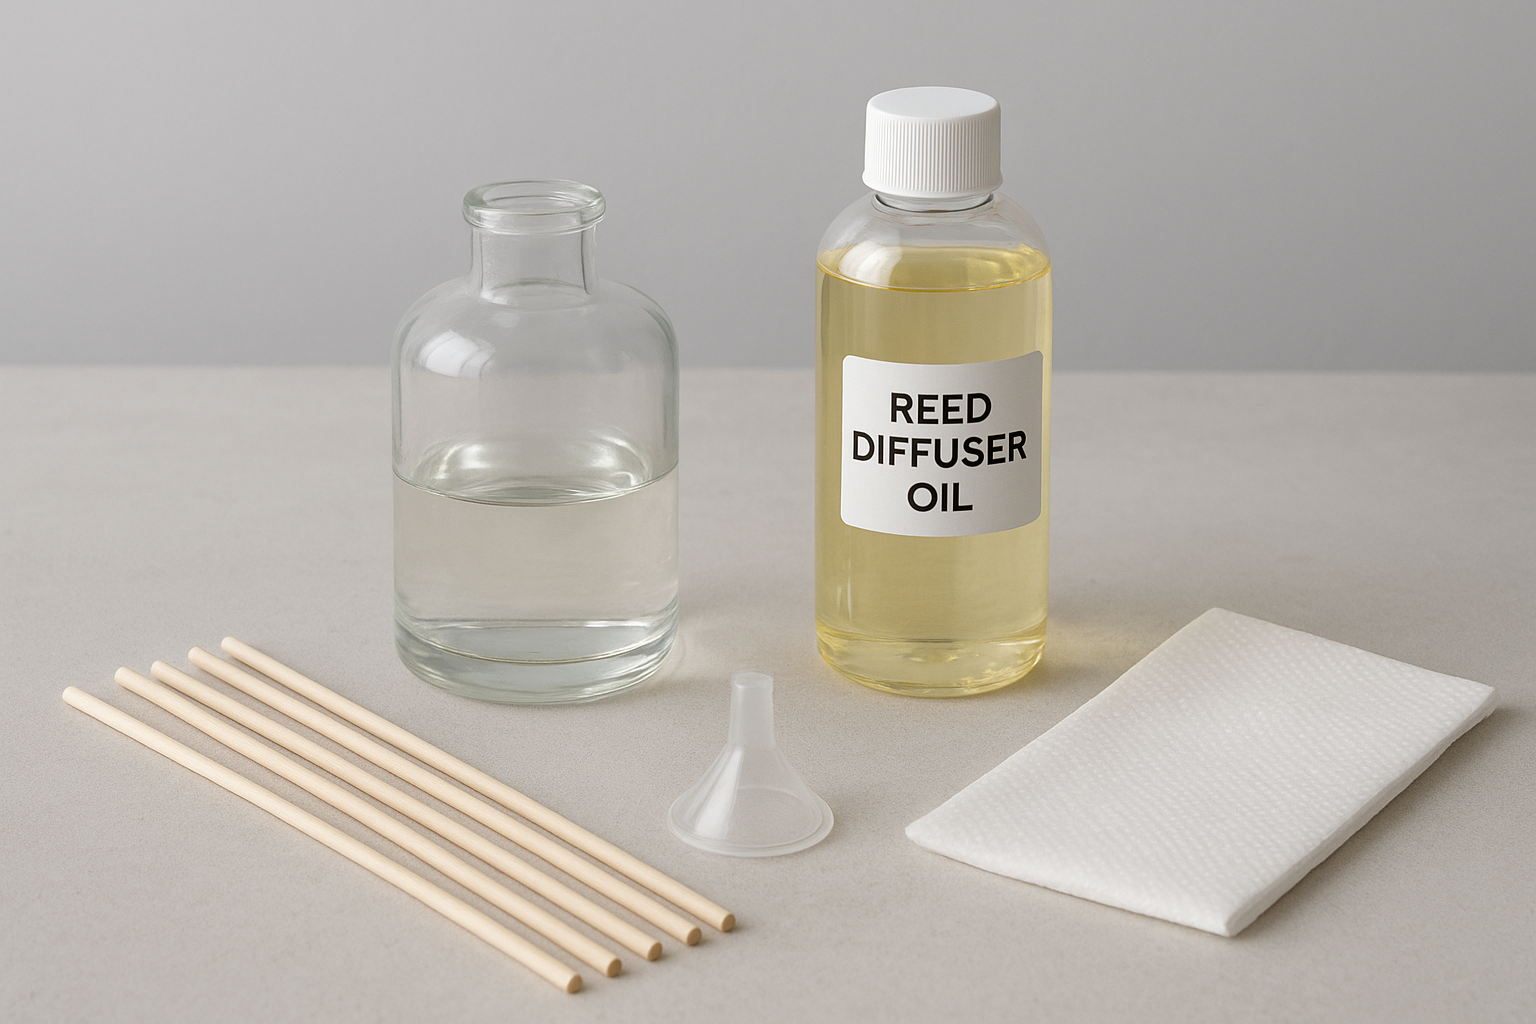
Lay out a few basics before you start pouring, because reed diffuser oil is highly scented and stains fabric and timber surfaces quickly. You don't need anything fancy, just the right things within reach.
- A small funnel, ideally one with a narrow spout for tight vessel necks.
- Paper towel or an old cloth for catching drips.
- A pair of disposable gloves if you're sensitive to concentrated fragrance oils.
- Fresh reeds, either new ones or your existing set if they're still supple.
- A flat, stable surface protected from heat and direct sunlight.
With the vessel checked, the volume worked out, and your tools within reach, you're ready to pick the actual refill oil reed diffuser product that suits your space and scent preference.
Step 1. Choose the right diffuser oil refill
Once you know your vessel size and reed condition, the actual buying decision comes down to fragrance strength and carrier oil quality. Not every reed diffuser refill on the shelf is made the same way, and the cheapest bottles often use a thin carrier that evaporates fast without carrying much scent, so it pays to understand what diffuser reed refills actually include. Look for refills with a decent fragrance oil concentration, generally above 10%, since anything lower will smell weak within a fortnight even in a well-maintained diffuser, and it's worth comparing the top fragrance oils for reed diffusers in Australia before you decide.
Check the carrier oil and concentration
Most oil reed diffuser refills use either a mineral oil base or a lighter synthetic carrier designed to travel up the reeds quickly, and knowing how a reed diffuser base works makes that choice much clearer. Mineral oil-based blends tend to throw scent slower but last longer, while lighter carriers give a stronger initial burst that fades sooner. If you're refilling a diffuser you've had for a while, stick with the same carrier type you started with, since switching can sometimes cause reeds to clog or drip differently than before.
A refill is only as good as its carrier oil, cheap thinners fade fast and waste your reeds.
Match scent strength to your room
Room size changes what strength you actually need, and this is where a lot of people overspend or underbuy, especially with reed diffusers for large rooms.
| Room type | Recommended strength | Refill frequency |
|---|---|---|
| Bathroom or hallway | Light to medium | Every 6-8 weeks |
| Living room or bedroom | Medium to strong | Every 8-10 weeks |
| Open-plan living areas | Strong | Every 6-8 weeks |
Pick a scent that suits the space
Beyond strength, think about where the diffuser sits day to day. A refillable reed diffuser in a bedroom suits calmer, lower-note scents like sandalwood or coastal florals, while kitchens and entryways handle brighter citrus or herbal blends better without becoming overpowering, and the best smelling reed diffusers Australian homes go for show how differently each note reads room to room. Our own reed diffuser refills are grouped by region and mood for exactly this reason, so you can match a Coorong-inspired scent to the room rather than guessing from a generic label. Once you've settled on strength and scent, you're ready to deal with the vessel itself before pouring anything new in.
Step 2. Empty and clean the diffuser bottle
Before any fresh reed diffuser refill goes anywhere near the vessel, pull the old reeds out and tip whatever oil remains into an old jar or straight down the sink with hot water running. Leftover oil at the bottom often carries a mix of dust and evaporated fragrance that will muddy a new scent if you pour on top of it. Glass and ceramic vessels handle this fine, but check for hairline cracks while the bottle is empty since a stressed seam can widen once it's holding fresh liquid again.
Never top up on old residue, a clean vessel is the difference between a fresh scent and a muddy one.
Wash out old residue properly
Giving the bottle a proper wash matters more than most people assume, because fragrance oils leave a fine film on glass that dulls new scents over time. Run warm, soapy water through the vessel and swirl it around, then rinse thoroughly since any soap left behind will interfere with how the new oil smells once the reeds start drawing it up.
- Tip out remaining oil and old reeds first.
- Fill the vessel with warm water and a small amount of dish soap.
- Swirl for thirty seconds, then rinse with clean warm water twice.
- Turn the vessel upside down on a paper towel and let it drain fully.
- Check the neck and shoulders for leftover film before moving on.
Dry the vessel fully before refilling
Drying sounds obvious, but rushing this step is where a lot of refilling reed diffuser attempts go wrong. Even a small amount of water left in the bottom will dilute your new oil, weakening the throw and shortening how long the scent lasts. Leave the vessel upside down on a clean towel for at least an hour, longer in humid weather, and give it a quick sniff before pouring anything in since any lingering soap smell means another rinse is needed.
With the vessel clean, dry, and free of old residue, you're set up to pour the new oil in without wasting a drop or muddying the fragrance you've just chosen.
Step 3. Pour in the oil and add fresh reeds
With a clean, dry vessel in front of you, pour slowly and use that funnel from your tools list, especially if you're working with a narrow neck, and if you want the longer version, here's our step-by-step guide to refilling reed diffuser oil. Aim for roughly 80% of the vessel's capacity, leaving a little headroom so the reeds don't push oil over the rim once they're inserted. This is the point where your earlier measuring pays off, since guessing volume now often means a sticky bench or a half-empty bottle that throws barely any scent.
Fill to about 80% capacity, reeds displace oil and a full bottle will overflow.
Pour with steady hands
Hold the bottle close to the vessel opening rather than pouring from height, because fragrance oil splashes easily and stains timber and fabric on contact. Tilt gently and stop once you've reached your target level, checking against the markings on the refill bottle if it has them. If you've bought one of our reed diffuser refills, the bottle is sized to match our vessels exactly, so you can pour the whole thing in without measuring at all.
Insert and flip the reeds
Once the oil is settled, insert your reeds one at a time, spacing them evenly around the neck rather than bunching them together. New reeds should go in dry-side down first, letting capillary action start pulling oil upward within a few minutes, which is the same wicking process behind the science of how reed diffusers work. If you're reusing reeds from before and they were still flexible, give them a quick wipe with a paper towel before placing them, since old residue on the tips can slow how fast they start wicking.
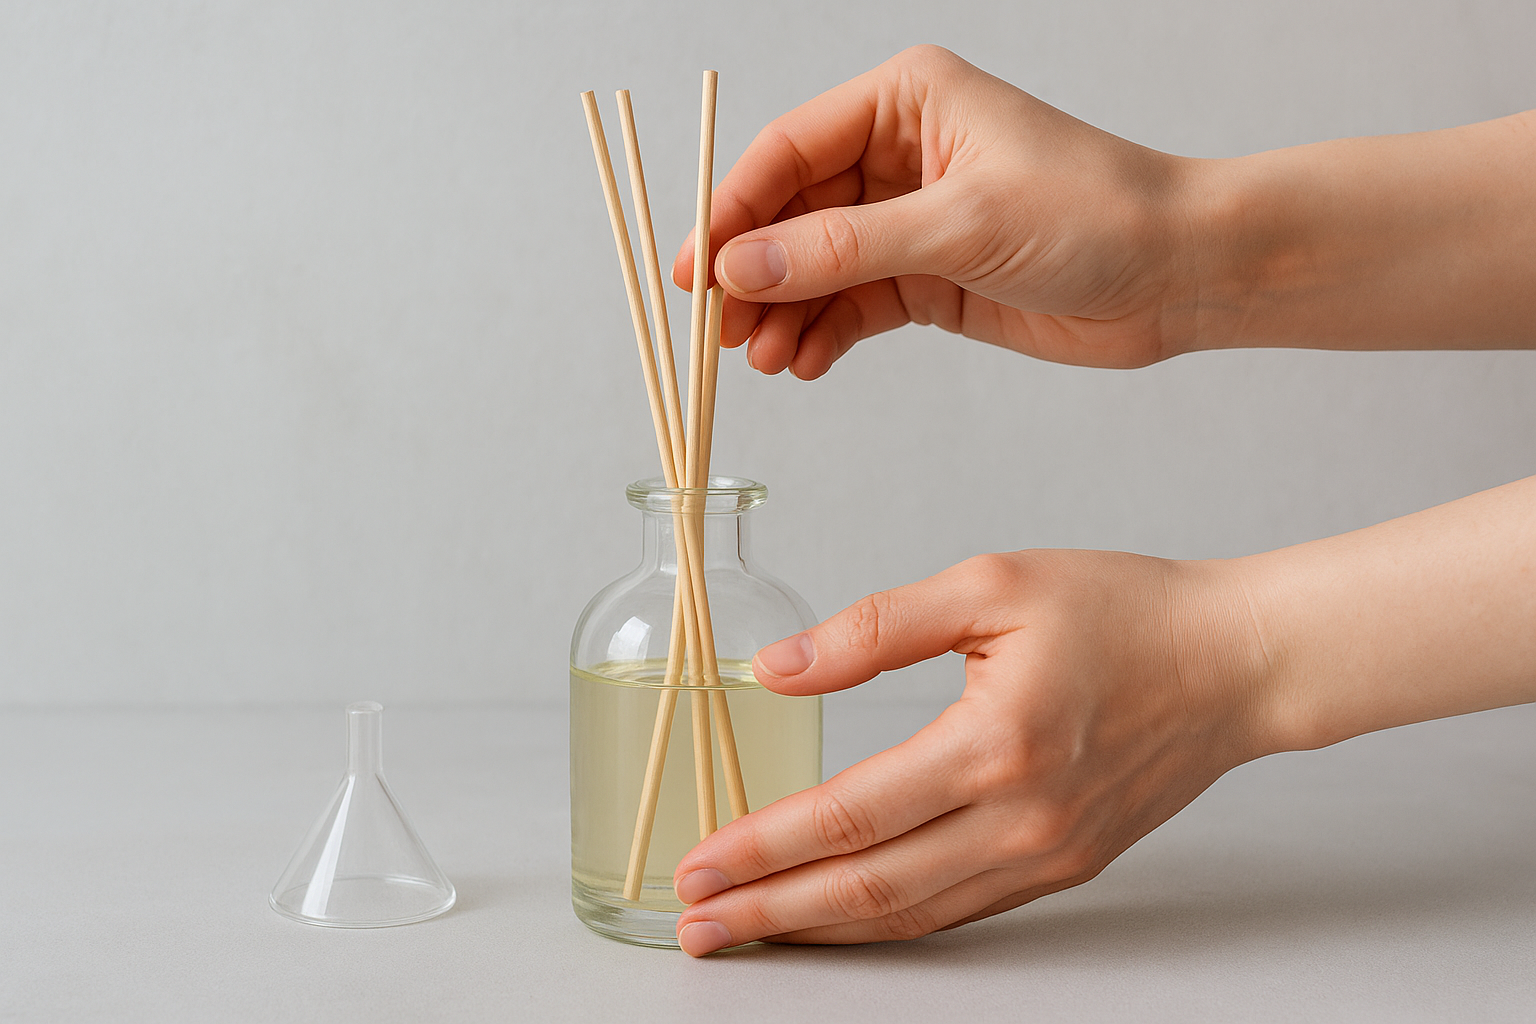
- Insert reeds evenly spaced, angled slightly outward if the neck allows it.
- Wait ten minutes before flipping, giving the reeds time to draw oil upward.
- Flip each reed so the saturated end points into the room.
- Repeat the flip every one to two weeks to keep fragrance output steady.
Flipping matters more than most people realise when refilling reed diffuser vessels, because the exposed end dries out and stops releasing scent within days if it's never turned. Rotating the reeds regularly is what actually controls how strong or subtle the fragrance feels from one week to the next, far more than the initial pour does.
Step 4. Position and maintain your diffuser
Where you put your diffuser after a refill matters just as much as how you poured it. Airflow, heat, and sunlight all change how fast the oil evaporates and how far the scent actually travels through a room, so a few minutes spent choosing the right spot pays off over the following weeks.
Find the right spot
Set your diffuser somewhere with gentle air movement, like a hallway, near a doorway, or on an open shelf, rather than tucked into a closed cabinet where scent has nowhere to go. Avoid direct sunlight and anywhere near a heater or air conditioning vent, since heat speeds up evaporation and can shorten the life of your reed diffuser refill by weeks. Keep it away from the very edge of a table too, since fragrance oil is easy to knock over and hard to lift out of timber or fabric once it's spilled.
Airflow spreads scent, but heat and direct sun burn through your refill oil twice as fast.
Build a simple maintenance routine
Once it's positioned, maintaining a diffuser is mostly about consistency rather than effort, and a few small habits will make a reed diffuser last longer in any room. Flip the reeds every one to two weeks as covered earlier, and give the vessel a quick check each month to see how much oil is left, since running it bone dry can leave residue baked onto the reeds that's harder to clean off later. Rotate reeds between vessels only if they're the same scent, otherwise you'll muddy both fragrances at once.
- Check oil level monthly and top up before it drops below a third full.
- Wipe dust off reed tips occasionally, since dust slows how well they wick.
- Add one or two extra reeds if the scent feels weak, rather than assuming the oil has failed.
- Replace reeds entirely every two to three refills, even if they still look flexible.
Maintained this way, a single vessel and a fresh reed oil diffuser refill every couple of months will keep a room smelling consistent for a full year without buying a new diffuser set at all, which is roughly how long reed diffusers last in Aussie homes.
Keeping the fragrance going
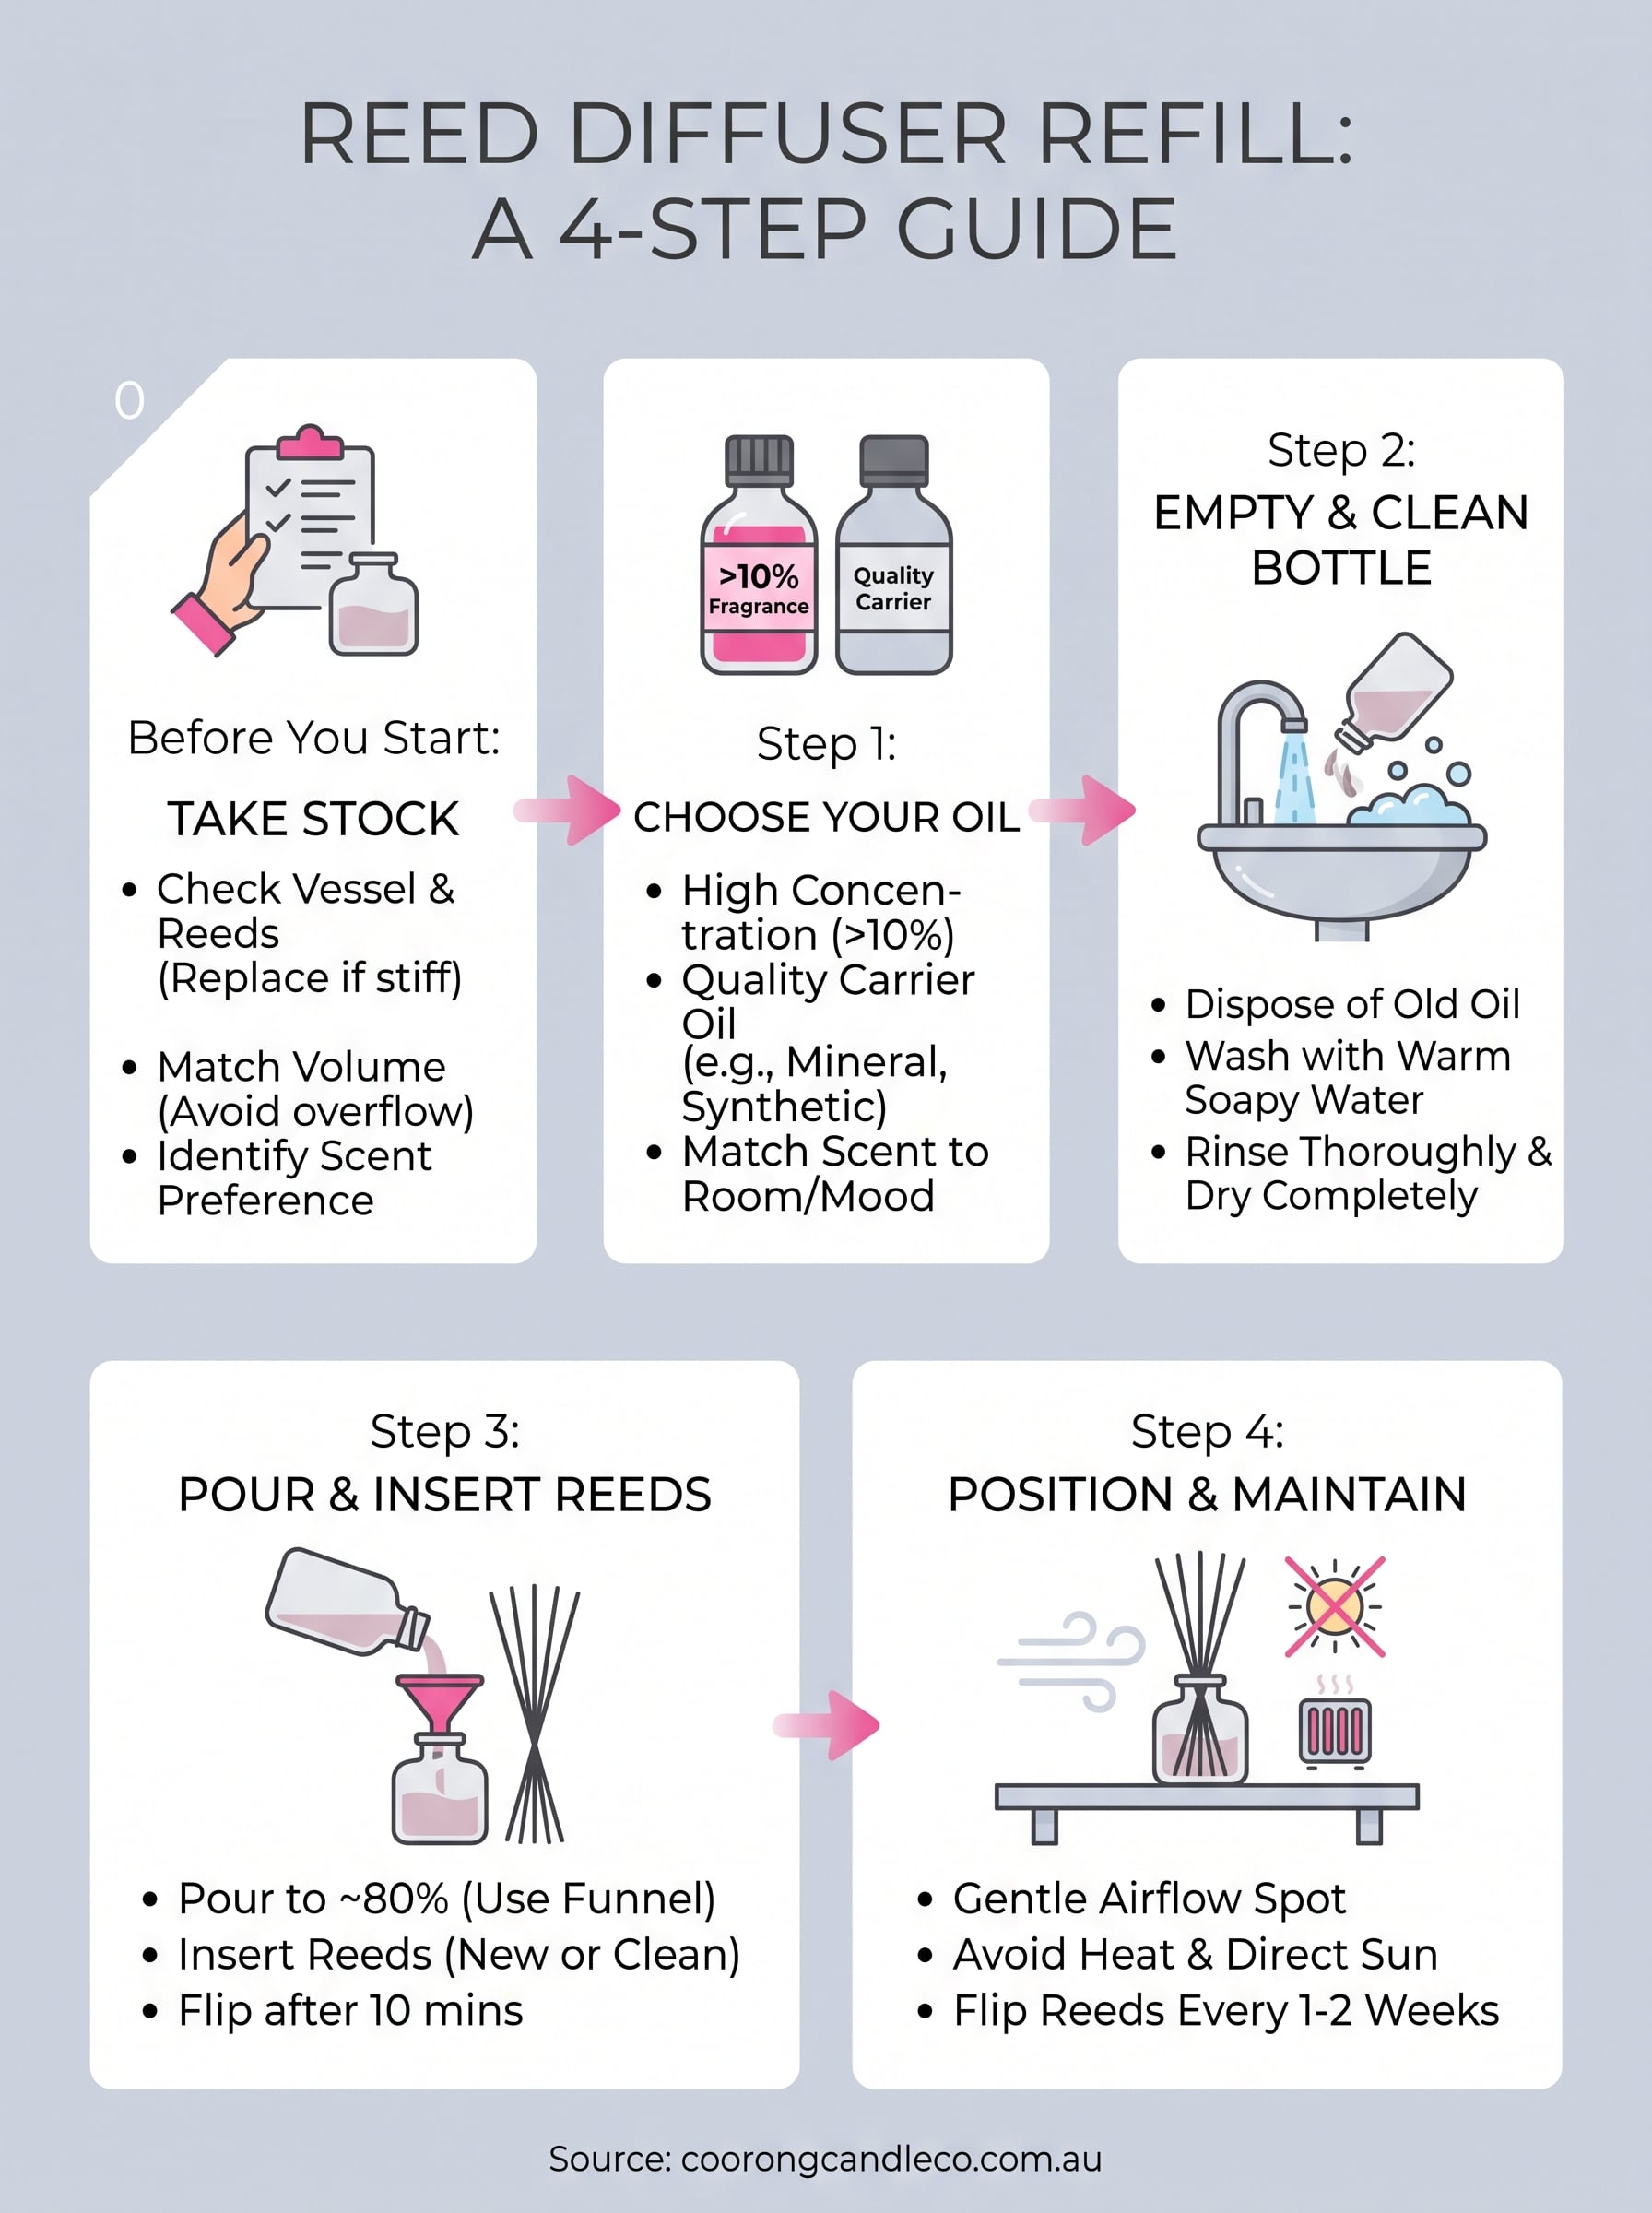
A reed diffuser refill isn't complicated once you've done it properly the first time. Check your vessel, pick an oil with real fragrance concentration, clean the bottle before pouring, and flip your reeds every week or two. That's the whole routine, and it's what turns one glass vessel into a scent source that lasts years rather than one season.
Buying the right oil matters more than any other step here. Cheap thinners fade within days and waste the reeds you've just cleaned and reinserted. Choosing a refill built for proper throw and longevity saves you money over a year of top-ups, not just this one purchase.
If your current diffuser has run its course or you fancy a new scent for the season, browse our natural reed diffusers, hand-blended in South Australia and pick one grouped by mood and region. Your reeds are ready when you are.